Monday, February 25, 2013

HTML5 Picture Text WebApp for making social network picture status message

Using HTML5 and a great Canvas Javascript library Fabricjs, I made a simple web app for placing text string on images for sharing on social networks like Facebook, Google+ or Twitter. One or more text strings can be placed on the canvas. Once placed, the text can be edited, rotated, scaled, stretched or styled with different fonts and stroked. The background can be a plain color fill or a user defined image - the image can be set with some opacity value.

To run the web app, go to http://dominoc925-pages.appspot.com/webapp/picture_text/default.html.
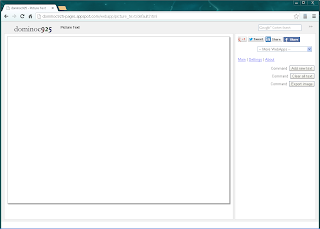


Change the canvas
  1. On the right pane, click Settings.


  2. In the Canvas width field, type in a new width (in pixels) e.g. 800.
  3. In the Canvas height field, type in a new height (in pixels) e.g. 600.
  4. In the Canvas fill color field, pick a new background color e.g. grey.
  5. To use an image for the background, choose Image in the Background combo box.

    Additional fields appear.

  6. Click the Choose File button. Choose an image.

    The image is displayed in the canvas.

  7. To change the image opacity, type in a value between 0 and 1 in the Background image opacity field.

Placing text

  1. On the right pane, click Add new text.

    The Add text dialog appears.

  2. Type in any text string in the Text string field.
  3. Optional. Choose a font, font style, effects, line spacing, text alignment, text fill color from the various combo boxes.
  4. Click Okay.

    The text string is placed randomly on the canvas.

  5. Close the dialog.
Move, rotate, resize, stretch the text
  1. Select the text string on the canvas.

    Handles appear around the text string.
  2. To move the text, just drag it to a new location.
  3. To resize the text, just press down SHIFT and drag the corner handles (four sided arrow cursor).
  4. To rotate the text, just drag the corner handles (diagonal double headed arrow cursor).


  5. To stretch the text, just drag the side handles (vertical or horizontal double headed arrow cursor). 
Changing the text properties
  1. Select the text string on the canvas.

    The Properties and Delete buttons appear on the right pane.

  2. On the right pane, click Properties.

    The Update text dialog appears.

  3. To change the text string, just type in new text in the Text string field.
  4. To change the font, style, effects, line spacing, or text alignment, use the combo boxes.
  5. To change the text fill color, just pick another color in the Text fill color picker field.
  6. To apply a stroke around the text, toggle on Stroke text. Then choose a color from the Text stroke color picker field. Choose a text stroke width in the Text stroke width field.
  7. Click Okay.

    The text string is updated.

  8. Close the dialog.
Creating the picture text image file
  1. On the right pane, click Export image.

    The text is composited with the background and a new window of the PNG image pops up.
  2. Right click on the image. Choose Save image as.


  3. Type in a file name and save the image.

Monday, February 18, 2013

Example KML for displaying extended data in balloons

In Google Earth, it is possible to display a nicely formatted Placemark balloon showing some relevant information about that Placemark. The simplest way to create the Placemark KML is to write and format everything (including the HTML mark ups) in the Placemark's Description tag, as shown in the example code below.
<Placemark>
<name>Microsoft</name>
<description>
<![CDATA[
<b>Example 1</b>
<table border="1" >
<tr><td>Company Name</td></tr>
<tr><td><i>Microsoft</i></td></tr>
</table>
]]>
</description>
<Point> <coordinates>-122.034924,37.331586,0</coordinates>
</Point>
</Placemark>

The screenshot shows how it is displayed in Google Earth.

However, if there are a lot of Placemarks, it would be a pain to have write the mark up and data values for everyone. It would be better to define a custom balloon style containing a template HTML mark up and placeholders for the variable data values once; the data values would then be stored under the Placemark's ExtendedData tag. When Google Earth renders the Placemark balloons, it would use the referenced balloon style and replace the placeholders with the actual data values from the Placemark's ExtendedData tags.

The example code below defines a balloon style with a placeholder $[Company_Name] in the HTML mark up text.
<Style id="MyBalloonStyle">
<BalloonStyle>
<text> <![CDATA[
<b>Example extended data template</b>
<table border="1" >
<tr><td>Company Name</td></tr>
<tr><td><i>$[Company_Name]</i></td></tr>
</table>
]]></text>
<bgColor>ffffffbb</bgColor>
</BalloonStyle>

Then in the Placemark tag, it is only necessary to place the data (name and value) under the ExtendedData tag as shown below. The balloon style is referenced with the StyleUrl tag.
<Placemark>
<name>Apple</name>
<styleUrl>#MyBalloonStyle</styleUrl>
<ExtendedData>
<Data name="Company_Name"><value>Apple Incorporated</value></Data>
</ExtendedData>
<Point> <coordinates>-122.034924,37.331586,0</coordinates>
</Point>
</Placemark>

The full KML code is shown below.


<?xml version="1.0" encoding="UTF-8"?>
<kml xmlns="http://www.opengis.net/kml/2.2">
<Document>
 
<Style id="MyBalloonStyle">
<BalloonStyle>
<text> <![CDATA[
<b>Example extended data template</b>
<table border="1" >
<tr><td>Company Name</td></tr>
<tr><td><i>$[Company_Name]</i></td></tr>
</table>
]]></text>
<bgColor>ffffffbb</bgColor>
</BalloonStyle>
<IconStyle> <color>ffffffff</color> <scale>1</scale>
<Icon><href>http://maps.google.com/mapfiles/kml/pushpin/grn-pushpin.png</href>
</Icon>
</IconStyle>
<LabelStyle> <scale>0</scale> </LabelStyle>
</Style>
<Folder> <name>Tech Companies</name>
<Placemark>
<name>Apple</name>
<styleUrl>#MyBalloonStyle</styleUrl>
<ExtendedData>
<Data name="Company_Name"><value>Apple Incorporated</value></Data>
</ExtendedData>
<Point> <coordinates>-122.034924,37.331586,0</coordinates>
</Point>
</Placemark>
<Placemark>
<name>Google</name>
<styleUrl>#MyBalloonStyle</styleUrl>
<ExtendedData>
<Data name="Company_Name"><value>Google Incorporated</value></Data>
</ExtendedData>
<Point> <coordinates>-122.084676,37.421742,0</coordinates>
</Point>
</Placemark>
</Folder>
</Document>
</kml>

The screenshot shows how it is rendered in Google Earth.

Monday, February 11, 2013

Example KML for displaying a photo image from the local disk

Recently I had to generate some Google Earth KML files for displaying photos from a local hard drive in a Placemark balloon. In order to display local images not from a web server, the file keyword must be used with 3 forward slashes in the HTML img tag followed by the full path of the photo file, as shown in the example KML code below.

 <?xml version="1.0" encoding="utf-8"?>  
 <kml>  
  <Document>  
   <name>Example of displaying a local image file</name>  
   <Placemark>  
    <name>Monaco</name>  
    <Snippet>Photo 1</Snippet>  
    <description><![CDATA[  
 <img src='file:///c:\temp\monaco\IMG_5523.jpg' width='400' /><br/&gt;  
 Photo taken from near the palace in Monaco<br/>  
 ]]>  
 </description>  
    <Point>  
     <coordinates>7.421630,43.731459</coordinates>  
    </Point>  
   </Placemark>  
  </Document>  
 </kml>  
The following screenshots show how this KML file is rendered in Google Earth.
 When the Placemark is clicked, the balloon pops up showing the local photo image file.

Monday, February 4, 2013

GeoMedia code snippet to apply a workspace spatial filter

In GeoMedia, a Spatial filter is a means to improve the application performance by reducing the amount of spatial data for display and processing. Typically, this is done using an arbitrary polygon as the spatial filter boundary.

The following C# code snippet can be used as a method in a driving GeoMedia type custom application to apply a rectangular spatial filter to the GeoMedia workspace.


using GMService = Intergraph.GeoMedia.GMService;
using PService = Intergraph.GeoMedia.PService;
using PBasic = Intergraph.GeoMedia.PBasic;
using PClient = Intergraph.GeoMedia.PClient;
 
//...etc....
private GeoMedia.Application _application = null;
//...etc...

public void ApplyWorkspaceSpatialFilter(PBasic.point lowerLeftPoint, PBasic.point upperRightPoint)
{
//Declare variables
PBasic.PolygonGeometry polygon;
PBasic.point pnt;
object objBlob;
PClient.GeometryStorageService storageSvc;
GMService.ApplySpatialFilterService spatFilterSvc;
 
//Create a new instance of the ApplySpatialFilterService
spatFilterSvc = new GMService.ApplySpatialFilterService(); 
 
//Create a new polygonGeometry object for the spatial filter polygon
polygon = (PBasic.PolygonGeometry) _application.CreateService("GeoMedia.PolygonGeometry");

//Create a new GeoMedia point object
pnt = (PBasic.point)_application.CreateService("GeoMedia.point");

//Populate the spatial filter polygon object with the bounding rectangle
pnt.X = lowerLeftPoint.X;
pnt.Y = lowerLeftPoint.Y;            
polygon.Points.Add ( pnt, null);
pnt.X = lowerLeftPoint.X;
pnt.Y = upperRightPoint.Y;
polygon.Points.Add (pnt, null);
pnt.X = upperRightPoint.X;
pnt.Y = upperRightPoint.Y;
polygon.Points.Add (pnt, null);
pnt.X = upperRightPoint.X;
pnt.Y = lowerLeftPoint.Y;
polygon.Points.Add (pnt, null);
pnt.X = lowerLeftPoint.X;
pnt.Y = lowerLeftPoint.Y;
polygon.Points.Add (pnt, null);
 
//Create a new instance of the GeometryStorageService object
storageSvc = (PClient.GeometryStorageService) _application.CreateService("GeoMedia.GeometryStorageService");

//Convert the polygonGeometry object into a blob
storageSvc.GeometryToStorage(polygon, out objBlob);
 
//Assign the polygonGeometry to the SpatialFilterService object and apply the spatial filtering to
//the GeoMedia application workspace
spatFilterSvc.Application = this._application;
spatFilterSvc.SpatialFilterOperator = PClient.GConstants.gdbTouches;
spatFilterSvc.SpatialFilterGeometry = objBlob;
spatFilterSvc.SpatialFilterName = "SpatialFilter1";
spatFilterSvc.UseGeometryMBR = false;
spatFilterSvc.Execute();
 
//Free up resources
objBlob = null;
if (spatFilterSvc != null) Marshal.FinalReleaseComObject(spatFilterSvc);
if (storageSvc != null) Marshal.FinalReleaseComObject(storageSvc);
if (polygon != null) Marshal.FinalReleaseComObject(polygon);
if (pnt != null) Marshal.FinalReleaseComObject(pnt);
}