Showing posts with label Shapefile. Show all posts

Wednesday, March 19, 2025

Take Geospatial files on the go with the Shapefiler App

 Easily load and visualize multiple GeoJSON and Shapefiles with this powerful mapping tool. The app automatically assigns overlay colors, but you have full control over the styling—customize icons, colors, and opacity through the layer properties menu. Tap on polygons, lines, and markers to view detailed feature attributes. Quickly find specific locations with the built-in free text search, making navigation effortless. Whether you're a GIS professional or a mapping enthusiast, this app provides an intuitive way to explore spatial data on your device. 


Key features

Load multiple Geospatial files: Overlay GeoJSON and Shapefiles over a choice of base map tiles.

Integrated tabular and map views: Tap on a data table record to locate the corresponding feature on the map

Multiple coordinate reference systems: Source Geospatial GeoJSON and Shapefiles in various coordinate reference systems can be reprojected to the standard World Mercator projection for display.

Free text search: Easily search features by text and locate on the map. 

For more detailed information, visit https://dominoc925.blogspot.com/p/shapefiler-help.html

Download and try out the Shapefiler app from the following stores:

Get it on Google Play

Monday, April 15, 2013

Using the NetTopologySuite to read and write Shapefiles in C#

I was looking for a .NET library to use to read and write Shapefiles without using unmanaged dynamic link libraries. I found quite a few that could read but not write Shapefiles. In the end, I found the NetTopologySuite at http://code.google.com/p/nettopologysuite/ to suit my requirements the best.

The following code snippet show how to use the library's ShapefileDataReader to read a Shapefile. In the example, all the database records and the Shape geometries are read into a features collection.


using GisSharpBlog.NetTopologySuite.Features;
using GisSharpBlog.NetTopologySuite.Geometries;
using GisSharpBlog.NetTopologySuite.IO;
using GeoAPI.Geometries;

...etc....

GeometryFactory factory = new GeometryFactory();
ShapefileDataReader shapeFileDataReader = new ShapefileDataReader(shpFilename, factory);
 
//Display the shapefile type
ShapefileHeader shpHeader = shapeFileDataReader.ShapeHeader;
Console.WriteLine(string.Format("Shape type: {0}", shpHeader.ShapeType));
 
//Display the min and max bounds of the shapefile
IEnvelope bounds = shpHeader.Bounds;
Console.WriteLine(string.Format("Min bounds: ({0},{1})", bounds.MinX, bounds.MinY));
Console.WriteLine(string.Format("Max bounds: ({0},{1})", bounds.MaxX, bounds.MaxY));
 
//Display summary information about the Dbase file
DbaseFileHeader header = shapeFileDataReader.DbaseHeader;
Console.WriteLine("Dbase info");
Console.WriteLine(string.Format("{0} Columns, {1} Records", header.Fields.Length, header.NumRecords));
for (int i = 0; i < header.NumFields; i++)
{
DbaseFieldDescriptor fldDescriptor = header.Fields[i];
Console.WriteLine(string.Format("   {0} {1}", fldDescriptor.Name, fldDescriptor.DbaseType));
}
 
//Reset the pointer to the start of the shapefile, just in case
//shapeFileDataReader.Reset();
 
//Read through all records of the shapefile (geometry and attributes) into a feature collection 
ArrayList features = new ArrayList();
while (shapeFileDataReader.Read())
{
Feature feature = new Feature();
AttributesTable attributesTable = new AttributesTable();
string[] keys = new string[header.NumFields];
IGeometry geometry = (Geometry)shapeFileDataReader.Geometry;
for (int i = 0; i < header.NumFields; i++)
{
DbaseFieldDescriptor fldDescriptor = header.Fields[i];
keys[i] = fldDescriptor.Name;
attributesTable.AddAttribute(fldDescriptor.Name, shapeFileDataReader.GetValue(i));
}
feature.Geometry = geometry;
feature.Attributes = attributesTable;
features.Add(feature);
}
//Close and free up any resources
shapeFileDataReader.Close();
shapeFileDataReader.Dispose();

It is important to free up any resources used by calling the Close and Dispose methods, especially if you want to apply any file based operations e.g. deleting or renaming onto the Shapefile.

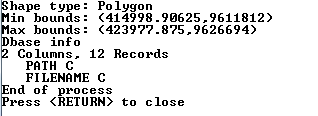
The following screenshot shows an example output from the code snippet.

The ShapefileDataWriter class can be used to create a Shapefile. It seems that the class can only create new Shapefiles and there are no methods append to an existing Shapefile. The following code snippet shows how to write features with geometry and attributes into a Shapefile.


//Create a new shapefile from features
GeometryFactory outGeomFactory = new GeometryFactory();
//The constructor will append a ".shp" extension to the input filename so the 1st argument should not have an extension at all
string outShpFilenameNoExt = Path.Combine(Path.GetDirectoryName(outShpFilename), Path.GetFileNameWithoutExtension(outShpFilename));
ShapefileDataWriter writer = new ShapefileDataWriter(outShpFilenameNoExt, outGeomFactory);
DbaseFileHeader outDbaseHeader = ShapefileDataWriter.GetHeader((Feature)features[0], features.Count);
writer.Header = outDbaseHeader;
writer.Write(features); 

Monday, April 8, 2013

Add text label as attribute to polygon in Global Mapper

It is useful to be able to copy the text label from points (so called area centroids) to the enclosing area polygons as attributes. This can be done using Global Mapper's Add Attributes to Selected Areas from Points command. If the text labels are not already point attributes, then there is a simple workaround that can be performed to convert them into point attributes. The following example illustrates the workaround by simply exporting out the points as a Shapefile and using the exported Shapefile for the source point attributes.

  1. In Global Mapper, create, load and display the area polygons and points with labels.


  2. Select File | Export Vector Format.

    The Select Export Format dialog box appears.

  3. Choose Shapefile. Click OK.

    The Shapefile Export Options appear.

  4. Toggle on Export Points. Specify the destination point Shapefile name and location, e.g. C:\Temp\centroid.shp.


  5. Click OK.

    The point Shapefile is created.
  6. Unload the original point layer.


  7. Drag and drop the exported point Shapefile, e.g. centroid.shp, onto the Global Mapper's map view.
  8. Press ALT+P. Click on one of the points.

    The Feature Information dialog box appears.

    Note: the text label is an attribute
    .
  9. Press ALT+D. Click and drag to select all the area polygons and points.


  10. Press right click on the mouse.

    A popup menu appears.


  11. Choose Attribute Functions | Add Attributes to Selected Areas from Points.

    A prompt appears.

  12. Click Yes.

    A message appears.

  13. Click OK.

    The text label is added to the area polygons as attributes.

Monday, December 31, 2012

Display Shapefiles on Google Maps with this Google Mapplet

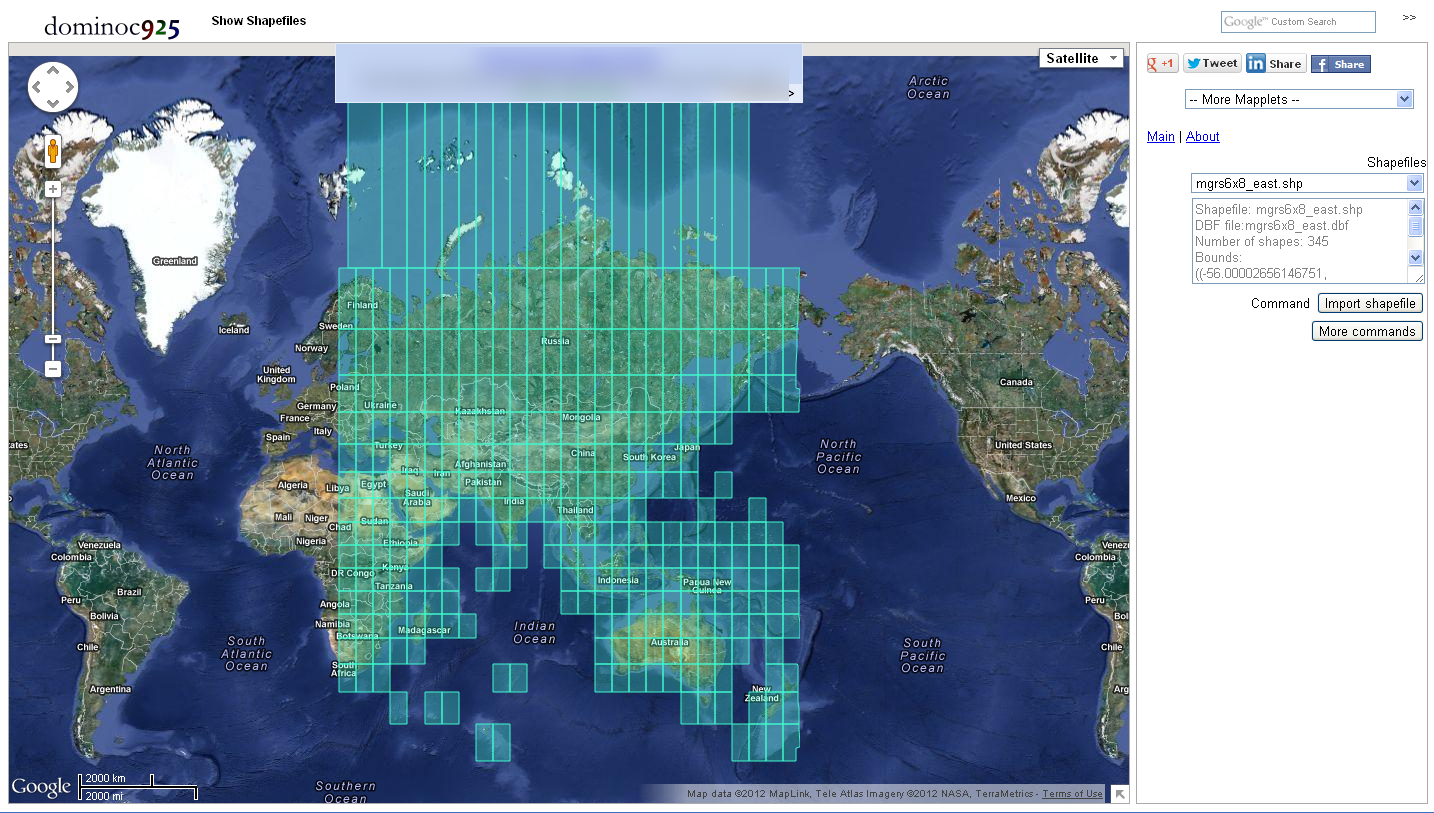
It would be nice to import and overlay ESRI Shapefiles over a Google Maps backdrop without having to upload the files to a web server. With the new HTML5 FileReader objects  implemented in modern browsers, it is now possible to do this. I burnt some midnight oil to write this tool to read, reproject to the Mercator coordinate system, and display Shapefiles as Google Maps overlays.

The following steps demonstrate how to use the tool.

  1. Use a modern browser (such as Chrome or FireFox) to open this page http://dominoc925-pages.appspot.com/mapplets/vshpfile.html.


  2. Click Import shapefile.

    The Import Shapefile dialog box appears.
  3. In the SHP field, click the Choose File button. Browse and select a Shapefile e.g. mgrs6x8_east.shp.


  4. In the DBF field, click the Choose File button. Browse and select the Shapefile's corresponding DBF file e.g. mgrs6x8_east.dbf.


  5. In the Coordinate system type field, choose the correct system for the Shapefile e.g. Geographic. If Projected is chosen, then choose the correct Projection.


  6. In the Geodetic Datum field, choose the correct datum e.g. WGS84.
  7. Click Start Import.

    If all goes well, the Shapefile will be displayed on the Google Maps backdrop. It might be necessary to zoom into the Shapefile's bounds by clicking the More commands | Fit shapefile buttons on the sidebar.


  8. Click on the Shapefile overlay to display the DBF attributes in an Info window.


  9. Repeat to display more Shapefiles. 

Monday, December 24, 2012

WebApp to show DBASE (*.dbf) file information

The ESRI Shapefile format stores database attributes in DBASE DBF (*.dbf) file and shape geometries in another associated file (*.shp). Using the DBASE file structure documentation in http://www.dbf2002.com/dbf-file-format.html, I wrote a simple Javascript web app to show basic information about a DBF file, similar to the open source ShapeLib's dbfinfo executable.

 The web app can be run from this page http://dominoc925-pages.appspot.com/webapp/dbf_info/default.html.

  1. To use the web app, simply drag and drop one or more DBASE files (*.dbf) into the dashed box as shown in the screenshot below.

  2. Or click the button and choose one or more (*.dbf) files. .


    Basic information about the DBF file is displayed, including the number of records, the number of columns, column names and type.


Note: This will run only on Chrome and a development version of FireFox that uses Gecko 7 at the moment. 

Monday, December 17, 2012

WebApp to show Shapefile information

I wrote a simple HTML5 Web App to show basic information about one or more ESRI Shapefile (*.shp) files similar to the shpinfo command from the open source ShapeLib library. The processing of the Shapefile is done in the local web browser without having to upload it to a server. The web app can be run from this web site http://dominoc925-pages.appspot.com/webapp/shpfile_info/default.html.

One the page is displayed, either click the button and select one or more Shapefiles or drag and drop *.shp files into the dashed box as shown in the screenshots below.


The Shapefile information is displayed in the web page.