I wanted to use Windows c++ classes and use them in another c++ applications through shared Windows DLLs, while using
CMake to generate build files and
Visual Studio to compile into final executables. I spent some time figuring out how to do it and the following steps illustrate a simple example.
Create a Windows DLL
The first step is to create a Windows DLL and export the functions that will be called by other methods.
Listing of Animal.h
1
2
3
4
5
6
7
8
9
10
11
| #include <string>
using namespace std;
class Animal {
private:
string name;
public:
Animal(string);
virtual void print_name();
};
|
Listing of Animal.cpp
1
2
3
4
5
6
7
8
9
10
| #include <iostream>
#include "Animal.h"
using namespace std;
Animal::Animal(string name):name (name){}
void Animal::print_name(){
cout << "Name is " << this->name << endl;
}
|
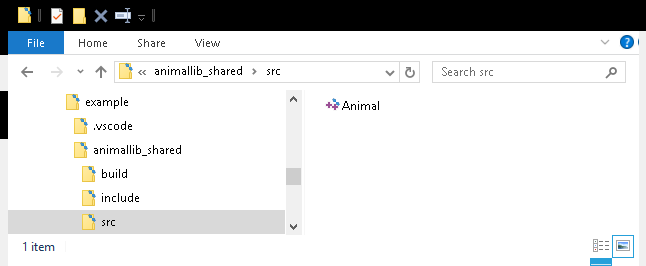
The
Animal.h and
Animal.cpp files are placed in the
include and
src folders under the
[example root folder]\animallib_shared\ folder, as shown below.

The next thing to do is to create the
CMakeLists.txt in the Windows DLL project e.g.
[example root folder]\animallib_shared\ folder.
1
 2
 3
 4
 5
 6
 7
 8
 9
10
11
12
13
14
15
16
17
18
19
20
21
22
23
| cmake_minimum_required(VERSION 2.8.6)
project (animallib)
set (CMAKE_BUILD_TYPE Debug)
#include *.h files under include folder and
#the project's output folder e.g. Debug
include_directories (include ${PROJECT_BINARY_DIR})
#compile all *.cpp source files under src folder
file (GLOB SOURCES "src/*.cpp")
#output library as animallib.*
#output library export file *.lib and
#output macro definitions include file
include (GenerateExportHeader)
add_library(animallib SHARED ${SOURCES})
GENERATE_EXPORT_HEADER (animallib
BASE_NAME animallib
EXPORT_MACRO_NAME animallib_EXPORT
EXPORT_FILE_NAME animallib_Export.h
STATIC_DEFINE animallib_BUILT_AS_STATIC
)
|
Next, we have to modify the header (*.h) and source code (*.cpp) files to add in the Windows export macro
animallib_EXPORT and cmake generated header file
animallib_Export.h.
Listing of modified animal.h
1
 2
 3
 4
 5
 6
 7
 8
 9
10
11
12
13
| #include <string>
#include "animallib_Export.h"
using namespace std;
class Animal {
private:
string name;
public:
animallib_EXPORT Animal(string);
virtual animallib_EXPORT void print_name();
};
|
Listing of modified Animal.cpp
1
 2
 3
 4
 5
 6
 7
 8
 9
10
11
12
| #include <iostream>
#include "Animal.h"
#include "animallib_Export.h"
using namespace std;
animallib_EXPORT Animal::Animal(string name):name (name){}
animallib_EXPORT void Animal::print_name(){
cout << "Name is " << this->name << endl;
}
|
Open up a
Windows Command prompt and change directory to the build folder of the Windows DLL project e.g.
[example root folder]\animallib_shared\build\ folder.
Type in the
cmake command (assuming cmake is in the PATH environment variable):
C:> cd \path\to\example\animallib_shared\build
C:> cmake ..
 |
| Build files are generated |
 |
| The generated build files |
Open up the generated Visual Studio solution file
[example root folder]\animallib_shared\build\animallib.sln in
Visual Studio. Then select
Build | Build Solution to compile the Windows DLL.
 |
| Compilation messages |
 |
| The generated *.dll and export library *.lib files under [example root folder]\animallib_shared\build\Debug\ |
Using the Windows DLL in a separate C++ application
Now that the Windows DLL has been generated and the functions exported, the next thing is to use the DLL's classes and functions in an application e.g.
UseAnimalLib project under [example root folder]\useanimallib\]
 Listing of uselib.cpp
1
2
3
4
5
6
7
8
9
10
11
12
| #include "Animal.h"
#include "animallib_Export.h"
int main(int argc, char *argv[]){
//Create a new animal instance with name Dog
Animal animal("Dog");
//try to call the class's print_name method
animal.print_name();
return (0);
}
|
Then create a
CMakeLists.txt file under the [example root folder]\useanimallib\ folder.
1
 2
 3
 4
 5
 6
 7
 8
 9
10
11
12
13
14
15
| cmake_minimum_required(VERSION 2.8.6)
project (UseAnimalLib)
set (EXAMPLE_DIR d:/path/to/example/root/folder)
set (PROJECT_LINK_LIBS animallib.dll)
link_directories (${EXAMPLE_DIR}/animallib_shared/build/Debug)
include_directories (${EXAMPLE_DIR}/animallib_shared/include ${EXAMPLE_DIR}/animallib_shared/build)
#compile all *.cpp source files under src folder
file (GLOB SOURCES "src/*.cpp")
add_executable(uselib ${SOURCES})
target_link_libraries (uselib ${PROJECT_LINK_LIBS})
|
Open up a
Windows Command Prompt. Change directory to the
[example root folder]\useanimallib\build folder.
C:> cd \path\to\example\useanimallib\build
C:> cmake ..
 |
| The build files are generated |
 |
The generated build files
|
Open up the generated solution file e.g. [example root folder]\useanimallib\build\Debug\uselib.sln using Visual Studio and build the solution.
 |
| Building the solution |
The executable that uses the Windows DLL can now be run in a Command Prompt, assuming the DLL is in the PATH environment variable, as shown below.