Besides graphics editing software like
Photoshop and
Gimp, the free and open source raw image format processing software
RawTherapee (see
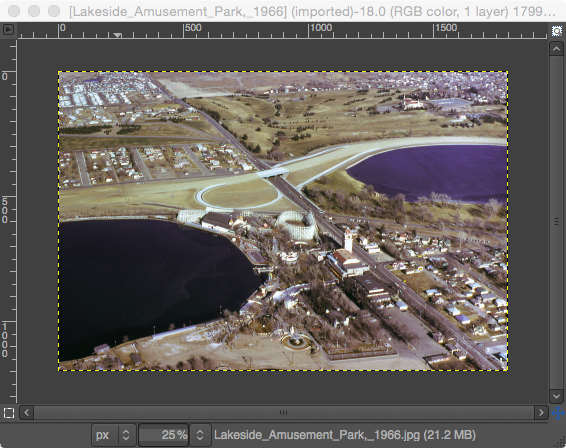
http://rawtherapee.com/) can be used to correct color cast problems in aerial photographs due to atmospheric haze or sensor problems. An example of an image with a color cast problem is shown below. The sample can be downloaded from
http://commons.wikimedia.org/wiki/File:Lakeside_Amusement_Park,_1966.jpg.
RawTherapee has the RGB curves function that can be used to easily correct the color cast problem.
The trick to solving the color cast problem is to adjust the RGB curves to ensure the color gray values have the same RGB values. If a gray color feature in the image e.g. an asphalt road has unequal RGB values, then the image has a color cast problem. Some times, it may be necessary to adjust the curves in the middle, dark, and/or light tones. The following example illustrates how to correct the color cast problem using RawTherapee.
- Start RawTherapee. Load the image.

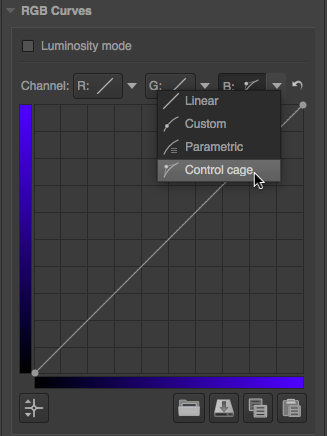
- Click the Color tab on the right pane. Then click RGB Curves as shown below.

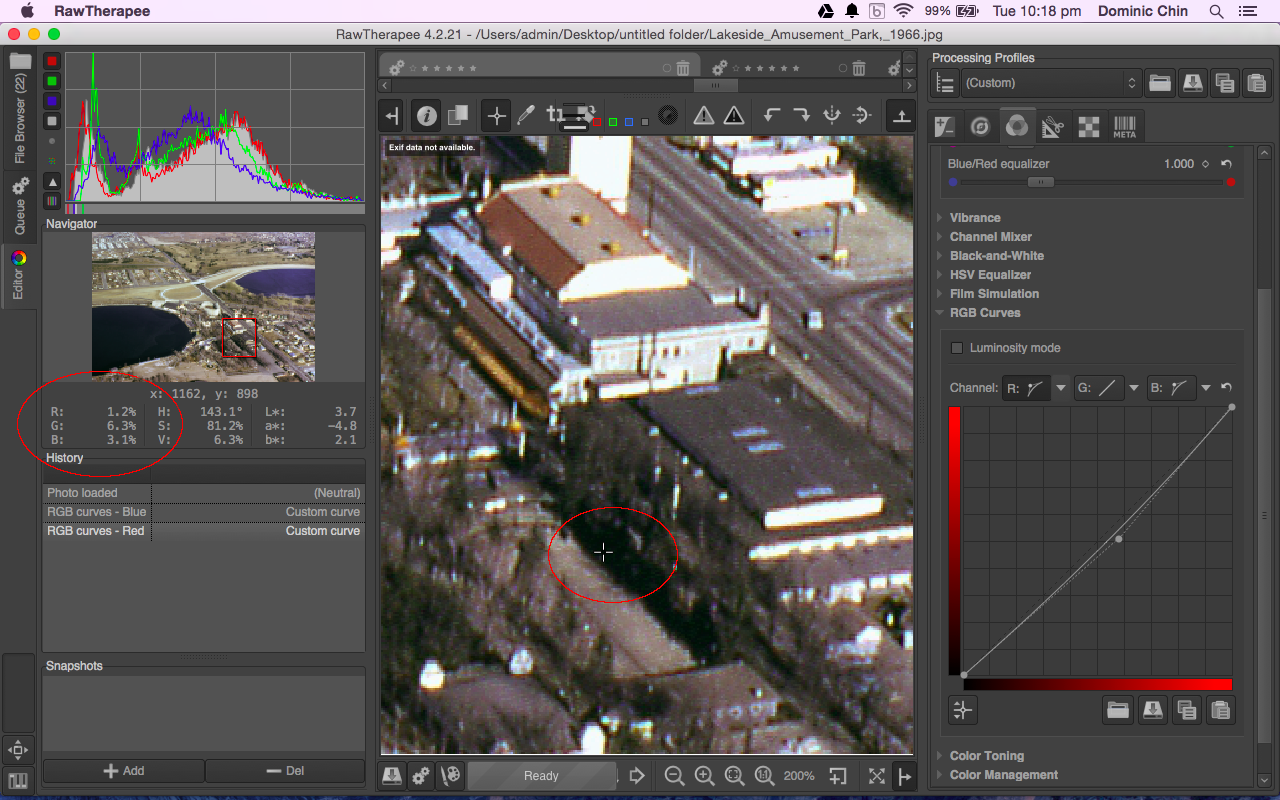
- Move the screen pointer around the image. Observe the RGB % values in the Navigator pane on the left when the pointer is on a mid tone gray colored feature e.g. paved road.
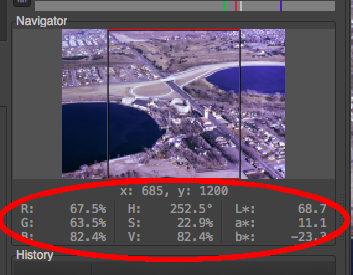
Note: in this example, the RGB values are 67.5%, 63.5%, and 82.4%. The numbers indicate that there is a blue cast in the mid tone values, i.e. the blues are too high and will have to be lowered. The red and green values are alright (maybe the reds need to be lowered just a tad).
- In the RGB Curves, choose the Blue Channel Control Cage as shown below.
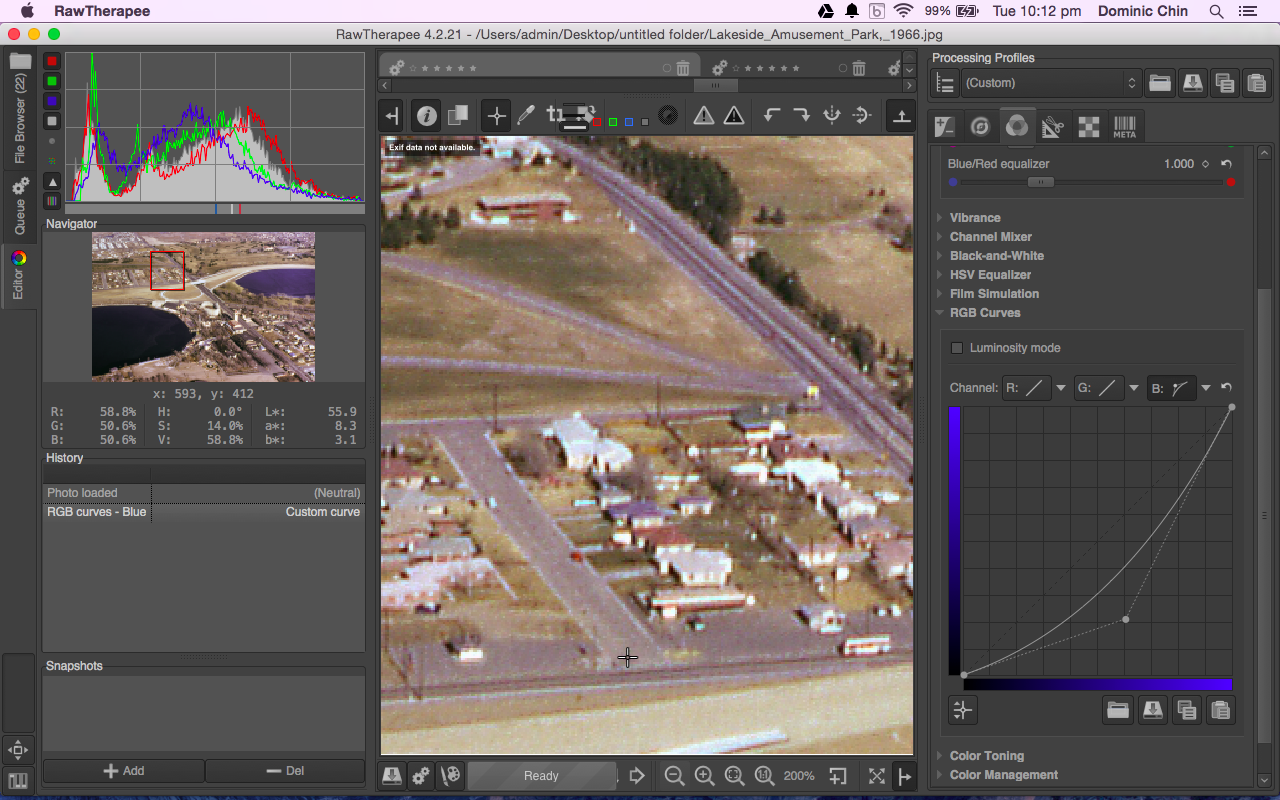
- Drag down the blue curve in the middle tone area. Move the cursor to the mid tone gray color feature and observe the adjusted RGB values in the Navigator pane underneath the screen pointer. Readjust the blue curve if necessary until the RGB values are about equal.
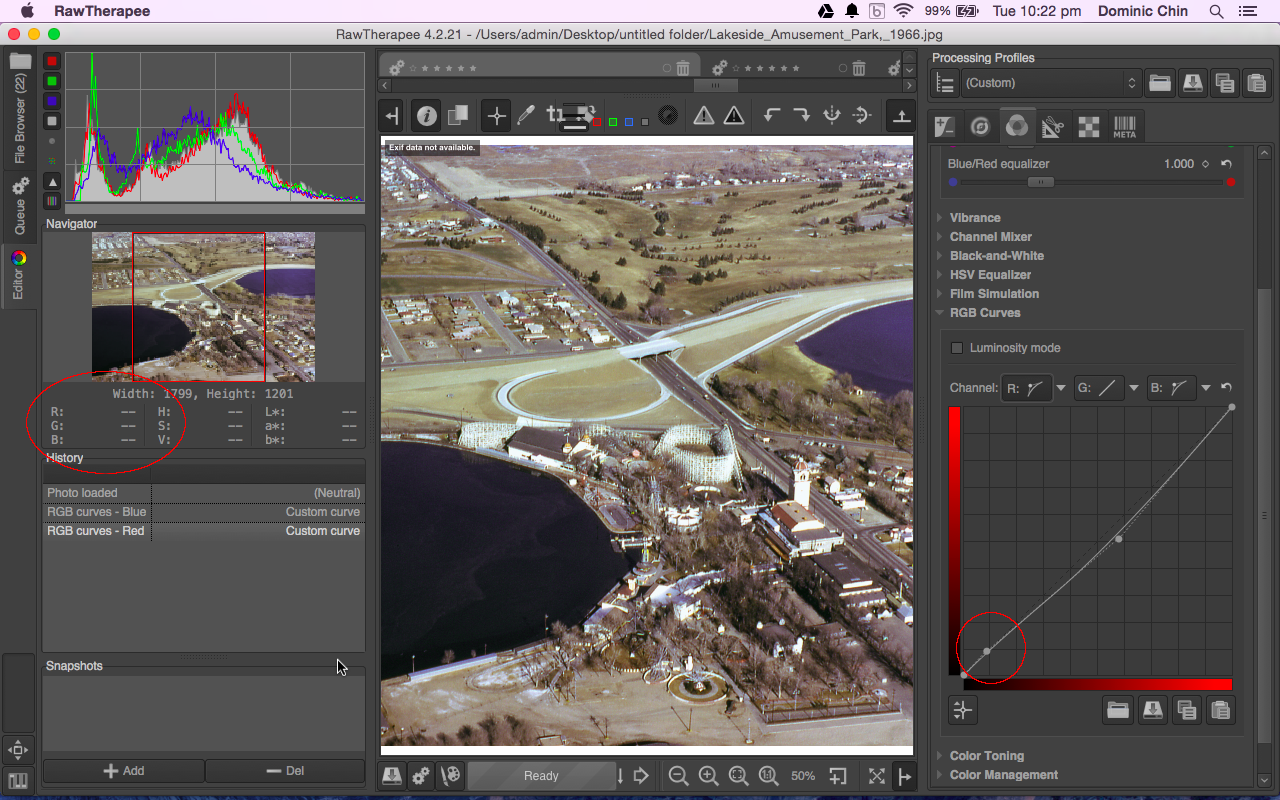
- I decided to adjust the mid tone red curve a little. So in the RGB Curves pane, click the Red Channel Control cage. Drag down the red curve in the mid tone area slightly and observe the adjusted RGB values in the Navigator pane. Readjust until the RGB values are about equal.
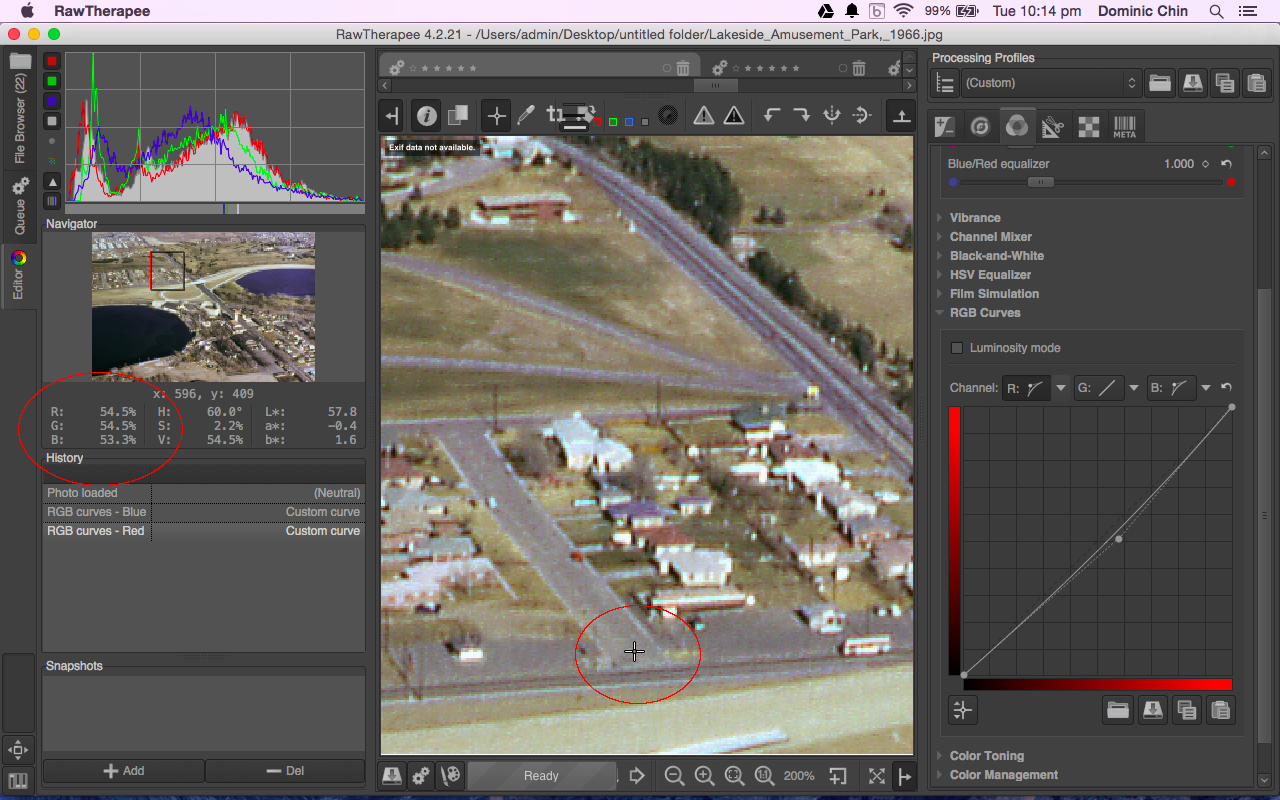
- No adjustment is necessary for the light tones since the color cast seems to be minimal. However the dark tones seem to need a little more red values as shown in the screenshot below.
- In the RGB Curves pane, drag the red curve in the dark tones slightly up. When the RGB values are about equal, the correction is complete.
Note: after every change, always move the cursor to the dark area and check the adjusted RGB values in the Navigator pane.
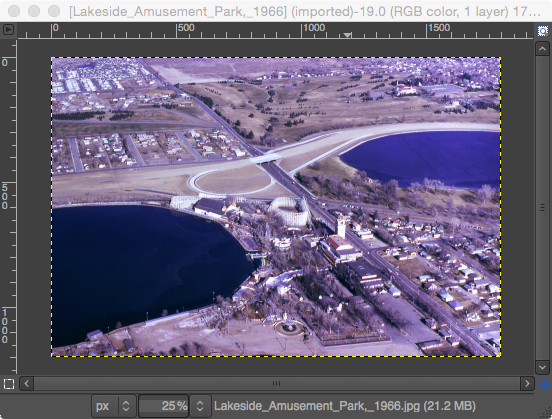
- Now to apply the color correction, send the job to the queue and generate the image in your desired format e.g. JPEG.
The color corrected image is created.


