The rtsp-simple-server README instructions on https://github.com/aler9/rtsp-simple-server is a little sparse on publishing as a systemd service using Gstreamer and the vaapi plugin. I spent some time trying to get the service to run properly. This post documents the steps I used on an Intel system board running Ubuntu 20.

Install GStreamer
- Optional. If Gstreamer has not been installed, then follow the instructions on https://gstreamer.freedesktop.org/documentation/installing/on-linux.html?gi-language=c.
- If the GStreamer VAAPI plugin has not been installed, run the following command in a Terminal:
$ sudo apt install gstreamer1.0-vaapi
Download and install rtsp-simple-server
- Using a browser, download and extract the rtsp-simple-server binary from the github repo https://github.com/aler9/rtsp-simple-server into a folder, e.g. /path/to/rtsp/
The files rtsp-simple-server and the rtsp-simple-server.yml are extracted out into the directory /path/to/rtsp/. - Open up a Terminal. At the prompt, change directory to the extracted location.
$ cd /path/to/rtsp/ - Move the binary to the folder /usr/local/bin/
$ sudo mv rtsp-simple-server /usr/local/bin/ - Move the configuration file to the folder /usr/local/etc/
$ sudo mv rtsp-simple-server.yml /usr/local/etc/
Configure rtsp-simple-server to publish from gstreamer
- Open up a Terminal. At the prompt, change directory to the directory /usr/local/etc/.
$ cd /usr/local/etc/ - Using a text editor, edit the configuration file rtsp-simple-server.yml. Create a new path name e.g. mystream under the paths key.
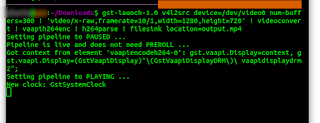
paths: mystream: runOnDemand: gst-launch-1.0 v4l2src device=/dev/video0 ! 'video/x-raw,framerate=30/1,width=320,height=240' ! videoconvert ! vaapih264enc ! h264parse ! rtspclientsink location=rtsp://localhost:$RTSP_PORT/$RTSP_PATH runOnDemandRestart: yes - In the runOnDemand key, type in the Gstreamer pipeline to read from a video source, perform encoding and finally to publish to the rtsp server.
Note 1: device points to the video source.gst-launch-1.0 v4l2src device=/dev/video0 ! 'video/x-raw,framerate=30/1,width=320,height=240' ! videoconvert ! vaapih264enc bitrate=200000 ! h264parse ! rtspclientsink location=rtsp://localhost:$RTSP_PORT/$RTSP_PATH
Note 2: video/x-raw line specifies the video format, frame rate, and resolutions to use
Note 3: videoconvert converts the color space
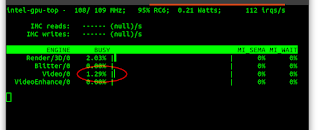
Note 4: vaapih264 performs the video encoding using the Intel GPU
Note 5: rtspclientsink publishes the video to the rtsp server - Save and close the configuration file.
Create and start the rtsp-simple-server service
- Open up a Terminal. Type in the following to create the systemd service.
sudo tee /etc/systemd/system/rtsp-simple-server.service >/dev/null << EOF
[Unit]
After=network.target
[Service]
ExecStart=/usr/local/bin/rtsp-simple-server /usr/local/etc/rtsp-simple-server.yml
[Install]
WantedBy=multi-user.target
EOF
- To enable and start the service, run the following:
$ sudo systemctl enable rtsp-simple-server
$ sudo systemctl start rtsp-simple-server
Optional. Define LIBVA environment variables
On some boards, when using the vaapi encoding plugin, gstreamer may not run with the error message:
WARNING: erroneous pipeline: no element "vaapih264enc"
In this case, setting the environment variables LIBVA_DRIVERS_PATH and LIBVA_DRIVER_NAME for the service may solve the problem. An example of the command to create the rtsp-simple-server service with the environment variables is shown below:
sudo tee /etc/systemd/system/rtsp-simple-server.service >/dev/null << EOF
[Unit]
After=network.target
[Service]
EnvironmentName="LIBVA_DRIVERS_PATH=/usr/lib/x86_64-linux-gnu/dri/"
EnvironmentName="LIBVA_DRIVER_NAME=i965"
ExecStart=/usr/local/bin/rtsp-simple-server /usr/local/etc/rtsp-simple-server.yml
[Install]
WantedBy=multi-user.target
EOF