Monday, November 30, 2015

An example of using an SQLite database in a Spring Hibernate application project

I wanted to use SQLite as an object relational model (ORM) database for a Spring Hibernate Java application. It turned out to be relatively simple to achieve. This post shows a simple example illustrating the project configuration, SQLite table creation, Java object definition, saving and retrieving a Java object into/from the database. The example project structure is shown in the screenshot below.


In order to prepare a Java application to work with SQLite as an ORM database, the following steps can be done:
  1. Add in the software dependencies to the project's Maven pom.xml
  2. Define Hibernate beans in the application context configuration file
Add in software dependencies to pom.xml
The following listing is an example pom.xml file.
Note that Hibernate, SQLite and Spring ORM dependencies have been appended to the dependencies element.

<?xml version="1.0" encoding="UTF-8"?>
<project xmlns="http://maven.apache.org/POM/4.0.0"
 xsi:schemaLocation="http://maven.apache.org/POM/4.0.0 http://maven.apache.org/maven-v4_0_0.xsd"
 xmlns:xsi="http://www.w3.org/2001/XMLSchema-instance">
 <modelVersion>4.0.0</modelVersion>
 <groupId>org.springframework.samples.spring</groupId>
 <artifactId>spring-hibernate-utility</artifactId>
 <version>1.0.0.CI-SNAPSHOT</version>
 <packaging>jar</packaging>
 <name>Spring Hibernate Utility</name>
 <url>http://www.springframework.org</url>
 <description>
  <![CDATA[This project is a minimal jar utility with Spring configuration for Hibernate.]]>
 </description>
 <properties>
  <maven.test.failure.ignore>true</maven.test.failure.ignore>
  <spring.framework.version>3.0.6.RELEASE</spring.framework.version>
 </properties>

 <dependencies>

  <dependency>
   <groupId>junit</groupId>
   <artifactId>junit</artifactId>
   <version>4.7</version>
   <scope>test</scope>
  </dependency>
  <dependency>
   <groupId>org.springframework</groupId>
   <artifactId>spring-test</artifactId>
   <version>${spring.framework.version}</version>
   <scope>test</scope>
  </dependency>
  <dependency>
   <groupId>org.springframework</groupId>
   <artifactId>spring-context-support</artifactId>
   <version>${spring.framework.version}</version>
  </dependency>
  <dependency>
   <groupId>org.springframework</groupId>
   <artifactId>spring-aop</artifactId>
   <version>${spring.framework.version}</version>
  </dependency>
  
  <!-- Dependencies for Hibernate and ORM  -->  
  <dependency>
   <groupId>com.h2database</groupId>
   <artifactId>h2</artifactId>
      <version>1.3.156</version>
  </dependency>
  <dependency>
   <groupId>org.springframework</groupId>
   <artifactId>spring-orm</artifactId>
   <version>${spring.framework.version}</version>
  </dependency>
  <dependency>
   <groupId>org.hibernate</groupId>
   <artifactId>hibernate-entitymanager</artifactId>
   <version>3.6.0.Final</version>
  </dependency>

  <!-- Dependencies for SQLite -->
  <dependency>
   <groupId>org.xerial</groupId>
   <artifactId>sqlite-jdbc</artifactId>
   <version>3.8.11.2</version>
  </dependency>
  <dependency>
   <groupId>net.kemitix</groupId>
   <artifactId>sqlite-dialect</artifactId>
   <version>0.1.0</version>
  </dependency>  
  
  <!--  
  <dependency>
   <groupId>hsqldb</groupId>
   <artifactId>hsqldb</artifactId>
   <version>1.8.0.10</version>
  </dependency>
   -->
  <dependency>
   <groupId>log4j</groupId>
   <artifactId>log4j</artifactId>
   <version>1.2.16</version>
  </dependency>
 </dependencies>

 <build>
  <plugins>
   <plugin>
    <groupId>org.apache.maven.plugins</groupId>
    <artifactId>maven-compiler-plugin</artifactId>
    <version>2.3.2</version>
    <configuration>
     <source>1.5</source>
     <target>1.5</target>
    </configuration>
   </plugin>
  </plugins>
 </build>

 <repositories>
  <repository>
   <id>org.jboss.repository.releases</id>
   <name>JBoss Maven Release Repository</name>
   <url>https://repository.jboss.org/nexus/content/repositories/releases</url>
   <snapshots>
    <enabled>false</enabled>
   </snapshots>
  </repository>

 </repositories>

</project>

Define Hibernate beans in the application context configuration file
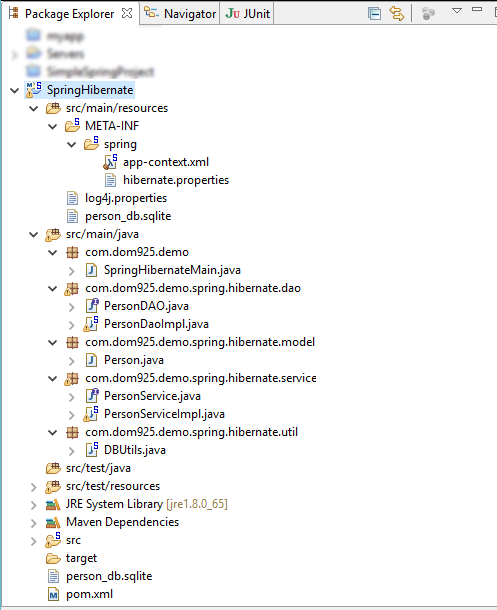
The Spring Java application's context configuration file is located in the /path/to/project/src/main/resources/META-INF/spring/app-context.xml file. The beans SessionFactory, TransactionManager and the DataSource should at least be defined in the file as shown in the listing below.

Note: In this example listing, we configure Spring to scan for additional components under the package namespace com.dom925.demo.spring.


<?xml version="1.0" encoding="UTF-8"?>
<beans xmlns="http://www.springframework.org/schema/beans"
 xmlns:xsi="http://www.w3.org/2001/XMLSchema-instance" xmlns:context="http://www.springframework.org/schema/context"
 xmlns:tx="http://www.springframework.org/schema/tx" xmlns:jdbc="http://www.springframework.org/schema/jdbc"
 xsi:schemaLocation="
  http://www.springframework.org/schema/jdbc http://www.springframework.org/schema/jdbc/spring-jdbc-3.0.xsd
  http://www.springframework.org/schema/beans http://www.springframework.org/schema/beans/spring-beans-3.0.xsd
  http://www.springframework.org/schema/tx http://www.springframework.org/schema/tx/spring-tx-3.0.xsd
  http://www.springframework.org/schema/context http://www.springframework.org/schema/context/spring-context-3.0.xsd">

 <tx:annotation-driven transaction-manager="transactionManager" />

 <context:annotation-config/>
 
 <!-- Tell Spring where to scan for components -->
 <context:component-scan base-package="com.dom925.demo.spring" />
 
 <!-- Specify the Hibernate properties setting file -->
 <context:property-placeholder 
  location="classpath:META-INF/spring/hibernate.properties"/>

 <bean id="dataSource" 
  class="org.springframework.jdbc.datasource.DriverManagerDataSource">
  <property name="driverClassName" value="${jdbc.driverClassName}" />
  <property name="url" value="${jdbc.url}" />
  <property name="username" value="${jdbc.username}" />
  <property name="password" value="${jdbc.password}" />
 </bean>
 
 <bean id="sessionFactory" 
  class="org.springframework.orm.hibernate3.annotation.AnnotationSessionFactoryBean">
  <property name="dataSource" ref="dataSource" />
  <property name="annotatedClasses" value="com.dom925.demo.spring.hibernate.model.Person" />
  <property name="hibernateProperties">
   <props>
    <prop key="hibernate.dialect">${hibernate.dialect}</prop>
    <prop key="hibernate.show_sql">${hibernate.show_sql}</prop>
   </props>
  </property>
 </bean>
 
 <bean id="transactionManager" 
  class="org.springframework.orm.hibernate3.HibernateTransactionManager">
  <property name="sessionFactory" ref="sessionFactory" />
 </bean>
 
 <tx:annotation-driven transaction-manager="transactionManager"/>
</beans>

In this example, some of the Hibernate data source's JDBC properties are defined in a separate file /path/to/project/src/main/resources/META-INF/hibernate.properties file, as shown below.

Note: this example configures Spring to use a SQLite database named person_db.sqlite. Since the path is not defined, it will be created in /path/to/project/ directory.

jdbc.driverClassName=org.sqlite.JDBC
jdbc.url=jdbc:sqlite:person_db.sqlite
jdbc.username=
jdbc.password=

hibernate.dialect=org.hibernate.dialect.SQLiteDialect
hibernate.show_sql=true

At this point, the project configuration should be done. The next steps would be to write the Java classes and interfaces. In this example, the following classes are created.
  1. DBUtils.java
  2. Person.java
  3. PersonDaoImpl.java which implements the interface PersonDAO.java
  4. PersonServiceImpl.java which implements the interface PersonServiceImpl.java
DBUtils.java
When Spring initializes the Java application, the @PostConstruct annotation in this file will cause the initialize method to be executed. This method will recreate the SQLite database and table each time you run the application. 


package com.dom925.demo.spring.hibernate.util;

import java.sql.Connection;
import java.sql.SQLException;
import java.sql.Statement;

import javax.annotation.PostConstruct;
import javax.sql.DataSource;

import org.springframework.beans.factory.annotation.Autowired;
import org.springframework.stereotype.Component;

@Component
public class DBUtils {

 @Autowired
 private DataSource dataSource;
 
 @PostConstruct
 public void initialize(){
  try {
   Connection connection = dataSource.getConnection();
   Statement statement = connection.createStatement();
   statement.execute("DROP TABLE IF EXISTS PERSON_INFO");
   statement.executeUpdate(
     "CREATE TABLE PERSON_INFO(" +
     "ID INTEGER Primary key, " +
     "FIRST_NAME varchar(30) not null, " +
     "LAST_NAME varchar(30) not null)"
     );
   statement.executeUpdate(
     "INSERT INTO PERSON_INFO " +
     "(FIRST_NAME, LAST_NAME) " +
     "VALUES " + "('DONALD', 'TRUMP')"
     );
   statement.close();
   connection.close();
  }
  catch (SQLException e) {
   e.printStackTrace();
  }
 }
}

Person.java
Now we define the plain old Java object POJO class that we want to associate to a SQLite database table.

Note I: the Spring annotations @Entity and @Table specify the database table
Note II: the annotations @Column specify the database column name, and @Id define the primary key.


package com.dom925.demo.spring.hibernate.model;

import javax.persistence.Column;
import javax.persistence.Entity;
import javax.persistence.GeneratedValue;
import javax.persistence.GenerationType;
import javax.persistence.Id;
import javax.persistence.Table;

@Entity
@Table(name = "PERSON_INFO")
public class Person {

 @Id
 @Column(name = "ID")
 @GeneratedValue(strategy = GenerationType.IDENTITY)
 private Integer id;
 
 @Column(name = "FIRST_NAME")
 private String firstName;
 
 @Column(name = "LAST_NAME")
 private String lastName;
  
 public Integer getId() {
  return id;
 }
 public void setId(Integer id) {
  this.id = id;
 }
 public String getFirstName() {
  return firstName;
 }
 public void setFirstName(String firstName) {
  this.firstName = firstName;
 }
 public String getLastName() {
  return lastName;
 }
 public void setLastName(String lastName) {
  this.lastName = lastName;
 }
 @Override
 public boolean equals(Object obj){
  if (this == obj){
   return true;
  }
  Person person = (Person) obj;
  if (firstName != null ?
    !firstName.equals(person.firstName)
    :person.firstName != null){
   return false;
  }
  else {
   return true;
  } 
 }
 @Override
 public String toString() {
  return "Person [id=" 
    + id 
    + ", name=" 
    + firstName 
    + " " 
    + lastName 
    + "]";
 }
}

PersonDAO.java
This interface defines the interface for accessing the Person data.


package com.dom925.demo.spring.hibernate.dao;

import java.util.List;

import com.dom925.demo.spring.hibernate.model.Person;

public interface PersonDAO {

 public List<Person> getAllPersons();
 
 public void insertPerson (Person person);
}

PersonDaoImpl.java
This implements the interface defined by the PersonDAO.java file. Note the use of the Spring @Repository and @Transactional annotations for database related activities.


package com.dom925.demo.spring.hibernate.dao;

import java.util.List;

import org.hibernate.Query;
import org.hibernate.Session;
import org.hibernate.SessionFactory;
import org.springframework.beans.factory.annotation.Autowired;
import org.springframework.stereotype.Repository;
import org.springframework.transaction.annotation.Transactional;

import com.dom925.demo.spring.hibernate.model.Person;

@Repository
@Transactional(readOnly = true)
public class PersonDaoImpl implements PersonDAO {

 @Autowired
 private SessionFactory sessionFactory;

 
 public List<Person> getAllPersons() {
  Session session = sessionFactory.openSession();
  String hql = "FROM Person";
  Query query = session.createQuery(hql);
  List<Person> persons = query.list();
  return persons;
 }

 @Transactional(readOnly = false)
 public void insertPerson(Person employee) {
  Session session = sessionFactory.openSession();
  session.save(employee);
 }

}

PersonService.java
This file defines the interface for a service to access the Person data.


package com.dom925.demo.spring.hibernate.service;

import java.util.List;

import com.dom925.demo.spring.hibernate.model.Person;

public interface PersonService {

 public List<Person> getAllPersons();
 
 public void insertPerson(Person person);
}

PersonServiceImpl.java
This is an implementation of the interface defined in the PersonService.java file. Note the Spring @Service annotation.


package com.dom925.demo.spring.hibernate.service;

import java.util.List;

import org.springframework.beans.factory.annotation.Autowired;
import org.springframework.stereotype.Component;
import org.springframework.stereotype.Service;

import com.dom925.demo.spring.hibernate.dao.PersonDAO;
import com.dom925.demo.spring.hibernate.model.Person;


@Service
public class PersonServiceImpl implements PersonService {

 @Autowired
 private PersonDAO personDao;
 
 public List<Person> getAllPersons() {
  List<Person> persons = personDao.getAllPersons();
  return persons;
 }

 public void insertPerson(Person person) {
  personDao.insertPerson(person);
 }

}

SpringHibernateMain.java
Finally, the Java application's main method, which loads the application context, get a PersonService bean to add a new Person object to the database. Then print out the database contents to the screen.


package com.dom925.demo;

import org.springframework.context.ApplicationContext;
import org.springframework.context.support.ClassPathXmlApplicationContext;

import com.dom925.demo.spring.hibernate.model.Person;
import com.dom925.demo.spring.hibernate.service.PersonService;

public class SpringHibernateMain {

 public static void main(String[] args) {
  ApplicationContext context = 
    new ClassPathXmlApplicationContext(
      "/META-INF/spring/app-context.xml");
  PersonService personService = 
    context.getBean("personServiceImpl", PersonService.class);
  
  Person person = new Person();
  person.setFirstName("HILLARY");
  person.setLastName("CLINTON");
  personService.insertPerson(person);
  
  for (Person p : personService.getAllPersons()){
   System.out.println(p);
  }
 }
}
Example print out from the Spring application

A zip file containing the example project can be downloaded here.

Monday, November 23, 2015

Display sample data in Visual Studio's Designer using simple data binding

In Visual Studio, when designing the graphical user interface using XAML, it would be nice to see the screen filled with sample data rather than a blank spot as shown in the example screenshot below.

In order to get the Designer to show some sample data, you have to create a few view model item and collection classes, as well as a sample data XAML. Then link up the sample data with the graphical page XAML using bindings. In this example, only a simple one way binding will be shown to illustrate the steps in getting the Designer to display some sample data.

Create a view model item class
In Visual Studio, create a new class that represents an object with properties that you want to display in the Designer, e.g. a PersonItemViewModel class with ID and FirstName properties in the project's ViewModels folder.

namespace Solarizr.ViewModels
{
    public class PersonItemViewModel
    {
        public string Id { get; set; }
        public string FirstName { get; set; }
    }
}


Create a view model collection class
To contain one or more Person items in a list, create a collection class e.g. PeopleViewModel in the project's ViewModels folder. Note that the name PeopleCollection used here will be used later in the Page XAML binding source definition.

using Solarizr.Models;
using System;
using System.Collections.Generic;
using System.Collections.ObjectModel;
using System.ComponentModel;
using System.Linq;
using System.Text;
using System.Threading.Tasks;

namespace Solarizr.ViewModels
{
    public class PeopleViewModel
    {
        public PeopleViewModel()
        {
            this.PeopleCollection 
                = new ObservableCollection<PersonItemViewModel>();
        }

        public ObservableCollection<PersonItemViewModel> PeopleCollection { get; set; }
    }
}

Create a XAML with sample data
With the PersonItemViewModel and PeopleViewModel collection class definitions created, the next thing to do is to create a XAML file populated with some sample data you want to display in the Visual Studio Designer. In the XAML file, it is important to add in a namespace xmlns declaration to the PersonItemViewModel and PeopleViewModel view model classes. In the code listing below, it is vm pointing to "using:Solarizr.ViewModels". The sample data XAML can be created in the project's SampleData folder. In this sample, 3 records are defined - David, John and Mary.


<vm:PeopleViewModel
    xmlns="http://schemas.microsoft.com/winfx/2006/xaml/presentation"
    xmlns:x="http://schemas.microsoft.com/winfx/2006/xaml"
    xmlns:vm="using:Solarizr.ViewModels"
    >

    <vm:PeopleViewModel.PeopleCollection>
        <vm:PersonItemViewModel Id="1" FirstName="David" />
        <vm:PersonItemViewModel Id="2" FirstName="John" />
        <vm:PersonItemViewModel Id="3" FirstName="Mary" />       
    </vm:PeopleViewModel.PeopleCollection>
    
</vm:PeopleViewModel>

Add in the view models to the Page XAML
Now with the sample data XAML created, the next step is to edit the Page XAML using the Visual Studio Designer and editor and add in the namespaces and bindings.

  1. In the Page XAML file, add in the view models namespace.

    xmlns:vm="using:Solarizr.ViewModels"
  2. Add in the sample data namespace.

    xmlns:sampleData="using:Solarizr.SampleData"
  3. Add in a design time data context and point it to the sample data.

    d:DataContext="{d:DesignData ../SampleData/PeopleViewModelSampleData.xaml }"
  4. Add in the data source to a list control's items e.g. ListView.

    ItemsSource="{Binding Path=PeopleCollection, Mode=OneTime}"
>

  • Add in the individual item control's binding field.

    Text="{Binding Path=FirstName}"
  • Width="80" Margin="10" />

    The Designer should now display the sample data from the binding as shown in the screenshot below.


    Monday, November 16, 2015

    Mosaic a large number of GeoTiff images using GDAL

    GDAL's gdalwarp function can be used to combine geo-referenced images into a large mosaic file. For a few files, it is relatively straightforward to type the input images in the command line, e.g.
    C:> gdalwarp input1.tif input2.tif output.tif
    A large number of images for merging

    If there are a large number of input files, as shown in the screenshot above, then a wildcard can be used, e.g.
    C:> gdalwarp input*.tif output.tif

    Alternatively, you can generate a list of input files and pass it to the gdalwarp as an argument as shown below. Then run the command.

    1. In a command prompt, type in the following.

      C:> cd \path\to\input_images
      C:> dir /o/b *.tif > list.txt


      The list is created.

    2. To use the list, use the --optfile argument in the gdalwarp command.

      C:> gdalwarp -multi -wm 1000 --optfile list.txt output.tif

      Note: the -multi argument tells gdalwarp to use multiple processing threads.
      The -wm 1000 tells gdalwarp to grab 1000 mb or memory for processing


      The images in the list are merged into the output.tif file.


    Monday, November 9, 2015

    Enable basic Spring Security authentication and authorization in a Google App Engine site

    After some effort, I managed to get a Google App Engine project to work with a simple Spring Security authentication and authorization over a secure HTTPS protocol. In addition to Spring Core and Spring MVC, Spring Security needs to be installed and configured for the App Engine project.

    Add Spring Security to the project's pom.xml file
    1. Open up the pom.xml in a text editor, e.g. C:\MyProject\myapp\pom.xml. Add in a convenience property for the Spring Security version.


    2. Add in the dependencies for Spring Security.
    <!-- Spring security dependencies -->
    <dependency>
    	<groupId>org.springframework.security</groupId>
    	<artifactId>spring-security-core</artifactId>
    	<version>${spring.security.version}</version>
    </dependency>    
    
    <dependency>
    	<groupId>org.springframework.security</groupId>
    	<artifactId>spring-security-web</artifactId>
    	<version>${spring.security.version}</version>
    </dependency>    
    
    <dependency>
    	<groupId>org.springframework.security</groupId>
    	<artifactId>spring-security-config</artifactId>
    	<version>${spring.security.version}</version>
    </dependency>
    

    Add in the Spring Security filters and the security configuration file to web.xml
    1. Open up the configuration web.xml file e.g. C:\MyProject\myapp\src\main\webapp\WEB-INF\web.xml in a text editor.
    2. Add in the filter and filter mapping sections for Spring Security.


    3. Add in the name and location of the Spring Security configuration file e.g. C:\MyProject\myapp\src\main\webapp\WEB-INF\spring-security.xml in the context-param section as shown below.


    An example of the resultant web.xml file

    <?xml version="1.0" encoding="UTF-8"?>
    <web-app version="2.5" xmlns="http://java.sun.com/xml/ns/javaee" xmlns:xsi="http://www.w3.org/2001/XMLSchema-instance" xsi:schemaLocation="http://java.sun.com/xml/ns/javaee http://java.sun.com/xml/ns/javaee/web-app_2_5.xsd">
    
    	<context-param>
    		<param-name>contextConfigLocation</param-name>
    		<param-value>
    		/WEB-INF/dispatcher-servlet.xml,
    		/WEB-INF/spring-security.xml
          	</param-value>
    	</context-param>
    
    	<context-param>
    		<param-name>log4jConfigLocation</param-name>
    		<param-value>/WEB-INF/classes/log4j.properties</param-value>
    	</context-param>
    
    	<!-- Bootstrap the root application context as usual using ContextLoaderListener -->
    	<listener>
    		<listener-class>org.springframework.web.context.ContextLoaderListener</listener-class>
    	</listener>
    
        <servlet>
            <servlet-name>dispatcher</servlet-name>
            <servlet-class>org.springframework.web.servlet.DispatcherServlet</servlet-class>
            <load-on-startup>1</load-on-startup>      
        </servlet>
    
        <servlet-mapping>
            <servlet-name>dispatcher</servlet-name>
            <url-pattern>/</url-pattern>
        </servlet-mapping>
    
    	<!-- Add support for HTTPS -->
        <security-constraint>
            <web-resource-collection>
                <web-resource-name>MySecureSite</web-resource-name>
                <url-pattern>/*</url-pattern>
            </web-resource-collection>
            <user-data-constraint>
                <transport-guarantee>CONFIDENTIAL</transport-guarantee>
            </user-data-constraint>
        </security-constraint>
    
    	<!-- For Spring Security -->
    	<context-param>
    		<param-name>contextConfigLocation</param-name>
    		<param-value>/WEB-INF/spring-security.xml</param-value>
    	</context-param>
    
    	<filter>
    		<filter-name>springSecurityFilterChain</filter-name>
    		<filter-class>org.springframework.web.filter.DelegatingFilterProxy</filter-class>
    	</filter>
    	
    	<filter-mapping>
    		<filter-name>springSecurityFilterChain</filter-name>
    		<url-pattern>/*</url-pattern>
    	</filter-mapping>
    	
    </web-app>
    

    Create the Spring Security configuration file spring-security.xml
    1. Use a text editor and create the Spring Security configuration file e.g. C:\MyProject\myapp\src\main\webapp\WEB-INF\spring-security.xml.

    2. Create an http element and add in one or more intercept-url elements to define which URLs you want to enable Spring Security, e.g. "/*" for all.


    An example listing is shown below. This example enables security for all mappings from the root for any user with the role ROLE_ADMIN. There is only one user admin with the password admin authorized with the role ROLE_ADMIN. Add in more roles and users as required.

    <beans:beans xmlns:beans="http://www.springframework.org/schema/beans"
    	xmlns:xsi="http://www.w3.org/2001/XMLSchema-instance" xmlns="http://www.springframework.org/schema/security"
    	xsi:schemaLocation="http://www.springframework.org/schema/beans 
    	http://www.springframework.org/schema/beans/spring-beans.xsd
    		http://www.springframework.org/schema/security 
    		http://www.springframework.org/schema/security/spring-security-4.0.xsd">
    
    	<http auto-config="true">
    		<intercept-url pattern="/*" access="hasRole('ROLE_ADMIN')" />
    	</http>
    	
    	<authentication-manager>
    		<authentication-provider>
    			<user-service>
    				<user name="admin" password="admin" authorities="ROLE_ADMIN" />
    			</user-service>
    		</authentication-provider>
    	</authentication-manager>
    	
    </beans:beans>
    

    Code the Spring controller
    1. Develop the Java application logic for the Spring Controller. Add in the Spring annotations @Controller and map one or more methods to URLs using the @RequestMapping annotations as shown below.


    package com.mycompany.myapp;
    
    import org.springframework.stereotype.Controller;
    import org.springframework.web.bind.annotation.RequestMapping;
    import org.springframework.web.bind.annotation.RequestMethod;
    import org.springframework.web.bind.annotation.ResponseBody;
    
    @Controller
    public class MySvc {
    	@RequestMapping("/hello")
    	public @ResponseBody String index(){
    		return "Greetings from Spring Boot!";
    	}	
    }


    Compile and deploy the application to Google App Engine. Now when the site URL e.g. https://myapp.appspot.com/hello is first accessed, a default Spring login prompt will appear.

    If an incorrect user name or password is submitted, the authentication will fail.

    If the correct user name and password is submitted, Spring Security will check the user's authorization for the requested URL. If it's in the user's role, then the URL will return the requested resource to the user as shown below.
     

    Monday, November 2, 2015

    Resolving a Visual Studio uninstallation that takes forever

    In some cases, uninstalling Visual Studio may seem to take a long time (as in days) with some cryptic messages about "Applying something" and a looping ball animation as shown in the screenshot below.

    If you are in this situation, open up the Windows Task Manager and examine the Disk activity. If the disk activity is minimal, it means the uninstaller is not doing anything and waiting for something.

    I found out that the uninstaller will not be able to proceed if the anti-virus software AVG is enabled and running on the system. It seems that AVG will hold onto some files needed by the uninstaller and the installer will wait endlessly for the files to be released. There is no timeout and there is no error messages displayed in the uninstaller.

    1. So to resolve the situation, simply disable AVG temporarily.


    2. Run the Visual Studio uninstaller again.
    3. Optional. Run Task Manager and show the Disk activity.

      The disk activity should be high.

    4. Visual Studio should be successfully removed within a reasonable amount of time now.