Showing posts with label Google Earth. Show all posts

Monday, February 18, 2013

Example KML for displaying extended data in balloons

In Google Earth, it is possible to display a nicely formatted Placemark balloon showing some relevant information about that Placemark. The simplest way to create the Placemark KML is to write and format everything (including the HTML mark ups) in the Placemark's Description tag, as shown in the example code below.
<Placemark>
<name>Microsoft</name>
<description>
<![CDATA[
<b>Example 1</b>
<table border="1" >
<tr><td>Company Name</td></tr>
<tr><td><i>Microsoft</i></td></tr>
</table>
]]>
</description>
<Point> <coordinates>-122.034924,37.331586,0</coordinates>
</Point>
</Placemark>

The screenshot shows how it is displayed in Google Earth.

However, if there are a lot of Placemarks, it would be a pain to have write the mark up and data values for everyone. It would be better to define a custom balloon style containing a template HTML mark up and placeholders for the variable data values once; the data values would then be stored under the Placemark's ExtendedData tag. When Google Earth renders the Placemark balloons, it would use the referenced balloon style and replace the placeholders with the actual data values from the Placemark's ExtendedData tags.

The example code below defines a balloon style with a placeholder $[Company_Name] in the HTML mark up text.
<Style id="MyBalloonStyle">
<BalloonStyle>
<text> <![CDATA[
<b>Example extended data template</b>
<table border="1" >
<tr><td>Company Name</td></tr>
<tr><td><i>$[Company_Name]</i></td></tr>
</table>
]]></text>
<bgColor>ffffffbb</bgColor>
</BalloonStyle>

Then in the Placemark tag, it is only necessary to place the data (name and value) under the ExtendedData tag as shown below. The balloon style is referenced with the StyleUrl tag.
<Placemark>
<name>Apple</name>
<styleUrl>#MyBalloonStyle</styleUrl>
<ExtendedData>
<Data name="Company_Name"><value>Apple Incorporated</value></Data>
</ExtendedData>
<Point> <coordinates>-122.034924,37.331586,0</coordinates>
</Point>
</Placemark>

The full KML code is shown below.


<?xml version="1.0" encoding="UTF-8"?>
<kml xmlns="http://www.opengis.net/kml/2.2">
<Document>
 
<Style id="MyBalloonStyle">
<BalloonStyle>
<text> <![CDATA[
<b>Example extended data template</b>
<table border="1" >
<tr><td>Company Name</td></tr>
<tr><td><i>$[Company_Name]</i></td></tr>
</table>
]]></text>
<bgColor>ffffffbb</bgColor>
</BalloonStyle>
<IconStyle> <color>ffffffff</color> <scale>1</scale>
<Icon><href>http://maps.google.com/mapfiles/kml/pushpin/grn-pushpin.png</href>
</Icon>
</IconStyle>
<LabelStyle> <scale>0</scale> </LabelStyle>
</Style>
<Folder> <name>Tech Companies</name>
<Placemark>
<name>Apple</name>
<styleUrl>#MyBalloonStyle</styleUrl>
<ExtendedData>
<Data name="Company_Name"><value>Apple Incorporated</value></Data>
</ExtendedData>
<Point> <coordinates>-122.034924,37.331586,0</coordinates>
</Point>
</Placemark>
<Placemark>
<name>Google</name>
<styleUrl>#MyBalloonStyle</styleUrl>
<ExtendedData>
<Data name="Company_Name"><value>Google Incorporated</value></Data>
</ExtendedData>
<Point> <coordinates>-122.084676,37.421742,0</coordinates>
</Point>
</Placemark>
</Folder>
</Document>
</kml>

The screenshot shows how it is rendered in Google Earth.

Monday, February 11, 2013

Example KML for displaying a photo image from the local disk

Recently I had to generate some Google Earth KML files for displaying photos from a local hard drive in a Placemark balloon. In order to display local images not from a web server, the file keyword must be used with 3 forward slashes in the HTML img tag followed by the full path of the photo file, as shown in the example KML code below.

 <?xml version="1.0" encoding="utf-8"?>  
 <kml>  
  <Document>  
   <name>Example of displaying a local image file</name>  
   <Placemark>  
    <name>Monaco</name>  
    <Snippet>Photo 1</Snippet>  
    <description><![CDATA[  
 <img src='file:///c:\temp\monaco\IMG_5523.jpg' width='400' /><br/&gt;  
 Photo taken from near the palace in Monaco<br/>  
 ]]>  
 </description>  
    <Point>  
     <coordinates>7.421630,43.731459</coordinates>  
    </Point>  
   </Placemark>  
  </Document>  
 </kml>  
The following screenshots show how this KML file is rendered in Google Earth.
 When the Placemark is clicked, the balloon pops up showing the local photo image file.

Monday, January 7, 2013

Earthquake Monitor Web App

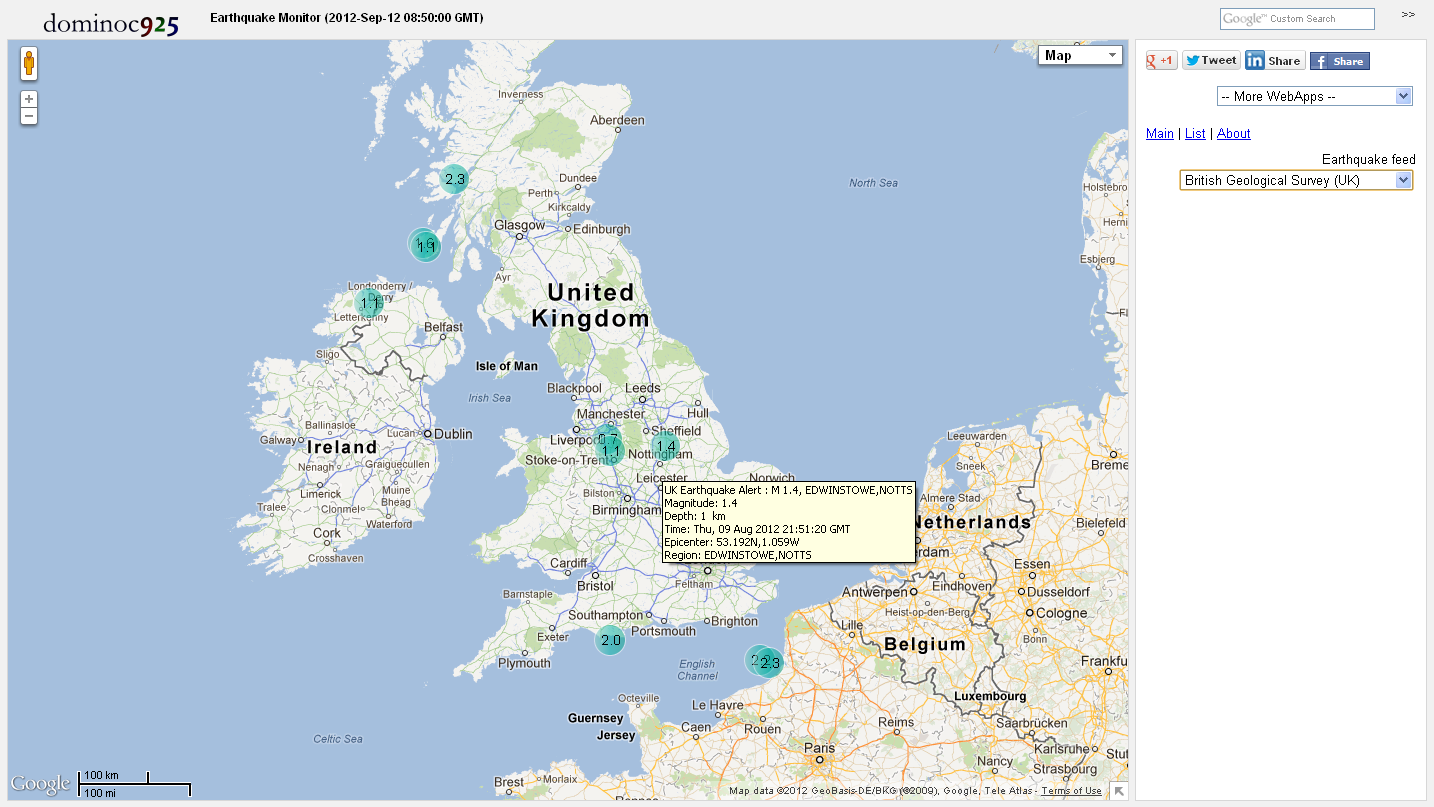
Since Google has announced that it will be closing down the iGoogle site, I decided to migrate some of the Google Gadgets that I had written to Chrome Web Apps for the Chrome Web Store. I consolidated the various earthquake gadgets using the USGS, British Geological Survey, Euro-Mediterranean Seismic Monitoring Center, and the New Zealand GeoNet earthquake feeds into a single Web App.

The screenshot below shows the Earthquake Monitor Web App. It can be installed through the Chrome Web Store (search for Earthquake Monitor) or directly from this url address http://dominoc925-pages.appspot.com/webapp/quakemon/default.html.


Simply choose an earthquake source feed in the side bar's Earthquake feed combo box as shown below.

The earthquake epicenters will be displayed as color coded icons by depth and time on Google Maps. Hovering the cursor on the icons will display a tool tip showing summary details about the earthquake event. Clicking on the icon will open up a page showing more detailed information.


Clicking on the List link in the side bar will display a list view of the earthquake events. The list can be sorted according to the time, depth or magnitude of the earthquake event. Clicking on the Map link will center and zoom to the earthquake epicenter in Google Maps.


Monday, June 25, 2012

Google Mapplet for creating persistent point markers

This Google Mapplet can be used to create persistent markers on Google Maps that will still be there when you close and reopen the web page. The markers will remain until they are explicitly deleted. The mapplet makes use of the IndexDB feature of the HTML5 specifications to persist the markers in the browser. This means that only modern Internet browsers such as Chrome, Firefox, and the upcoming Internet Explorer 10 will be able persist the markers. The mapplet can function in older browsers such as Internet Explorer 8 or 9 but the markers will not be retained on the next visit to the page.

To run this mapplet, click on the link http://dominoc925-pages.appspot.com/mapplets/plpoint.html.

Choice of markers
You can choose the type of marker to be pinned on to the map e.g. green, orange etc. Once placed, the markers can be dragged to another location, deleted, and labelled.

Export Points
The markers can be exported out as KML or comma-separated-values (CSV) format. This can be done by clicking the Export button in the side bar.

The Export Points dialog box is shown below.


Export Points example

  1. In the Output format drop down  box, choose the output format, e.g. KML.

    The Coordinate system type drop down box is enabled for CSV and disabled for KML.
  2. If necessary, in the Coordinate system type field, make a choice e.g. Projected.

    The Projection drop down box is enabled.
  3. If necessary, in the Projection field, choose a suitable destination projection for the output e.g. UTM 48N.
  4. If necessary, in the Geodetic datum field, choose a suitable destination datum e.g. WGS84.
  5. Click Start Export.

    The markers are exported to the destination format. The results are displayed in the Results box.


  6. Click the Results text. Press CTRL+C.
  7. In Notepad, press CTRL+V.

    The results are pasted into Notepad.


  8. Close and save the results into a *.csv file.


 An example of the results of a KML output displayed in Google Earth is shown below.


Monday, April 30, 2012

Google Mapplet for showing MGRS coordinates

The Military Grid Reference System (MGRS) is a worldwide standard based on Universal Transverse Mercator (UTM) used by NATO to locate points on the earth. More information about MGRS can be found in the Wikipedia


You can use this mapplet to display the MGRS coordinates for any point on Google Maps. Simply click on any location on Google Maps. Just adjust the Readout Digits to matched the desired MGRS Coordinate accuracy. 

Alternatively, you can type in an MGRS coordinate in the side bar e.g. 32SMG0329. Then click the Locate point on map button to display the MGRS coordinate on Google Maps. 


The default datum used is WGS84. If a different datum is desired, then simple click Datum and select another datum e.g. WGS72. 


Go to this site http://dominoc925-pages.appspot.com/mapplets/cs_mgrs.html to run the mapplet.

Monday, September 5, 2011

Google Maps tool for creating air photo frames

In aerial digital photography, the area captured by the camera is dependent on a number of factors including the camera lens and sensor dimensions, the flying speed and height, and the capture interval. For instance, if the capture interval is too slow and the aircraft is flying too fast, the amount of overlap between photo frames could be less and there could be gaps in coverage. The pixel ground resolution is also a consideration. With this tool , it is possible to estimate the coverage, overlap, resolution, given certain input parameters prior to the actual survey mission.

This Google Maps based tool was written partly based on some information about calculating camera field of views from this site http://www.bobatkins.com/photography/technical/field_of_view.html. The tool also use geodetic functions by Chris Veness from www.movable-type.co.uk/scripts/latlong.html.

The command makes a few assumptions:
  1. The camera sensor is a full frame sensor
  2. There is no lens distortion
  3. The ground elevation is flat and is based on the elevation at the center of the frame
  4. The earth is a perfect spheroid
  5. There is no roll and pitch.
The tool makes use of the Google Elevations Service to obtain the ground elevations at the center of the photo frames.

To use this tool,
  1. Click this link http://dominoc925-pages.appspot.com/mapplets/camframes.html.
  2. Fill in the camera focal length e.g. 50
  3. Fill in the camera sensor width e.g. 59.
  4. Fill in the camera sensor height e.g. 36.7.
  5. Fill in the camera sensor horizontal pixel dimensions e.g. 8176.
  6. Fill in the camera sensor vertical pixel dimensions e.g. 6132.
  7. Enter the aircraft altitude e.g. 1080.
  8. Enter the initial latitude and longitude position of the aircraft, e.g. 33.7232 and -100.3347.
  9. Set the capture interval e.g. 6.
  10. Enter the aircraft speed e.g. 33
  11. Enter the aircraft bearing e.g. 10
  12. Enter the number of frames to create e.g. 10.
  13. Click the Create button.

    The frames are created.
 To create a KML file, simply click the KML button. Then click the text area below the settings and press CTRL+C to copy the text to the clipboard. Then open up a text editor and paste the contents inside. Save the file with a .KML extension.

An example of the file in Google Earth is displayed in the screen shot below.

Monday, January 17, 2011

Export a map layout to KML from SAGA GIS

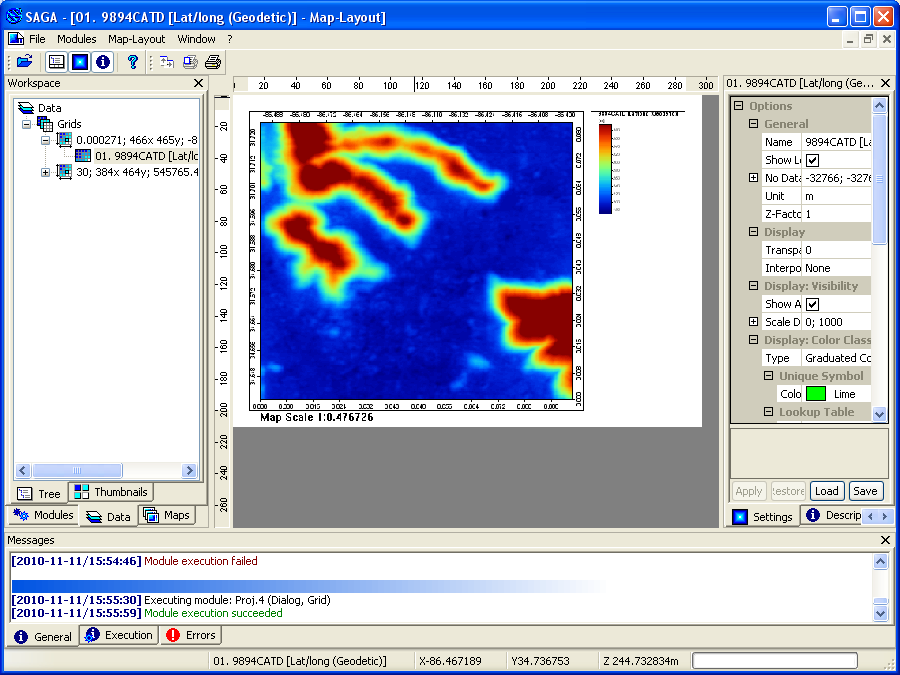
The contents of the Map Layout window in SAGA GIS can be exported as KML files and displayed in Google Earth. There is a catch, however: SAGA GIS will always create the KML files but it will not do an automatic coordinate system conversion to Geodetic Lat/Long.

Before creating the Map Layout window for export, all the data layers must be projected into the geographic Lat/Long coordinate system first. See my previous post on how to do reprojection.

The steps to export out as KML are below, assuming all the data layers are already in geographic Lat/Long.
  1. Start up SAGA GIS. Load in one or more grid layers and display them in one map window.

  2. Select Map | Show Print Layout.

    The Map Layout window appears.
  3. In the Workspace pane, activate the Map tab.

  4. In the Maps tree, mouse right click on the map name.

    A pop up menu appears.
  5. Choose Save as Image.

    The Save As Image dialog box appears.
  6. Specify an output file name and type, e.g. 9894CATD and PNG. Click Save.

    The Save Map as Image dialog box appears.
  7. Toggle Save KML file on. Click Okay.

    The KML file is created.
The screenshot below shows how the KML file looks like in Google Earth.