Monday, October 28, 2013

Trainsity Bangkok Android App

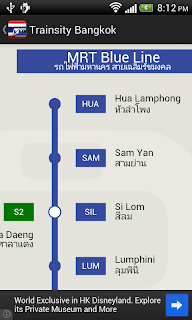
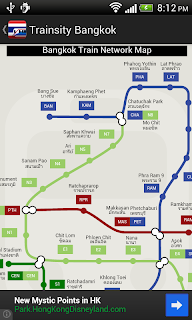
Find your way around the city of Bangkok using the high resolution vector maps of the Bangkok Sky Train ( BTS), Metro (MRT) and Airport Rail Link train network. The maps have small file size footprints but with many levels of zoom and can work offline without connecting to the Internet. Users can click the train station labels to open Google Maps or Google Street View, where they can use all the functions of the Google apps to visualize the surrounding area and/or perform routing for directions.


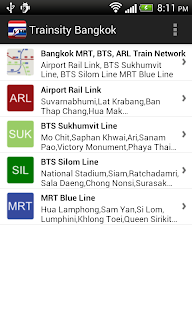
On a mobile handset, the app will display a list of train maps, which when tapped will open up a detail view of the transit map, as shown below.
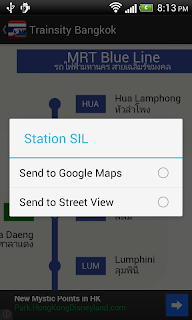
Tapping the station boxes will bring up an option menu where users can choose to display the station either in Google Maps or Street View.

On a tablet sized device, the app will display both the list and the detail map view, as shown below.

  If desired, the user can toggle the map to full screen mode by tapping the action bar icon.
The app can be downloaded from the Google Play Store.
Get it on Google Play

Monday, October 21, 2013

Rotate JPEG images without loss

Sometimes due to whatever reasons, the cameras mounted on aircraft may not be aligned in the flight direction. For instance, the top of the camera may be facing the tail and not the front of the aircraft, in which case the resultant photographs will be rotated 180 degrees to the flight direction. A simple tool to perform a rotation of the JPEG photographs without the lossy compression is the Jpegtran executable available on http://jpegclub.org/jpegtran/. Using it is easy, as shown below.


  1. In a Windows Command Prompt, type in the following:

    C:> jpegtran -rotate 180 input.jpg output.jpg

    The input.jpg image is rotated by 180 degrees.

Monday, October 14, 2013

SpatiaLite SQL statement to find points in a line buffer


A typical GIS spatial query is to find all the point features in a buffer around a linear feature. This can be easily achieved using SpatiaLite database also. The following illustrates the workflow using two SpatiaLite feature tables - nodes and segments.

Using any SpatiaLite interface (graphical or command line interface), simply type in the following SQL statement to create a 50 meter buffer around the line segment feature using the spatial operator ST_Buffer:

SELECT ST_Buffer(Geometry, 50) AS buffer 
FROM segments
WHERE name='line1'


The screenshot below shows how the 50 meter buffer looks like on a map.

To identify all the point nodes within the buffer, we can wrap the buffer statement in a more complex SQL statement:

SELECT a.* FROM nodes AS a,
(
SELECT buffer FROM
(
SELECT ST_Buffer(Geometry, 50) AS buffer 
FROM segments
WHERE name='line1'
) AS b
)
WHERE ST_Contains(buffer, a.Geometry)

The screenshot shows how the results are like on a map.

Monday, October 7, 2013

Edit line segments to snap to vertex nodes in Quantum GIS

I use QGIS to manage a linear network dataset for shortest path routing analysis. In order to perform the analysis, one of the requirements is to ensure that the line segments end points are snapped properly to the network nodes; if they are not snapped, then the routing would not be able to traverse pass the segment. There are tools in QGIS to help snap line segments to vertices, as illustrated below.

  1. In QGIS, load and display the line segments and point node layers, e.g. segments and stations.

    The layers are displayed.
  2. Select Settings | Snapping Options.

    The Snapping options dialog box appears.
  3. Toggle on the point nodes layer, e.g. stations. In the Tolerance field, type in a value which is reasonable for the dataset, e.g. 20 meters or 200 meters.

  4. Click OK.
  5. In the Layers pane, select the line segments layer. Then click the Select Single Feature icon. Click on the line segment to be snapped.

    The segment is highlighted.
  6. Press down the Toggle Editing icon.

    The vertex handles are displayed on the selected segment.
  7. Click the Node Tool icon. Click on the line segment.

    Red boxes appear around the vertex handles.
  8. Click on the line segment vertex that will be snapped to the node.

    A blue box appears around the vertex.
  9. Drag the blue vertex to the node.

    The line segment is snapped to the node.
  10. Press the Toggle Editing icon to end the editing.

    A prompt appears.
  11. Click Save.

    The changes are saved.