Wednesday, August 27, 2008

Batch Convert Microsoft Access MDB Files

If you have a lot of Microsoft Access database files in older MDB formats, it can get tedious having to open each MDB file individually and selecting Tools > Database Utilities > Convert To Access xxxx. I found out that you can do the conversion in the Windows Command Prompt window by passing in the name and path to the old MDB file, and the new name and path to the new MDB file as arguments to the MSACCESS.EXE executable. An example is shown below:


"C:\Program Files\Microsoft Office\Office\msaccess.exe" "C:\Path\To\yourOldFile.mdb" /convert "C:\Path\To\yourNewFile.mdb"


If you prefer, you can create a DOS batch file or VBSCRIPT and loop through all the MDB files you want to convert.

Wednesday, August 20, 2008

Shape File to DGN Text Elements with Rotation

The Shape file format does not define text geometries; the closest are point geometries with dbf attributes for storing the text properties such as rotation, label string, size. The default FME translation from Shape files to design files will result as point geometries (type 3/4) in the output Microstation design file. To create design files with text elements from shape files, you can use the FME Workbench as follows:
  1. Open up FME Workbench and define a default Shape File to Design File translation.
  2. Bring up the destination design file dataset's properties and enable the igds text properties, e.g. igds_rotation, igds_text_size, igds_text_string, and igds_type.


  3. If the Shape File attribute for storing the text rotation angle is in radians, then you will have to convert the values to degrees using the EXPRESSIONEVALUATOR factory. You can drag and drop the factory and define a new expression &ROT_ANGLE*(180/3.141592) as shown in the screen shot below.


  4. Next, connect up the fields as shown in the screen shot below and attach a constant value igds_text to the igds_type field of the destination dataset.


  5. Run the translation. Your resultant design files will have text elements with rotation, and size applied.

Monday, August 18, 2008

Troubleshooting GeoMedia Licensing

Sometimes it can be difficult trying to figure out why GeoMedia can't start up eventhough you have a seemingly correct license file, and your hostid seems to be correct, and so on. If you are having problems with the Intergraph GeoMedia license file, there is an undocumented debugging mechanism you can turn on.

You can create an empty text file licerr.txt in the folder C:\Temp\.

If the file licerr.txt exists, then the licensing routines will write debugging messages inside this file.

Example messages that you may encounter are as follows:
Lic path : C:\Program Files\Common Files\Intergraph\Ingr_Licenses\: 0
---------
lc_checkout: license feature - GeoMedia_Professional: 0
---------
lc_checkout: license version - 6.1: 0
---------
lc_checkout failure: -5
---------
GraceCheck: license feature - GeoMedia_Professional: 0
---------
GraceCheck: license version - 6.1: 0
---------
GraceCheck: The current time is greater than the install date plus the grace period: 0
---------

Friday, August 15, 2008

Display Line Direction in GeoMedia

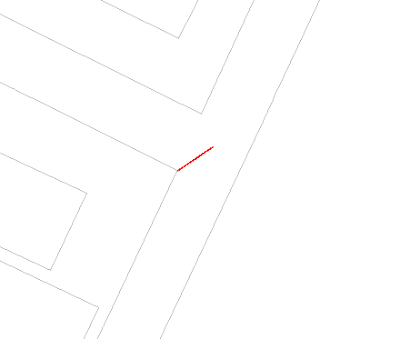
If you want to display the direction of line indicators in GeoMedia, there is an easy way using the Functional Attributes command. For example, I have the red line features in the screen shot below for which I want to display red arrows at the end to indicate the digitized line direction.


  1. In GeoMedia, select Analysis > Functional Attributes.

    The Functional Attributes dialog is displayed.


  2. Click New.

    The Functional Attribute dialog appears.

  3. In the Functional attribute name field, type in a meaningful name, e.g. LineDirection.
  4. In the Expression field, type in: ENDPOINT(Input.Geometry).

    The Functional Attribute dialog box should like this.


  5. Click Add.
  6. Click OK to close the Functional Attribute dialog.
  7. In the Functional Attributes dialog's Query name field, type in a meaningful name e.g. LineDirection.
  8. Click the Style button.

    The Select Style dialog appears.

  9. Click Properties.

    The Style Properties dialog appears.

  10. Under the Symbol Style tab, select the Triangle Up Filled Name.
  11. Choose a reasonable size e.g. 10pt.
  12. In the Rotation field, type in -90.
  13. Toggle on the Ignore map rotation option.

    The Style Properties dialog box should like this.


  14. Click OK to close all the dialog boxes.

    All the red line features should have a red color filled triangles at the end and pointing in the digitized direction.

Wednesday, August 13, 2008

Place Microstation Cells in FME

If you want to place Microstation cells from a cell library using the FME Workbench, the following must be done:
  1. In the destination dataset feature type, open up the Feature Type Properties form and enable the igds_type and igds_cell_name Format Attributes property.


  2. Right click on the igds_type property's green arrow and choose to Attach Constant to it. Then key in igds_cell as the constant value. Right click on the igds_cell_name property's green arrow and choose to Attach Constant to it. Key in the cell name e.g. TREE.


  3. Lastly, assign your cell library file to the destination dataset's Cell Library File parameter.


    Note: Make sure that the cell you are placing has a definition in the cell library.

Tuesday, August 12, 2008

Batch Geometry Snapping

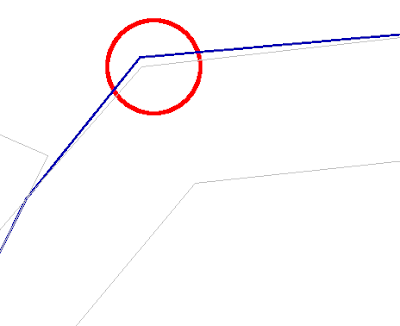
During a GIS project some time ago, I had to snap the vertices of geometry features to reference or anchor geometry features. As the name suggests, the anchor geometries are geometries which could not be moved. For example, see the figure below: it shows an overlay of two geometry features. The blue line work is the candidate geometry (land use polygon) that is to be snapped to the anchor (reference) geometry in grey (land parcels).


As there were hundreds of thousands of geometries to be processed, doing it interactively was out of the question and the job had to be done in batch mode. I did some research and learnt about the Anchored Snapper factory in SAFE FME Professional. Here I describe how to perform snapping of geometries using the Anchored Snapper.
  1. Open up the FME Workbench and define the source dataset for the candidate geometries for snapping (e.g. land use) and the anchor geometries (e.g. land parcels).
  2. Add in the Anchored Snapper factory and define the following parameters.


    Note: Enter a suitable snapping tolerance for your dataset.

  3. Define the destination datasets.

    I defined destination datasets for the snapped geometries, the untouched geometries, and the combined snapped and untouched geometries.

  4. Connect up all the datasets and the factory as shown in the figure below.


  5. Run the conversion.

    The results of the snapping are shown below. The red linework is the new snapped geometry while the light blue linework is the unsnapped geometry.

The SAFE FME algorithm was pretty efficient and the snapping process for a couple of hundred thousand polygon geometries took a short time (as in less than half an hour) to process. So I had the luxury of doing multiple runs with different tolerance values.

Wednesday, August 6, 2008

GeoMedia Datum Transformation from Kertau to WGS84

GeoMedia automatically performs datum transformation between two different coordinate system. The parameter file that controls this automated transformation is autodt.ini, which can be found in the folder drive:\Program Files\GeoMedia\Program\cssruntm\cfg\. For Singapore and West Malaysia, the default transformation from Kertau 1948 to WGS84 uses the Standard Molodensky transformation. If you open up the autodt.ini file with a text editor and search for the line with the string 'csgdKertau', you can find the following line:


; Kertau 1948 (West Malaysia and Singapore)
csgdKertau1948,csvdUserDefined,csgdWGS84,csvdUserDefined,csdtStandardMolodensky,-11,851,5


On some occasions, you may not want to use the Standard Molodensky transformation. Instead, a Second Degree General Polynomial transformation or Affine transformation that stretches may be more suitable, e.g. the SVY21 global transformation. To change GeoMedia to use the 2nd Degree General Polynomial, the above line in the autodt.ini file needs to be commented out and replaced with the following:


; Kertau 1948 (West Malaysia and Singapore)
csgdKertau1948,csvdUserDefined,csgdWGS84,csvdUserDefined,csdt2ndDegGeneralPolynomial,igDistanceMeter,igDistanceMeter,0,0,1,1,2.726683,0.999970,-0.000059,0,0,0,-0.130398,0.000058,0.999955,0,0,0


The numbers are simply the constants in the Affine transformation formula. Replace these numbers with your own constants. Below is an example.
East(WGS84) = a1 * East(Kertau) + b1 * North(Kertau) + c1
North(WGS84) = a2 * East(Kertau) + b2 * North(Kertau) + c2

a1 = 0.99970
b1 = -0.00005
c1 = 2.72668
a2 = 0.000058
b2 = 0.99955
c2 = -0.130398

Note: All future automatic datum transformation between Kertau 1948 and WGS84 will use the 2nd Degree General Polynomial algorithm with the constants you have defined.