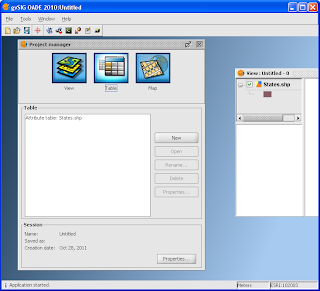
Being used to commercial GIS software, I was looking around for the option to connect to a non-graphical database table in the
gvSIG OADE 2010 application window. I failed to locate the command. Later on, I saw that the command is contained in the
Project Manager window - a child form within the main gvSIG application window. Once I found it, it was quite easy to connect to the non-graphical database table as shown in the
dbf example below.
- Start up gvSIG OADE 2010.
- In the Project Manager dialog box, click the Table button.
- Click the New button.
The New table dialog box appears.
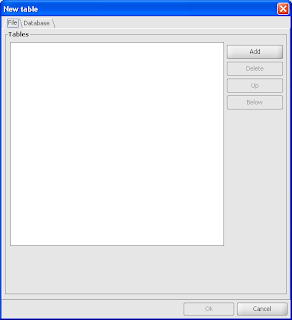
- Click Add.
The Open dialog box appears.
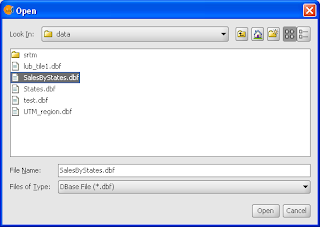
- Browse and select a dbf file e.g. SalesByState.dbf. Click Open.
The selected file is added to the list of Tables.
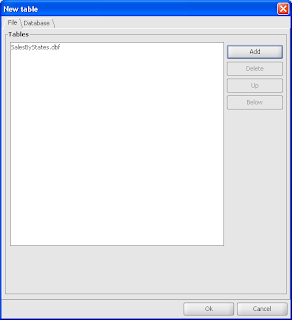
- Click OK.
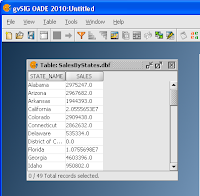
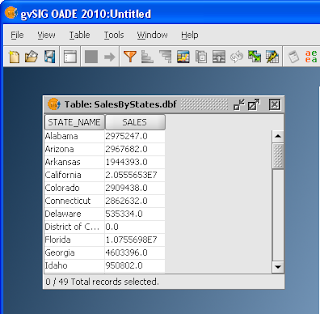
The attribute table is displayed in gvSIG.

 Being used to commercial GIS software, I was looking around for the option to connect to a non-graphical database table in the gvSIG OADE 2010 application window. I failed to locate the command. Later on, I saw that the command is contained in the Project Manager window - a child form within the main gvSIG application window. Once I found it, it was quite easy to connect to the non-graphical database table as shown in the dbf example below.


No comments:
Post a Comment