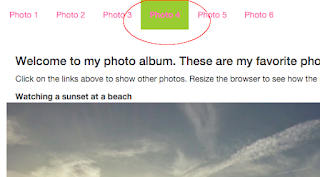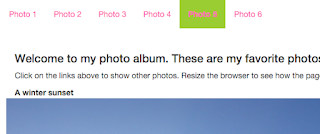
When the user clicks on another item, the other link e.g. Photo 5 is highlighted and the previously active link becomes a normal link again, as shown below.

I wanted to do the same but on a single page without resorting to server side programming. This can be done with some help using jQuery, Bootstrap, HTML and some custom CSS styles. Bootstrap can be downloaded from http://getbootstrap.com/. jQuery can be downloaded from https://jquery.com/
1. In the HTML page, set up the links with the nav semantic tag with the Bootstrap classes navbar, navbar-nav as shown below. A unique id e.g. main-nav should be assigned also.
<!doctype html>
<html lang="en">
<head>
<title>My favorite photos</title>
<link href="css/bootstrap.css" rel="stylesheet"/>
<link href="css/styles.css" rel="stylesheet"/>
<script src="js/jquery.min.js" ></script>
<script src="js/bootstrap.min.js" ></script>
</head>

<body>
<nav class="navbar">
    <div>
        <ul id="main-nav" class="nav navbar-nav">
            <li><a href="#" class="active photo-link" >Photo 1</a></li>
            <li><a href="#" class="photo-link" >Photo 2</a></li>
            <li><a href="#" class="photo-link" >Photo 3</a></li>
            <li><a href="#" class="photo-link" >Photo 4</a></li>
            <li><a href="#" class="photo-link" >Photo 5</a></li>
            <li><a href="#" class="photo-link" >Photo 6</a></li>
        </ul>
    </div>
</nav>
<!-- etc -->
2. Next define custom CSS styles for the non-active and active links. In this example, the non-active link is the photo-link class style.
.photo-link{
    color: hotpink;
}
.active {
    background-color: yellowgreen;
    font-weight: bold;
}
$('#main-nav li a').on('click', function() {
    var activeLink = $('.active');
    activeLink.removeClass('active');
    $(this).parent().addClass('active');
});

No comments:
Post a Comment