Tuesday, March 17, 2009

Defining Geocoding Model for GeoMedia 6.1

In my previous post, I showed how to define a rule to parse 6-digits postal codes. The next step in setting up address geocoding in GeoMedia is to define the geocoding model. In this step of the workflow, there are two geocoding model types - roof top or center line (with left and right house number ranges) that you can choose to create. 

To make it easier to define the geocoding model, Intergraph has provided a hidden utility in the {GeoMedia}\Program\ folder. If you can't find it then you have to install the latest GeoMedia 6.1 hot fix 6.1.5.19 or later. In this post, we are going to define a roof top geocoding model that will transform 6-digits postal code strings from reference GeoMedia features into address indexes. At the same time, we will have to define the user prompts and the transformation of the 6-digits postal code strings entered by the user. We are going to make use of the 6-digits postal code parsing rule defined in the earlier post. 

Base Address Definition

Here you have to define the components that make up your addresses e.g. house number, street name, street type, postal or zip code, etc. In our simple example, we have only one component i.e. postal code. 
  1. In Windows Explorer, double click the file DefGCM.exe in the {GeoMedia}\Program\ folder.

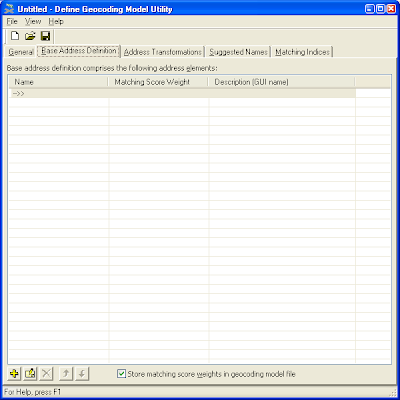
    The Define Geocoding Model Utility dialog box appears.
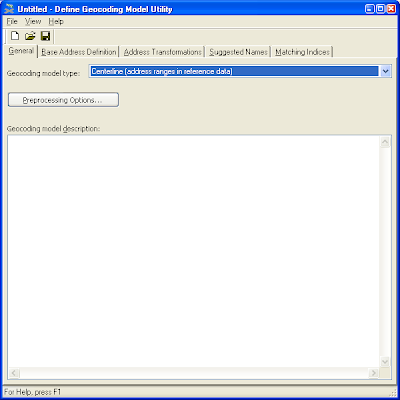

  2. Click Base Address Definition.


  3. Click the Add  button.

    The Base Address Element dialog box appears.
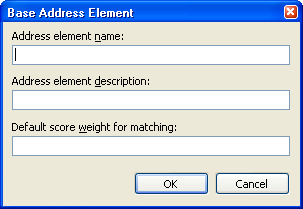

  4. In the Address element name field, enter a meaningful name, e.g. postalcode. In the Address element description field, enter a meaningful description, e.g. 6-Digits postal code.

    Note: the description will be used later in the GUI of other address functions.

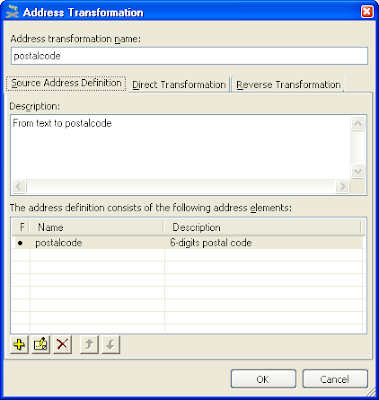
    The Base Address Element dialog box may look like this at this point.
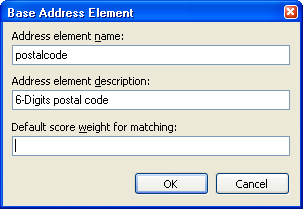

  5. Click OK.

    The new base address definition appears in the Define Geocoding Model Utility dialog box.
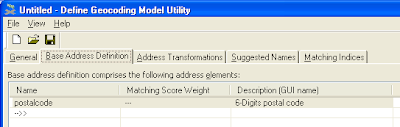


Define Address Transformations

There are two address transformations you have to set up. The first transformation to define is the transformation from the GeoMedia warehouse feature's address strings to the components (base address) of your addresses. The GeoMedia feature data is called the reference data here. For example, I may have a GeoMedia feature class named ADDRESS with an attribute field called POSTCODE that stores my postal code strings. I need to define how to map the POSTCODE field to the postalcode base address component.

The second transformation is the transformation from the address strings the user keys in to the base address components. For instance, the user may key in 123 or 123456;  I need to define the transformation that will map 123456 to the postalcode (base address) component.

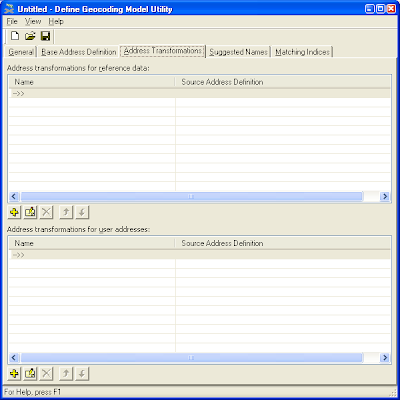
  1. Click the Address Transformation tab.

    The transformations entry fields for reference data and user addresses appear
    .

  2. Click the Add  button for reference data.

    The Address Transformation dialog box appears.
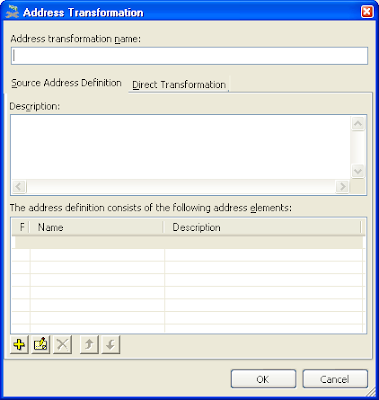
  3. Click the Add  button.

    The Address Transformation dialog box appears.
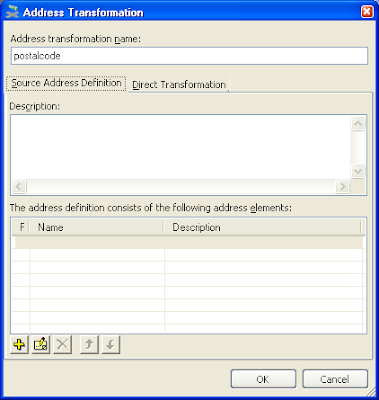

  4. In the Address transformation name, enter a meaningful name, e.g. Postal code from database.

  5. Click the Add  button.

    The Source Address Element dialog box appears.
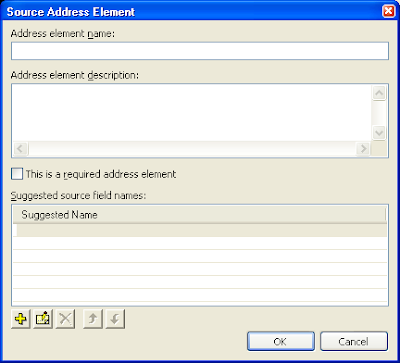

  6. In the Address element name field, enter a meaningful name, e.g. postalcode.

    Note 1: As we have only a single address element i.e. a 6 digits postal code, we can toggle on the This is a required address element option.

    Note 2: When you run the Publish to Address Geocoding Index utility, if you want it to automatically fill in the database field name for this address element, you can enter the database field name in the Suggested Name field.

  7. Click the Add  button.

    The Suggested Name dialog box appears
    .

  8. In the Suggested field name field, enter the database field name e.g. POSTCODE. Click OK.

  9. Click OK to close the Source Address Element dialog box.

    The new source address definition is added to the Address Transformation dialog box.

  10. Click the Direct Transformation tab. Then Click the Add  button.

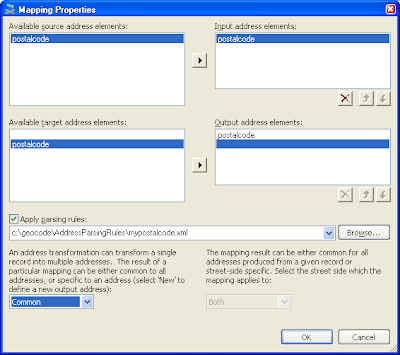
    The Mapping Properties dialog box appears.


  11. Toggle on Apply parsing rules. Click Browse.

    The Open Address Parsing Rules dialog box appears.

  12. Browse and select the rules file we defined earlier (in my previous post) e.g. mypostalcode.xml. Click Open.

  13. Click OK twice.

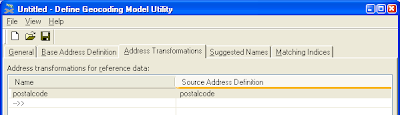
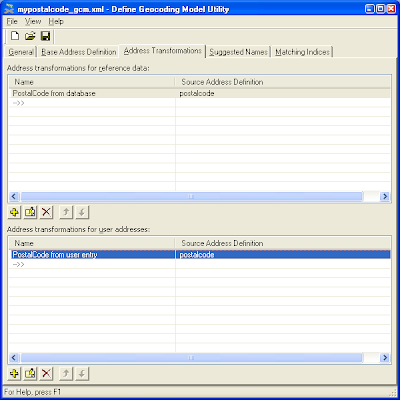
    The new address transformations for reference data definition is added to the Define Geocoding Model Utility dialog box.

  14. Click the Add button  in the user address section.

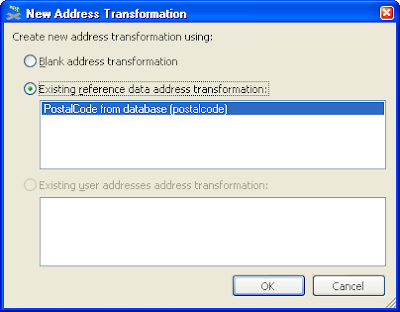
    The New Address Transformation dialog box appears.

  15. Toggle on Existing reference data address transformation. Select PostalCode from database and Click OK.

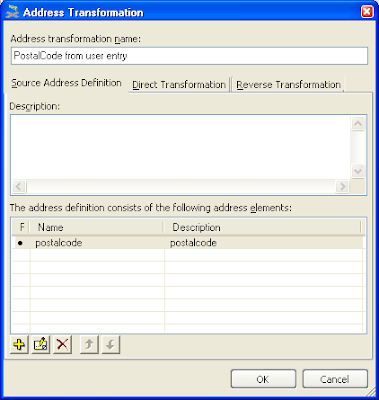
    The Address Transformation dialog box appears and the address definition from the reference data section is copied over.


    Note: instead of copying over the reference data definition, you can start from blank and create a new definition for transforming user addresses.

  16. In the Address transformation name, enter PostalCode from user entry.

    Click OK.

    The new definition is added to the address transformation for user addresses.


Define Suggested Names (optional)

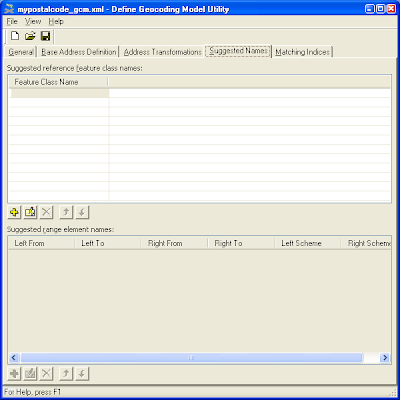
Suggested names are used by the Publish to Address Geocoding Index utility and GeoMedia's address geocoding functions e.g. Find Address. As the name indicates, Suggested Names are simply names that GeoMedia will use and find the matching feature classes and field names. If GeoMedia can't find the matching class/field, then the user will be prompted to select.
  1. Click Suggested Names tab.


  2. Click the Add  button.

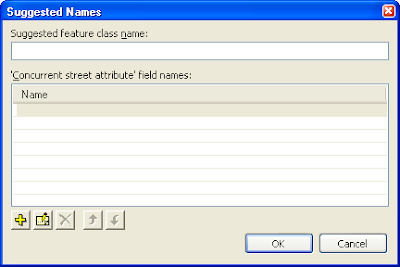
    The Suggested Names dialog box appears.


  3. In the Suggested feature class name, type in the name of the GeoMedia Warehouse feature class name that stores the reference addresses e.g. ADDRESSES.
  4. Click the Add  button.

    The Suggested Name dialog box appears.
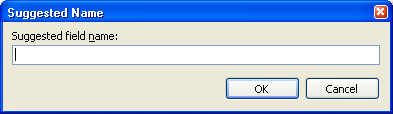

  5. In the Suggested field name field, type in the name of the database field in the GeoMedia feature class, e.g. POSTCODE.
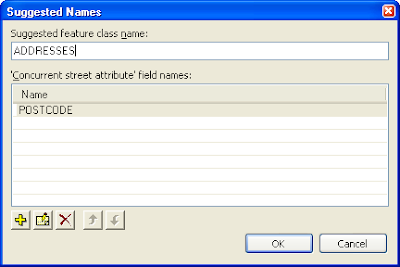


  6. Click OK.

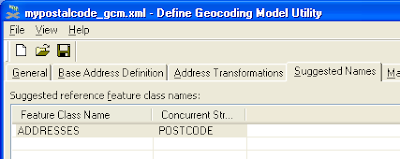
    The new suggested name is added.
Define Matching Indices

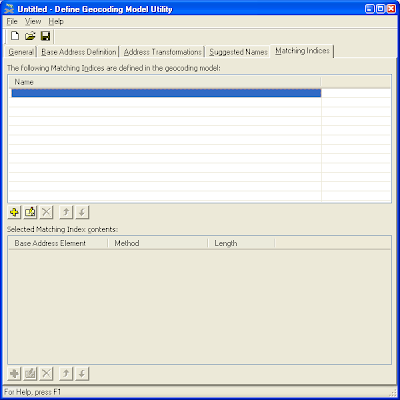
Here is where you can define how the user inputs will be matched with the geocoded address indexes. You can have sound like matching or the actual value matching.
  1. Click the Matching Indices tab.


  2. Click the Add  button in the upper half.

    The Matching Index Properties dialog box appears.
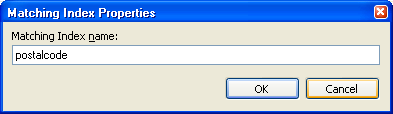

  3. In the Matching Index name field, enter postalcode. Press OK.

  4. Click the Add  button in the lower half.

    The Add to Matching Index dialog box appears.

  5. In the Include the first characters of drop down list, select a number e.g. 3. In the Address element drop down list, select postalcode. In the Using method, select Actual Value.
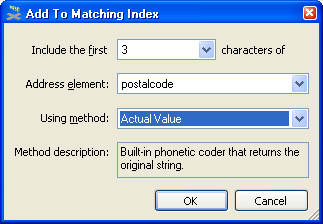


    Click OK.
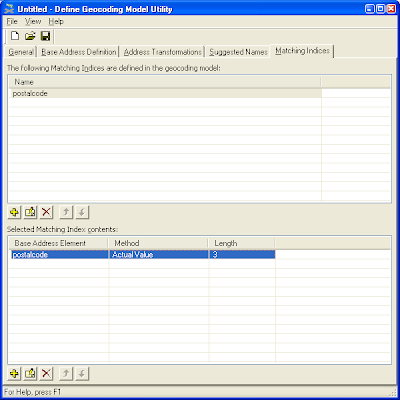

  6. Select File > Save As and save the Geocoding Model definitions to an XML file, e.g. mypostalcode_gcm.xml.

The final setup step is to run the Publish Address Geocoding Index utility.

Thursday, March 12, 2009

Simple example of defining parsing rules for geocoding in GeoMedia

Part of the workflow to setup GeoMedia geocoding functions to work is to define parsing rules to handle address conventions in your specific locality. Basically, the rules define how to break up an address string sequence into smaller parts - so-called tokens in GeoMedia geocoding terminology. For example, the string '123 James Street' can be parsed into the tokens house number '123', road name 'James' and road type 'Street'. 

As you can imagine, in real life the rules can be very complex in order to handle actual addresses. To aid in the rules definition process, GeoMedia comes with a hidden executable DefParsingRules.exe in the {GeoMedia product}\Program folder. The utility will save the rules as XML files that will be be used by GeoMedia's Publish Address Geocoding Index Utility to create the address geocoding index files (*.agi) . 

In this posting, I will show you how to use the Define Parsing Rules Utility to handle a simple example - 6 digits postal code strings. We will define a rule to output one 'postal code' token from input text strings. Perhaps in future I can post a more complex example. 
  1. Run the Define Parsing Rules Utility by double clicking the DefParsingRules.exe in the GeoMedia's program folder.

    The Define Parsing Rules Utility dialog box appears


  2. Click the Add button to add a new token.

    The Token dialog box appears.


  3. In the Name field, type in a token name e.g. POSTALCODE. In the Type drop down list, select Pattern.

    Note: the postal codes are all digits and a simple regular expression pattern would be more than sufficient to detect the postal code from the input text strings

    At this point, the Token dialog box may look like this.


  4.  Click the Pattern tab. In the Regular expression to match field, enter \d{6}

    Note: the \d{6} pattern will consider strings with 6 digits as postal codes

    The Token dialog box may look like this now


  5. Click OK to close the Token dialog box.

    The new token is created and added to the Tokens list.


  6. Click the Training Data tab.

    Note: you have to add in training data to 'train' the parser to detect the postal code strings


  7. Click the Add button 

    The Training Sample dialog box appears.

  8. In the Sample text field, type in a representative postal code string e.g. 123456. Click Parse

    The Training Sample dialog box should like this.

  9. If the Parsed token sequence list is still empty, then you can aid the training process by double clicking POSTALCODE in the Available tokens list. Click Parse again. 

    The sample text is parsed and added to the Parsed token sequence list.


  10. Click Replace Training Sequence.

    The Training Sample dialog box should look like this


  11. Click OK to close the Training Sample dialog box.

    Note: if the training is successful, the bottom right of the Define Parsing Rules Utility dialog box should show a neon green box with the Valid text

  12. In the Define Parsing Rules Utility dialog box, click the Output tab. 

  13. Click the Add button 

    The Output Entity dialog box appears.

    Note: You have to define how you want to format the result tokens of the parsing. If you have multiple tokens, you can choose to have space, comma, or semi-colon separators. This dialog box is where it happens

  14. Toggle on POSTALCODE in the At least one of the checked tokens must be present in this entity list. 

  15. Click the Output Elements tab.


  16. Click the Add button 

    The Output Element dialog box appears.

  17. Double click on POSTALCODE in the Available tokens list. Click OK.

    The Output Element dialog box should look like this.

  18. Click OK to close the Output Element dialog box.

    The element is added to the Output Entity list.

  19. Click OK to close the Output Entity dialog box.

    The Entity is added to the Output list.

  20. Click the Testing Data tab.


  21. You can now choose to test the rule against strings in text files, a database table, or a GeoMedia warehouse. In this example, we are going to test against a standard text file which has the contents shown below. As you can see, I have a few strings that satisfy the rule and some that don't. 


    In the File field, click Browse and select the text file.


  22. Click Run.

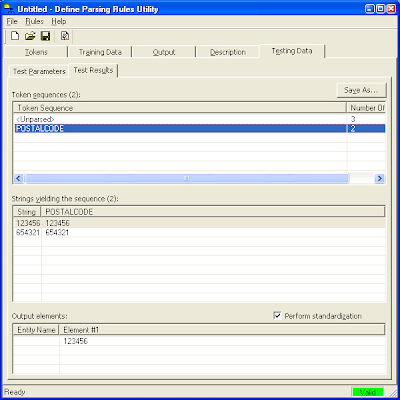
    Note: The rule is applied against the selected text file and 2 entries appear in the Token sequences list - Unparsed and POSTALCODE as shown below.


    When Unparsed is selected, the Strings yielding the sequence list shows the unmatched strings from the test file such as 123, ABCDEF, 1234567. 

    When POSTALCODE is selected, the Strings yielding the sequence list shows the matched strings from the test file, all having 6 digits. 

  23. Select File > Save As and save the parsing rules into an XML file. 
You have now created a parsing rule XML file which can be used later in the GeoMedia Publish to Address Index Utility

Tuesday, March 3, 2009

Export KML to DXF with GeoMedia

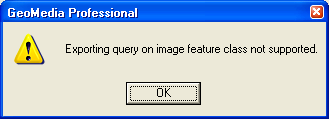
GeoMedia 6.1 can read and display KML files. Once you are able to connect to the KML warehouse, you can use any GeoMedia command to manipulate the KML features. The Output to Feature Class and Export Warehouse commands are also available for you to convert KML features into other formats such as Access, Shape files, DGN, DWG, etc. However, I encountered some difficulty in exporting KML features to DXF. If you tried to run the Export to DXF command as shown below, you will encounter this "Exporting query on image feature class not supported" error message.


This posting describes a method that I used to manipulate the data to enable GeoMedia to export the KML features to DXF successfully. The issue is that the KML format supports embedded raster images while the Export to DXF command is not able to handle raster geometries. So the workaround is to import the KML features into an Access warehouse first, delete the raster geometry database field, update the metadata, then export the KML features in Access to DXF. Details are below.

Import KML features into Access 
  1. In GeoMedia, select Warehouse | New Connection.

    The New Connection dialog box appears.


  2. In the Connection type list box, select KML.


  3. In the KML file field, click Browse and select a KML file. You can leave the Warehouse configuration file field blank.

  4. Click OK.

    GeoMedia is now connected to the KML file.

  5. Select Warehouse | Output to Feature Classes.

    The Output to Feature Classes dialog box appears.

  6. In the Source features to output box, toggle on the KML feature. In the Target connection drop down list, select a read/write Access warehouse connection. Note: If you don't have one, then connect to one or create a new Access Warehouse first.

    The Output to Feature Classes dialog box may look this.


  7. Click the Advanced tab.

  8. In the Target Feature Class field, type in a new name e.g. google if you do not like the default name.

    The Output to Feature Classes dialog box may look like this.


  9. Click OK and Yes when prompted.


    The KML features are imported into the target Access warehouse. Notice that the KML feature has 3 geometry types - text, raster and compound.


  10. Exit GeoMedia.
Delete the KML feature's Raster geometry field
  1. In Microsoft Access, select File | Open.

    The Open dialog box appears.

  2. In the File name field, type in the name of the Access warehouse file and click Open.

    The selected database is opened in Microsoft Access.

  3. In Microsoft Access, select the KML table name imported from the KML file previously, e.g. google.

  4. Click Design.

    The Table form is displayed.

  5. Click the gray box on the left of the RasterGeometry field name.

    The RasterGeometry row is highlighted.


  6. On the keyboard, press Delete. Click Yes when prompted.

    The RasterGeometry field is removed from the form.


  7. Close the table form and click Yes when prompted.

    The RasterGeometry field is deleted from the table.

  8. Exit Microsoft Access
Update the Access Warehouse Metadata
  1. On the Windows desktop, select Start | All Programs | GeoMedia | Utilities | Database Utilities.

    The Database Connection dialog box appears.

  2. In the Access database name field, click Browse and select the Access warehouse file.

    The Database Connection dialog box may look like this.


  3. Click OK.

    The Database Utilities dialog box appears.


  4. Click Delete Feature Class Metadata.

    The Delete Feature Class Metadata dialog box appears.


  5. In the Feature classes list box, select the KML feature e.g. google. Click OK.

    The metadata for the KML feature is removed.

  6. In the Database Utilities dialog box, click Insert Feature Class metadata.

    The Insert Feature Class Metadata dialog box appears.

  7. In the Available tables/views list box, select the KML feature. Click the '>' button.

    The Insert Feature Class Metadata dialog box may look like this.


  8. Click OK.

    The Select Coordinate System dialog box appears.


  9. Click Assign and close the dialog box.

    The KML feature metadata is regenerated and added back this time without the metadata for the rasterGeometry field.

  10. Close the Database Utilities dialog box.

Export to DXF
Now you can perform the export to DXF successfully.
  1. In GeoMedia, open up the connection to the Access warehouse again.

  2. Select Warehouse | Export to | AutoCAD.

    The Export to AutoCAD dialog box appears.


  3. In the Features to export field, select the KML feature. Change any other settings if you wish.

    The dialog box may look like this.


  4. Click Apply.

    The KML feature is exported to DXF