Monday, March 30, 2015

How to change the Android ActionBar background from the default dark color

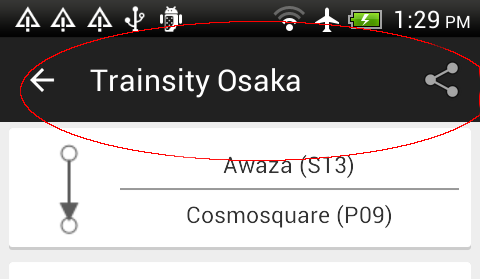
By default, the background color of the ActionBar in any Android App is black as shown in the example below.

I wanted to style the background to a different non-black color. After some investigation, I had to do the following:
  • Choose a color
  • Define a custom theme
  • Assign the custom theme to the application
Choose a color
  1. Decide on a color to use for the background e.g. red or #303f9f in hex.
  2. Decide on a color for the text e.g. white of #ffffff in hex.
  3. Add these colors to the Android app's XML file e.g. [app]/res/values/color.xml.
<?xml version="1.0" encoding="utf-8"?>
<resources>
<color name="actionbar_background">#303f9f</color>
<color name="actionbar_text">#ffffff</color>
</resources>


Define a Custom theme

  1. Open up the Android app's styles XML file e.g. [app]/res/valuess/styles.xml, in a text editor.
  2. Append in a new style e.g. CustomActionBarTheme that inherits a parent theme e.g. Theme.AppCompat.Light.DarkActionBar.
  3. Append in new styles for the action bar, title text, and tabs text, e.g. MyActionBar, MyActionBarTitleText and MyActionBarTabText.
  4. The following code shows the complete styles.xml file.

<resources>
 
<!-- Base application theme. -->
<style name="AppTheme" parent="Theme.AppCompat.Light.DarkActionBar">
<!-- Customize your theme here. -->
</style>
 
<style name="CustomActionBarTheme"
parent="@style/Theme.AppCompat.Light.DarkActionBar">
<item name="android:actionBarStyle">@style/MyActionBar</item>
<item name="android:actionBarTabTextStyle">@style/MyActionBarTabText</item>
<item name="android:actionMenuTextColor">@color/actionbar_text</item>
 
<!-- Support library compatibility -->
<item name="actionBarStyle">@style/MyActionBar</item>
<item name="actionBarTabTextStyle">@style/MyActionBarTabText</item>
<item name="actionMenuTextColor">@color/actionbar_text</item>
</style>
 
<!-- ActionBar styles -->
<style name="MyActionBar"
parent="@style/Widget.AppCompat.Light.ActionBar.Solid.Inverse" >
<item name="android:background">@color/actionbar_background</item>
<item name="android:titleTextStyle">@style/MyActionBarTitleText</item>
 
<!-- Support library compatibility -->
<item name="background">@color/actionbar_background</item>
<item name="titleTextStyle">@style/MyActionBarTitleText</item>
</style>
 
<!-- ActionBar title text -->
<style name="MyActionBarTitleText"
parent="@style/TextAppearance.AppCompat.Widget.ActionBar.Title">
<item name="android:textColor">@color/actionbar_text</item>
</style>
 
<!-- ActionBar tabs text -->
<style name="MyActionBarTabText"
parent="@style/Widget.AppCompat.ActionBar.TabText">
<item name="android:textColor">@color/actionbar_text</item>
</style>
 
</resources>


Assign the new custom theme to the Android Application

  1. Open up the AndroidManifest.xml file in a text editor.
  2. In the application tag, change the theme to the new theme e.g. @style/CustomActionBarTheme.
  3. The following code snippet shows the relevant portion of the edited AndroidManifest.xml file.

<?xml version="1.0" encoding="utf-8"?>
<manifest xmlns:android="http://schemas.android.com/apk/res/android"
android:installLocation="auto"
package="com.dom925.demo" >
 
<application
android:name=".App"
android:allowBackup="true"
android:icon="@drawable/ic_launcher"
android:label="@string/app_name"
android:theme="@style/CustomActionBarTheme">
 
<!-- etc -->
 
</manifest>

Now the application's ActionBar should be using the custom theme with a non-black background.

Friday, March 20, 2015

Enabling the Developer options on Xiaomi Redmi Note Android phone

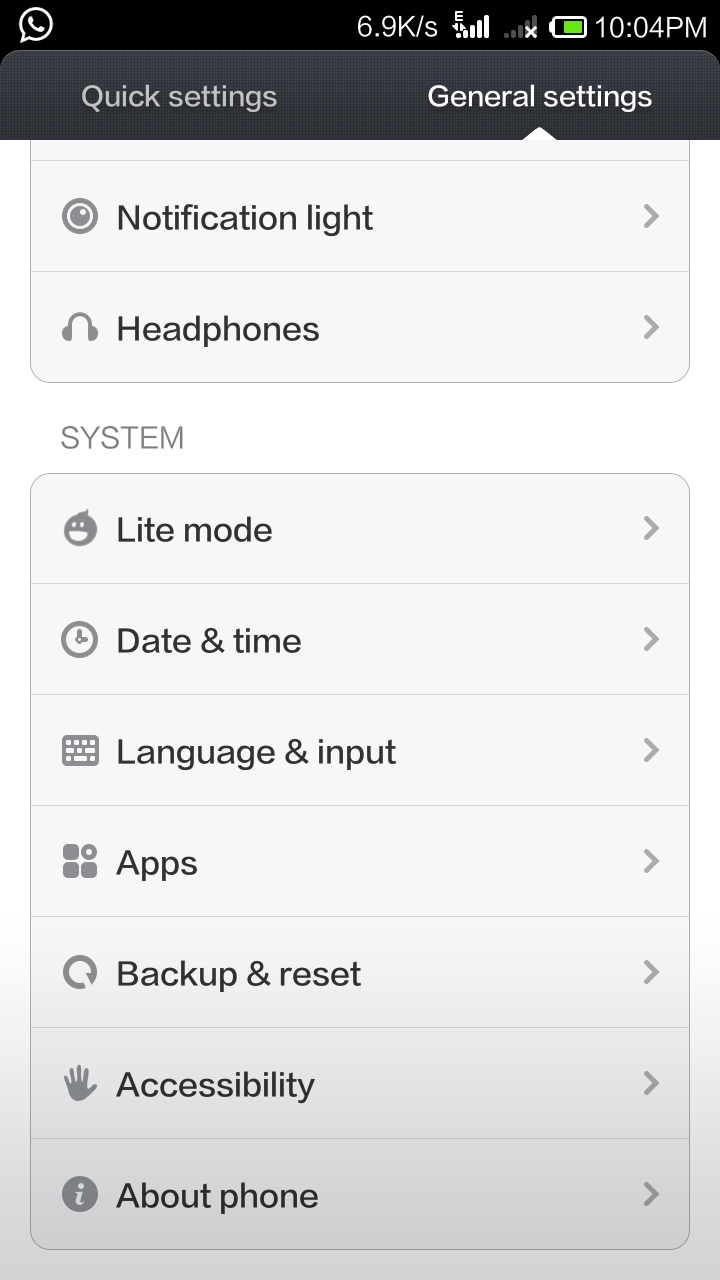
If you want to develop Android apps using a Xiaomi Redmi Note mobile phone, you'd find it to be missing the developer options, as shown in the General Settings screen below.

This is not enabled by default but it can be switched on by doing the following.

  1. Open up Settings.

    The General Settings screen appears.
  2. Tap on About phone.

    The About phone screen appears.

  3. Tap Android version several times.

    The message You are now a developer appears.
  4. Close the About Phone and Settings screens.
  5. Open up Settings.

    The General Settings screen appear.

    Note: the {} Developer options are now available.

Monday, March 2, 2015

Trainsity Osaka Windows Phone App

Carry these high resolution vector maps of Osaka city's subway train network in your Windows Phone and find your way around Osaka. The maps have small file sizes and can be accessed without a data connection. The following metro rail lines are available:
  • Midosuji, 
  • Tanimachi, 
  • Yotsubashi, 
  • Chuo, 
  • Sennichimae, 
  • Sakaisuji, 
  • Nagahori-Tsurumi-ryokuchi, 
  • Imazatosuji, 
  • Newtram Nanko Port Town, 
  • Kita Osaka Kyuko, 
  • Kintetsu Keihanna, 
  • Hankyu Kyoto, 
  • Hankyu Senri, 
  • Osaka Monorail, and 
  • Kitakyu Namboku lines.
Users can click the train station labels to open the external Bing Maps app where they can use all the functions of the external app to visualize the surrounding area including querying for directions. This app has its own directions function for finding the best path from one train station to another.

On a Windows Phone handset, the app will display tiles of train lines, which when tapped will open up a detail view of the metro transit map, as shown below.
Tapping the station labels will bring up an option menu where users can choose to display the station location in Bing Maps.
If you want to find how long it takes to travel from one station to another, and the best route to take, simply swipe to the Route page. Then type in the From station and To station. As you enter the values, a drop down list will appear and a station can be selected from the list. Finally tap the Execute icon.
Tapping the more details link will display the recommended route to take.
 Click the button below to download the app from the Windows Phone store.


Monday, February 23, 2015

Disabling the Windows Phone frame rate numbers display while debugging

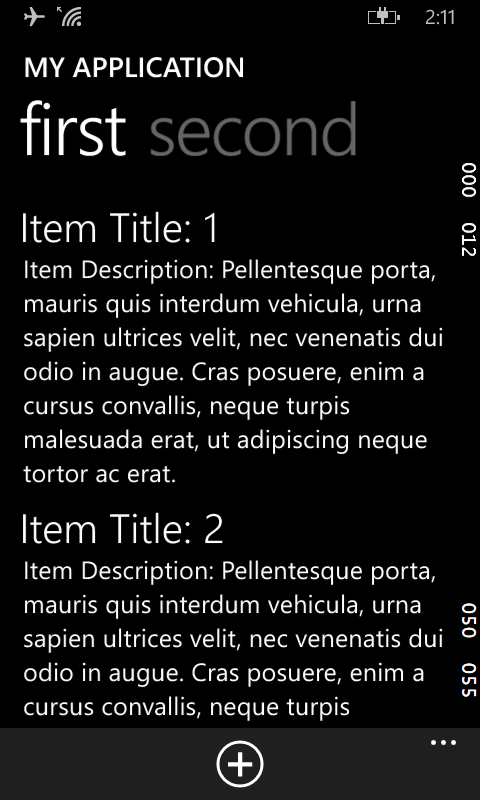
While debugging Windows Phone Apps, there will be some (weird looking) running numbers on the right side of the app's screen, as shown in the screen shot below.

These are actually frame rate counter numbers to aid in debugging. They can be easily switched off if you do not want them on the screen, especially if you want to capture the screen. To turn it off, just do the following:

  1. In Visual Studio, open up the project's App.xaml.cs file in the editor.


  2. Look for the following lines:

    if (System.Diagnostics.Debugger.IsAttached)
    {
    this.DebugSettings.EnableFrameRateCounter = true;
    }

  3. Change them to the following:

    if (System.Diagnostics.Debugger.IsAttached)
    {
    this.DebugSettings.EnableFrameRateCounter = false;
    }

  4. Run and debug the app again.

    The frame rate numbers are no longer displayed.


Monday, February 16, 2015

How to fix AdDuplex ad unit configuration error for Microsoft AdMediator

The following error message "Ad unit configuration error Please check the configuration" kept popping up in the Microsoft AdMediator control in an Windows Phone 8 app when it tried to display an ad from AdDuplex.

After troubleshooting the issue, I found that the AdDuplex configuration was indeed incorrect. To resolve the issue the following must be done.

  1. In the Visual Studio project, right click on the project with the AdMediator control. Choose Add | Connected Services.

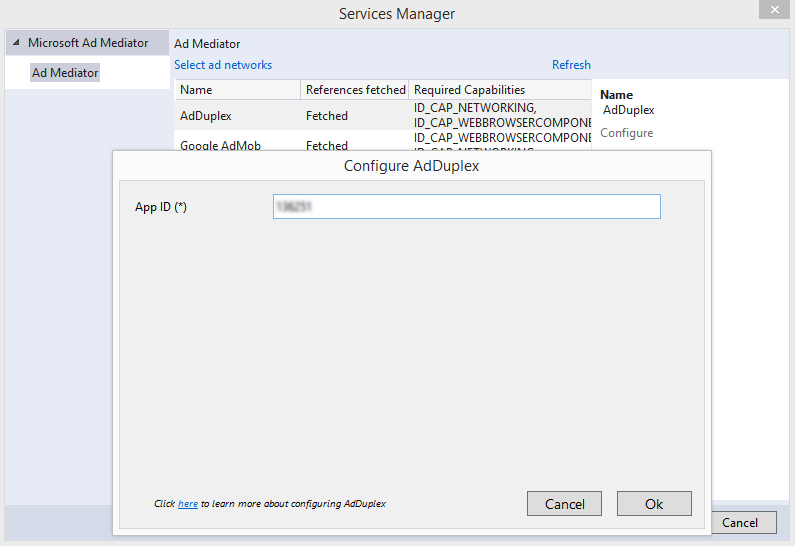
    The Services Manager dialog box appears.

  2. Select AdDuplex. Click Configure.

    The Configure AdDuplex dialog box appears.
  3. Note that the dialog is asking for App ID.
  4. In a web browser, open up the AdDuplex app detail page that you want to show ads for https://manage.adduplex.com/#/apps.

  5. Important: Instead of using the App key as it says on the page, copy the Ad unit ID value at the bottom of the page, e.g. 123456.
  6. Now back to the desktop's Configure AdDuplex dialog box. In the App ID field, type in the value from the web page Ad unit ID, e.g. 123456. Click OK.
  7. In the Service Manager dialog box, click OK.
  8. Build and run the app.

    AdDuplex ads will start appearing correctly in the AdMediator control.

Monday, February 9, 2015

Calculating a rough estimate of the Earth's radius from the old definition of meter

I sometimes have a hard time remembering the radius of the Earth. This tip shows how to derive the rough value if you don't remember the actual number.

According to Wikipedia, the 'Metre' was previously defined as follows:
"The other approach suggested defining the metre as one ten-millionth of the length of the Earth's meridian along a quadrant; that is, the distance from the Equator to the North Pole."
If we approximate the Earth as a perfect Circle, then according to the definition above, the Circumference (C) of the Earth would be 4 times 10 Million meters i.e.
C =  40 Million meters.
Circumference C and Radius R of a circle
From the standard circle equation and the circumference of the Earth (C) above, we can quickly derive the approximate radius (R) of the Earth i.e.

Solving for R = 0.5 * C / Pi, we get the Earth's radius of roughly 6370 kilometers, which is not far from the more accurate 6371 Km value.

Friday, January 30, 2015

Using gdalwarp to mosaic adjacent geo-referenced images

I had to merge adjacent 1 km by 1 km GeoTiff ortho-rectified mosaic images into 2 km by 2 km tiles and I really did not want to run the ortho-rectification and mosaicking processes again just to resize the tiles. After some digging around I found that GDAL has a few tools to perform the merging. I chose to use the gdalwarp executable, as it allows me to define a list of images to merge and the destination image bounds.


The following example shows how to use gdalwarp to merge 2 adjacent GeoTiff images into one.
Two adjacent image tiles to merge
  1. Open up a Command Prompt. Type in the gdalwarp command to merge two files e.g. left.tif and right.tif and output to a new file mosaic.tif:

    C:> gdalwarp left.tif right.tif mosaic.tif
  2. Press Return.

    Processing messages appear and the files are merged.


    The resultant merged GeoTiff image