
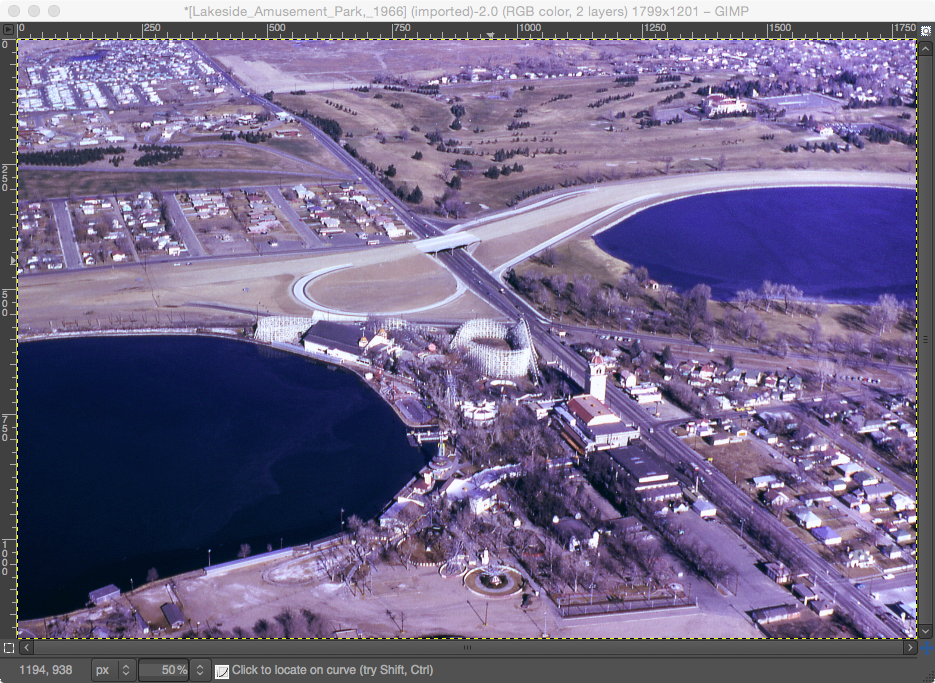
Note: aerial photograph courtesy of http://www.airlinesafety.com/editorials/AboutTheEditor.htm.
The Curves correction function in just about any image processing software can be used to easily correct the color cast problem. The open source application Gimp is used in this example.
The key to solving the problem is to use the fact that the color gray has the same RGB values. If a gray colored feature in the image e.g. an asphalt road has unequal RGB values, than the image has a color cast problem. To correct the problem, all you have to do is to get the RGB values for that gray point in the image to be the same using the Curves function. It may be necessary to do the correction in the middle, dark and light tones. The following example illustrates how to correct the color cast problem.
- Start Gimp and open the aerial photograph. Optional. Make a duplicate layer of the image.
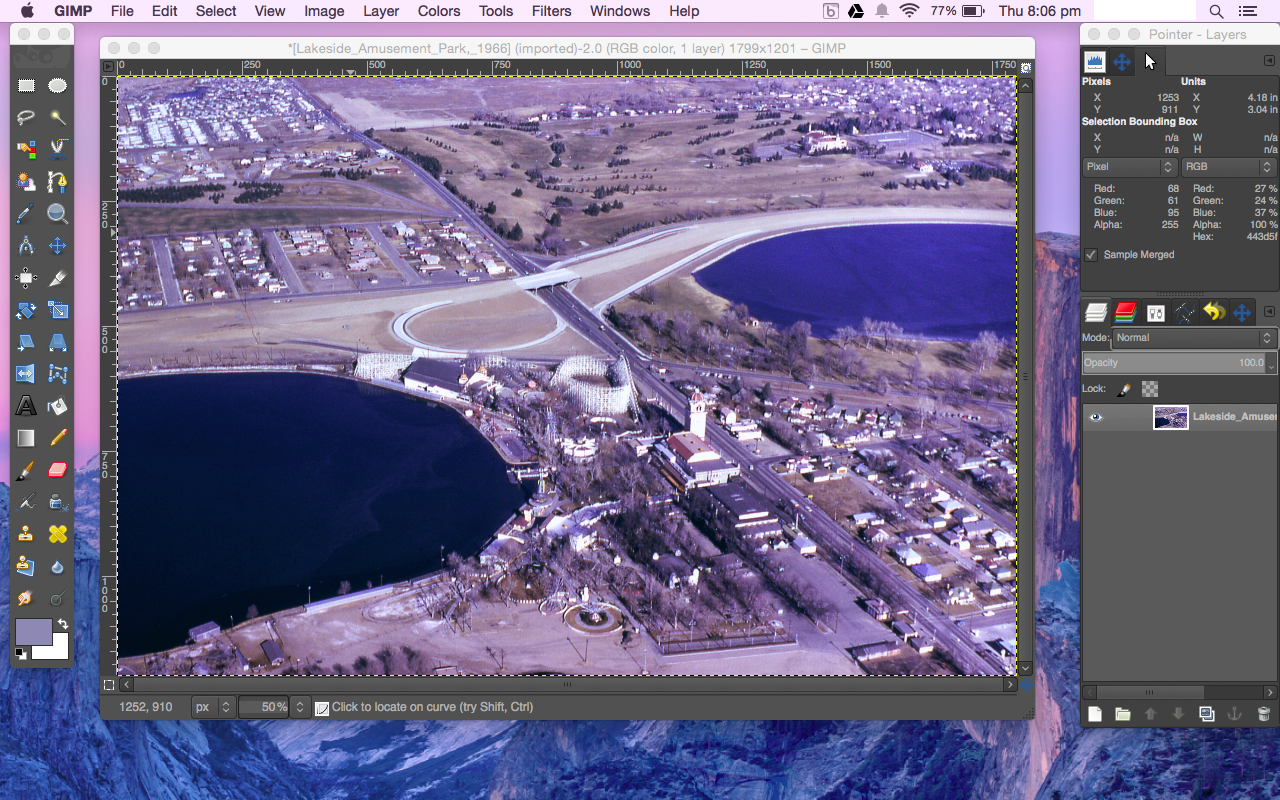
- If the Pointer window is not displayed, then select Windows | Dockable Dialogs | Pointer.
Note: the circled area displays the RGB in pixel or percentage values.
- Move the pointer around the mid tone gray colored feature e.g. paved road, as shown in the screenshot below. Observe the RGB values in the Pointer window.
Note: in this example, the RGB values are 142, 140, 189 or 55%, 55%, 74%. The numbers say that there is a blue cast in the mid tone values i.e. the blue values are too high and will have to be lowered. The red and green values are okay.
- Select Colors | Curves.
The Adjust Color Curves dialog box appears.
- Since blue is the problem color, select Blue in the Channel field. Then drag down the blue curve at around 189 pixel value as shown in the screenshot below. You can also move the cursor to the mid tone gray feature and check the new RGB values in the Pointer window. The correction is complete when the RGB values are about equal.
Note: if the preview is toggled on, the effect of the changes will be displayed in the image window.
- In this example, the light tones do not seem to show much color cast. However, the dark tones don't seem to have enough red values as shown in the screenshot below. The dark area under the bridge show the RGB values of 1, 18, 17 or 0%, 7%, 7%.

- In the Adjust Color Curves dialog box, change the Channel to Red. Click a point in the middle of the curve to anchor the mid and light tone red values since the problem is only in the dark tones. Then drag the 0 pixel curve point up to 17 pixel value.
Note: after every change, always move the cursor to the dark area and check the RGB values in the Pointer window.
- When the numbers and preview look pleasing, click OK to confirm the changes.
The image shows the corrected colors.
Contrast this to the original color casted version.

2 comments:
Thank you, Dominoc925 ! I always wondered how to do this manually !
Very attractive images, you have added here. Really Aerial photos are very helpful for everyone to know different things. Aerial photography is not only fun for the photographers but also provides one of the most picturesque views of the things one wants to capture through the lenses. Aerial photography can cover a wide landscape and provide a panoramic view.
Post a Comment