Monday, November 25, 2013

Find dangles using QGIS

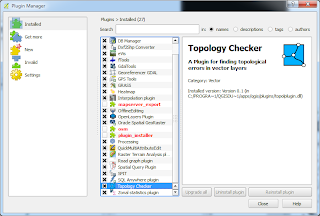
QGIS Desktop 2 has a easy to use plug-in - Topology Checker, that can be used to identify dangles in linear features. If it is not installed, then it is a simple matter to use the Plug-in Manager to download and install it, as shown below.


Using the Topology Checker to find dangles is straightforward. Just choose the linear feature layer and define the validation rule(s), and run it. An example usage is illustrated below.

  1. Start QGIS 2. Load and display a linear feature layer e.g. segments.


  2. Select Vector | Topology Checker | Topology Checker.

    The Topology Checker pane appears on the right.

  3. In the Topology Checker pane, click Configure.

    The Topology Rules Settings appear.

  4. In the Current Rules first drop down combo box, choose a linear feature e.g. segments.

    The second and/or third combo boxes are enabled.

  5. In the second combo box, choose a validation rule e.g. must not have dangles. Click Add Rule.

    The rule is added to the list.

  6. Click OK.
  7. In the Topology Checker pane, click Validate All.

    The dangles are listed.

  8. In the list, select one error.

    The dangle is highlighted and centered in the map.

Monday, November 18, 2013

Simple shortest path analysis using QGIS Road Graph plug-in

There is a Road Graph plug-in that can be installed in QGIS, and used to perform directional and non-directional shortest path analysis. Using the plug-in is quite straight forward, provided the network data is available and topologically clean. The following is an example showing a non-directional shortest path calculation using a linear metro network layer from a SpatiaLite database but it could from any GIS format.

  1. Start up QGIS 2. Load and display a linear network layer e.g. segments.


  2. Select Vector | Road Graph | Settings.

    The Road graph plugin settings appear.

  3. In the Layer field, choose the linear network layer e.g. segments.
  4. Optional. In the Time unit field, choose the time units to report on e.g. minutes.
  5. Optional. In the Distance unit field, choose the distance units to report on e.g. meter.
  6. Optional. In the Topology tolerance field, type in a non-zero value, if there are gaps in your linear network. Leave it zero if your network is topologically clean.
  7. Click the Default settings tab.


  8. In the Direction field, I chose Two-way direction as my network is bi-direction.
  9. Click OK.
  10. In the Shortest path pane's Start field, click the "cross" button.


  11. Click a starting point of the analysis in the map.
  12. In the Shortest path pane's Stop field, click the "cross" button. Click the ending point in the map.
  13. In the Criterion field, choose Distance.
  14. Click Calculate.

    The shortest path by distance is calculated and displayed in the map.

Monday, November 11, 2013

Split a polygon feature with a digitized line in QGIS

It is possible to split a polygon feature by interactively drawing a line over it in QGIS 2.0 with the Split Feature command. The command doesn't seem to be accessible from the menus and only available as a tool bar item in the Advanced Digitizing tool bar palette. The following shows how to access it to split a polygon.

  1. Start QGIS 2.0. Load and display a vector layer e.g. mask.shp.


  2. Select View | Toolbars. Toggle on Advanced Digitizing.


    The Advanced Digitizing tool bar is displayed.

  3. In the Layers pane, select the polygon layer. Then select Layer | Toggle Editing.

    The polygon layer is enabled for editing.
  4. Click the Split Feature icon.


  5. Digitize a line over a polygon feature.


  6. Right click to complete the line.

    The polygon feature is divided into parts according to the digitized line.

  7. To make the change permanent, toggle off Editing mode.

Monday, November 4, 2013

Burn or rasterize vectors onto GeoTiff images

Once a while I get an unusual request like burning contour vector lines onto GeoTiff images. It's a good thing the open source software GDAL has a gdal_rasterize utility to do the job. Here is an illustrated example of burning vector lines onto a raster image.
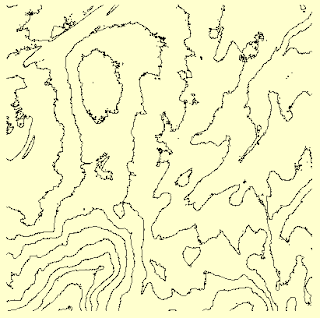
Input vector contour lines
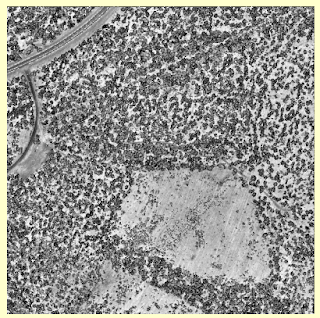
Input raster GeoTiff file


  1. Open up a Windows Command Prompt.
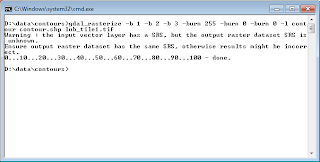
  2. Type in the following command, (assuming the GDAL installation bin folder is in the system path).

    C:\> gdal_rasterize -b 1 -b 2 -b 3 -burn 255 -burn 0 -burn 0 -l contour contour.shp lub_tile1.tif

    Note 1: -burn 255 -burn 0 -burn 0 means burn the RGB color values (255, 0, 0).
    Note 2: -b 1 -b 2 -b 3 means to use the three bands of R, G, and B.
    Note 3: this utility will overwrite the input raster file, so make sure there is a backup copy of the file.


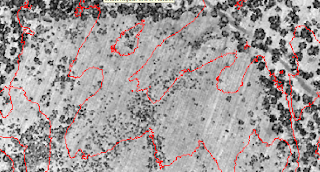
    The contour.shp vector lines are burned onto the GeoTiff file lub_tile1.tif.