Monday, December 27, 2021

ffmpeg command to encode videos using Intel GPU on Ubuntu

Using ffmpeg to encode a video stream, I found the encoding process to use my CPU excessively. I wanted to reduce the CPU usage by transferring the encoding to my built-in Intel GPU. To determine details about the on board Intel GPU driver, you can use the following command on Ubuntu:

$ vainfo


In the example screenshots below, I used the libx264 software encoding option in the ffmpeg command to encode a video stream coming from the device /dev/video0 into an output mpeg file output.mp4:

$ sudo ffmpeg -hide_banner -i /dev/video0 -c:v libx264 output.mp4

While this command is running, the top command shows a high CPU usage.

$ top

After reading through the ffmpeg manual pages and a lot of trials, I found the options to use to enable Intel GPU encoding with the ffmpeg command:

$ sudo ffmpeg -hide_banner -vaapi_device /dev/dri/renderD128 -i /dev/video0 -vf 'format=nv12,hwupload' -c:v h264_vaapi output.mp4


Running the top command shows reduce CPU usage during the encoding process:


Another example with more options is illustrated below: 

$ ffmpeg \
        -vaapi_device /dev/dri/renderD128 \
        -s 1280x720 \
        -i /dev/video0 \
        -vf 'scale=320x240,fps=fps=25,format=nv12,hwupload' \
        -c:v h264_vaapi \
        -b:v 600k \
        output.mp4

ffmpeg will request a video stream of resolution 1280x720 from the source, then scale the frames to 320x240 resolution with a fps of 25. Then it uploads the video data to the Intel GPU for encoding before writing it out with a video bitrate of 600k to the output.mp4 file.


Monday, November 15, 2021

Android Studio: Fixing the warning "flatDir should be avoided"

After upgrading my gradle plugin to version 7, I encountered this warning message "Using flatDir should be avoided because it doesn't support any meta-data format".

As shown in the screenshot below, I have the word flatDir under the repositories keyword inside my Android app's build.gradle file.


This flatDir is used to point to the location of my local Android library file(s), named inside the build.gradle's dependencies section - shown below.

To fix the warning, all I needed to do was to do the following:

  1. Remove the flatDir part from the build.gradle file's repositories section. 
  2. Inside the build.gradle's dependencies section, replace the local Android library name implementation with the following relative path to the local library file name with extension :

    implementation files ( 'libs/my-local-library.aar')

    An example is shown below.


Monday, October 18, 2021

Use Virtual Machine Manager to create a Raspberry Pi virtual machine on Ubuntu

I tried to use the Virtual Machine Manager (virt-manager)'s graphical user interface on Ubuntu to create a Raspberry Pi virtual machine. I found it to be a little tricky having to know the right parameters and configuration. This post describes the steps I went through to successfully create and run the Raspberry Pi virtual machine.

Install software prerequisites

If virt-manager and/or QEMU are not installed on the Ubuntu host, then run the following commands to install them.

$ sudo apt-get install qemu-kvm libvirt-clients libvirt-daemon-system bridge-utils virtinst libvirt-daemon virt-manager

Download a Raspberry Pi OS image

  1. Open up a browser to https://www.raspberrypi.com/software/operating-systems/.

  2. Click on a Raspberry Pi OS image of your choice to download. For example, Raspberry Pi OS Lite.

  3. Unzip the download file and place the extracted image file e.g. 2021-05-raspios-buster-armhf-lite.img to a folder, e.g. /path/to/folder/.

Download a QEMU kernel and the device tree blob (.dtb) for Raspberry Pi

  1. Open up a browser and browse to the repository https://github.com/dhruvvyas90/qemu-rpi-kernel.

  2. Click on kernel-qemu-4.19.50-buster and download the kernel to a folder, e.g. /path/to/folder/.


  3. Next, click on versatile-pb-buster.dtb and download the file to a folder, e.g. /path/to/folder/.

Create a new VM

  1. On the Ubuntu host, run virt-manager.

    The Virtual Machine Manager graphical application appears.
     
  2. Click the Create a new virtual machine button.

    The New VM dialog box wizard appears.


  3. In the Architecture options drop down, choose armv6l in the Architecture combo box. Then select versatilepb in the Machine Type combo box. Press Forward.

    Step 2 page appears.
     
  4. In the Provide the existing storage path field, click Browse.

    The Choose Storage Volume dialog appears.


  5. Click Browse Local and choose to open the previously downloaded Raspberry Pi OS image, e.g. /path/to/folder/2021-05-raspios-buster-armhf-lite.img.


  6. In the Kernel path field, click the Browse button.

    The Choose Storage Volume appears again.


  7. Click Browse Local and choose to open the previously downloaded kernel file, e.g. /path/to/folder/kernel-qemu-4.19.50-buster.

  8. In the DTB path field, click the Browse button.

    The Choose Storage Volume appears.

  9. Click Browse Local and choose to open the previously downloaded dtb file, e.g. /path/to/folder/versatile-pb-buster.dtb.

  10. In the Kernel args field, type in the following:

    root=/dev/vda2 panic=1

  11. Finally, in the Choose the operating system you are installing field, type and choose the following:

    Generic default (generic)

    The Step 2 of the New VM dialog should look like the screen below.


  12. Click Forward.

    Page Step 3 appears.

  13. In the Memory field, change the value to 256.


  14. Click Forward.

    Page 4 appears.


  15. Optional. Change the Name from vm-armv6l if necessary.

     
  16. Toggle on Customize configuration before install. In the Network selection drop down, select Specify shared device name. Then type in virbr0 in the Bridge name.

  17. Click Finish.

    The vm-armv6l on QEMU/KVM dialog box appears.


Customize configuration

  1. Click CPUs. Then in the Model combo box, choose arm1176. Then click Apply to save the change.


  2. Click Boot Options. Toggle on Enable boot menu. Then Toggle on IDE Disk 1. Click Apply.


  3. Click on IDE Disk 1. Then click the Advanced options drop down. In the Disk bus field, change from IDE to VirtIO. Click Apply.


  4. Click the NIC icon. Then change the Device model to virtio. Click Apply.


  5. Optional. Click Add Hardware to add additional peripherals such as Serial mouse, Video card etc. if necessary.

  6. Click Begin Installation.

    The processing messages appear and the Raspberry Pi VM is created.


Monday, October 11, 2021

Using rostopic to simulate publishing odometry topic messages

While developing (Robotic OS) ROS1 node callbacks, and you don't have any inertial motion devices on hand, you can use the rostopic utility command with pub option to simulate the publishing of odometry messages. Basically, before being able to use the command, you have to find out how the odometry message is structured. Once you have the fields - names and format, simply create a shell script and type in the rostopic command with the correct argument structure. More information about the rostopic command is available on http://wiki.ros.org/rostopic.

Identify the Odometry message fields

This can be done using the rosmsg command. In a Terminal, type in the following command:

$ rosmsg info nav_msgs/Odometry

The odometry fields are displayed.

Create a shell script

Using your favorite text editor, create a shell script e.g. test_rostopic.sh to publish odom topic messages of type nav_msgs/Odometry. Type in the following with the fields and corresponding values in yaml format. Make sure no tabs are used and be careful of the spaces.

rostopic pub /odom nav_msgs/Odometry '
{
header: {seq: 1, stamp: now},
pose: 
  { 
  pose: { 
    position: { x: 10, y: 20, z: 30}, 
    orientation: { x: 0.2, y: 0.1, z: 0}
  }, 
  covariance: [0,0,0,0,0,0,0,0,0,0,0,0,0,0,0,0,0,0,0,0,0,0,0,0,0,0,0,0,0,0,0,0,0,0,0,0]},
}'
-r 0.1

Note: the last line "-r 0.1" simply says to repeat the rostopic pub command at 0.1 hz.

Run the shell script

 In a Terminal, type in the following to run the rostopic pub command.

$ bash /path/to/test_rostopic.sh

Optional. To see whether the odometry messages published by the script, open up another Terminal and run the following command:

$ rostopic echo odom

The odom topic is displayed.

Monday, September 6, 2021

How to quickly publish an RTSP stream from a webcam on Ubuntu

I wanted to quickly publish an RTSP video stream from a webcam on Linux without having to work with the complexity of sources and layers in OBS Studio. I found this neat software RtspSimpleServer downloadable from https://github.com/aler9/rtsp-simple-server

 For my testing purposes using just the default parameters, I did the following:

Install and run RtspSimpleServer

  1. Using a browser, download and extract the RtspSimpleServer binary from the github repo https://github.com/aler9/rtsp-simple-server into a folder, e.g. /path/to/rtsp/

    The files rtsp-simple-server and the rtsp-simple-server.yml are extracted out into a directory /path/to/rtsp/.

  2. Open up a Terminal. At the prompt, type in the cd command to change to the directory of the rtsp-simple-server.

    $ cd /path/to/rtsp/

  3. At the prompt, run the rtsp-simple-server server:

    $ ./rtsp-simple-server

    Process messages appear to show the server is running.


Publish a video stream

  1. Optional. If the video for linux utils are not installed, then run the apt command to install it.

    $ sudo apt install v4l-utils

  2. Open up a new Terminal. Type in the ffmpeg command to publish the stream from the webcam device (assuming /dev/video0).

    $ ffmpeg \
    -f v4l2 \
    -framerate 90 \
    -re -stream_loop -1 \
    -video_size 640x320 \
    -input_format mjpeg \
    -i /dev/video0 \
    -c copy \
    -f rtsp \
    rtsp://localhost:8554/mystream


    Processing messages appear.


Open the stream with a VLC client

  1. Open up a new Terminal.

     
  2. Run the vlc command to open the published stream.

    $ vlc rtsp://localhost:8554/mystream


    The VLC client pops up to show the RTSP stream from the webcam.

Monday, August 9, 2021

Fixing the Tensorflow error: could not load dynamic library 'libcudart.so.11.0'

I tried to install and run Tensorflow on a Ubuntu 20.04 laptop with a Nvidia GPU but I encountered the "could not load dynamic library 'libcudart.so.11.0'" error message, as shown in the screenshot below.

To resolve the issue, I had to install the Nvidia kernel and Cuda 11 libraries from the Nvidia repository. The steps are outlined below.

  1. On the Ubuntu machine, open a Terminal. Type in the following commands to add the Nvidia ppa repository:

    $ wget https://developer.download.nvidia.com/compute/cuda/repos/ubuntu2004/x86_64/cuda-ubuntu2004.pin

    $ sudo mv cuda-ubuntu2004.pin /etc/apt/preferences.d/cuda-repository-pin-600 && sudo apt-key adv --fetch-keys https://developer.download.nvidia.com/compute/cuda/repos/ubuntu2004/x86_64/7fa2af80.pub

    $ sudo add-apt-repository "deb https://developer.download.nvidia.com/compute/cuda/repos/ubuntu2004/x86_64/ /"

  2. In the Terminal, type in the commands to install the Nvidia kernel.

    $ sudo apt-get update && sudo apt-get install -y nvidia-kernel-source-460

  3. Finally, install Cuda with the following command.

    $ sudo apt-get -y install cuda

Subsequently when importing the Tensorflow library, the error message no longer appears.

Note: Download and install any additional missing libraries from https://developer.download.nvidia.com/compute/cuda/repos/ubuntu2004/x86_64/ if necessary.

Monday, July 5, 2021

Setup SSH certificates for accessing a remote computer hosts without any prompts

In one of my projects, I wanted to be able to connect to and run shell commands on a remote Linux host computer without having to be prompted for :

(a) a login password and (b) host key fingerprint verification. 

Fingerprint prompt


For the first requirement, I discovered a tool called sshpass, which allows me to include the password in the command call to the remote host; but it is not able to return back the status of the remote command calls. For the second, I could setup host SSH certificates but I did not want to the overhead of having to create and maintain the certificates. 

The solution to achieve my objectives is described in the sections below. Basically I just needed to generate and sign my user certificate and have it authenticated by the remote SSH host when I ssh into the remote host; after setting up and configuring them, of course. 

Create user certificate authority keys

In order to generate user certificates, I need to use user certificate authority (CA) keys. The following steps outlines how to generate these keys.

  1.  On a secure Linux workstation e.g. pc1, log in as a user e.g. pcuser and open up a Terminal. Key in the following commands to generate the user CA, e.g. user_ca.

    $ mkdir -p /path/to/ca/
    $ cd /path/to/ca/
    $ ssh-keygen -t rsa -b 4096 -f user_ca -C user_ca


    The private key user_ca and the public key user_ca.pub are generated.

    Note: change the certificate fie name prefix from user_ca to your desired prefix if necessary.

Setup the remote SSH host to recognize my user certificates

  1.  On the remote SSH host, e.g. server1, open up a Terminal and copy over the previously generated user CA public key e.g. user_ca.pub.

    $ scp pcuser@pc1:/path/to/ca/user_ca.pub /tmp/.
    $ cd /etc/ssh/
    $ sudo mv /tmp/user_ca.pub /etc/ssh/.


    Note: where pcuser is the login used to generate the user CA keys on the workstation pc1.

  2. Change the owner of the user CA public key file e.g. user_ca.pub to root.

    $ sudo chown root user_ca.pub
    $ sudo chgrp root user_ca.pub

  3. Next, use a text editor to append the following TrustedUserCAKeys line into the /etc/ssh/sshd_config file. Save and exit the editor.

    $ sudo vi /etc/ssh/sshd_config
    ...etc...
    TrustedUserCAKeys /etc/ssh/user_ca.pub


  4. Then type in the following command to restart the SSH daemon.

    $ sudo systemctl restart sshd

    The remote SSH host is now configured to recognize any user certificates signed using the user CA user_ca key files.

Use the user CA to issue my user certificates

  1.  Back on the secure Linux workstation e.g. pc1, type in the following commands to generate a user certificate.

    $ cd /path/to/ca/
    $ ssh-keygen -f my-key -b 4096 -t rsa


    The private key file my-key and public key file my-key.pub are generated.


  2. Now, sign the generated public key e.g. my-key.pub with the user CA public key e.g. user_ca.pub.

    $ ssh-keygen -s user_ca -I serveruser1@somedomain.com -n serveruser1 my-key.pub


    The signed user certificate my-key-cert.pub is generated.


    Note 1: where -I serveruser1@somedomain.com is a string identifier for system logs,
    -n serveruser1 is a comma delimited list of login user names on the remote host to be authorized for access
    .

    Note 2: include the -V option if you want to ensure the user certificate has an expiry date.

  3. Optional. Run the following command to display information about the generated user certificate my-key-cert.pub.

    $ ssh-keygen -L -f my-key-cert.pub

Store and use the user certificate

  1.  On the user's workstation, e.g. pc2, open up a Terminal and create a directory to store the generated user certificates e.g. /path/to/my-certs/.

    $ mkdir -p /path/to/my-certs/

  2. Remove the group and others read, write and execute permissions of the newly created directory so that only the owner can access.

    $ chmod go-rwx /path/to/my-certs/

  3. Copy over the user certificates my-key-cert.pub, my-key, my-key.pub generated in the previous section and place them into the /path/to/my-certs/ directory.

  4. Finally, to ssh into the remote host e.g. server1 with the user certificate my-key, type in the following command.

    $ ssh -o StrictHostKeyChecking=no -i /path/to/my-certs/my-key serveruser1@server1

    You are authenticated and logged into the remote host server1 as user serveruser1 without any password or fingerprint prompt.


Monday, April 12, 2021

Simple .NET5 C# example to show a Message box using AvaloniaUI

The cross platform AvaloniaUI (https://avaloniaui.net/) does not come with a message box class. In order to display message boxes like typical Windows applications, you have to use third party libraries. One such tool is the MessageBox.Avalonia NuGet package (https://github.com/AvaloniaUtils/MessageBox.Avalonia). 

This post shows how to create a simple Hello World project that calls the message box package to open up a modal message box from a main window. 

Create an AvaloniaUI MVVM project

  1. In a Terminal, type in the command to create a project:

    $ dotnet new avalonia.mvvm -o hellomsg

    The template "Avalonia .NET Core MVVM App" was created successfully.

  2. In the Terminal, change directory into the newly created project. Then install the MessageBox.Avalonia Nuget package.

    $ cd /path/to/hellomsg
    $ dotnet add package MessageBox.Avalonia


      Determining projects to restore...                                            
      Writing /tmp/tmpaumBpn.tmp                                                    
    info : Adding PackageReference for package 'MessageBox.Avalonia' into project '/path/to/hellomsg/hellomsg.csproj'
    .    
    ...etc..


Add a button to the newly created XAML file

  1. Using a text editor, open up the MainWindow.axaml file.

  2. Remove the TextBlock and add in a Button, as shown below.

    <Window xmlns="https://github.com/avaloniaui"
            xmlns:x="http://schemas.microsoft.com/winfx/2006/xaml"
            xmlns:vm="using:hellomsg.ViewModels"
            xmlns:d="http://schemas.microsoft.com/expression/blend/2008"
            xmlns:mc="http://schemas.openxmlformats.org/markup-compatibility/2006"
            mc:Ignorable="d" d:DesignWidth="800" d:DesignHeight="450"
            x:Class="hellomsg.Views.MainWindow"
            Icon="/Assets/avalonia-logo.ico"
            Title="hellomsg">
    
        <Design.DataContext>
            <vm:MainWindowViewModel/>
        </Design.DataContext>
    
        <!-- <TextBlock Text="{Binding Greeting}" HorizontalAlignment="Center" VerticalAlignment="Center"/> -->
        <Button
            Command="{Binding ShowMsgBoxCommand}"
            CommandParameter="{Binding $parent[Window]}"
            Content="Open MessageBox"
        />
    
    </Window>
    

    Note 1: The Button's Command will bind to a ShowMsgBoxCommand in the MainWindowViewModel.
    Note 2: The Button will pass in the Window object to the ShowMsgBoxCommand through the CommandParameter
    .

Create the ShowMsgBoxCommand in the View Model

  1. In a text editor, open up the file MainWindowViewModel.cs.

  2. Add in a new ReactiveCommand property and name it as ShowMsgBoxCommand.


    public ReactiveCommand<object, Unit> ShowMsgBoxCommand { get; }


    Note: this command will take in an object and return the default Unit.

  3. In the constructor, add in the code to create the ShowMsgBoxCommand command. Inside the command, create the message box, define the parameters and display it.

    ShowMsgBoxCommand = ReactiveCommand.CreateFromTask<object>( async (sender) => {
    var dialog = MessageBoxManager
                    .GetMessageBoxStandardWindow("My title", "My message");
    await dialog.ShowDialog(sender as Avalonia.Controls.Window);
    });


    Note: pass in the Window object as the owner of the message box to the ShowDialog method.

  4. The full listing of MainWindowViewModel.cs is shown below.


    using System;
    using System.Collections.Generic;
    using System.Text;
    using System.Reactive;
    using ReactiveUI;
    using MessageBox.Avalonia;
    
    namespace hellomsg.ViewModels
    {
        public class MainWindowViewModel : ViewModelBase
        {
            public ReactiveCommand<object, Unit> ShowMsgBoxCommand { get; }
            public string Greeting => "Welcome to Avalonia!";
            public MainWindowViewModel(){
                ShowMsgBoxCommand = ReactiveCommand.CreateFromTask<object>( async (sender) => {
                    var dialog = MessageBoxManager
                                    .GetMessageBoxStandardWindow("My title", "My message");
                    await dialog.ShowDialog(sender as Avalonia.Controls.Window);
                });
            }
        }
    }
    

Run the application

  1. In the Terminal, run the dotnet application.

    $ dotnet run

  2. If all is correct, the following should appear. When the button is clicked, a modal message box should pop up.


Monday, April 5, 2021

How to resolve: Unable to load shared library 'libSkiaSharp' when trying to run an AvaloniaUI .NET 5 app

I was trying to run a simple .NET 5 application that uses the cross platform AvaloniaUI graphical user interface library on Ubuntu 20.04. More information about AvaloniaUI can be found on https://avaloniaui.net/. But after executing the command $ dotnet run, the exception error messages appear complaining about a missing libSkiaSharp shared object file, as shown in the screenshot below.


After some investigations, I managed to resolve the problem by removing the dotnet SDK binaries that come from the Ubuntu's Snap PPA repositories, that are installed when the following command is executed:


Instead of using Ubuntu's repo, the official Microsoft installer from https://dotnet.microsoft.com/download/dotnet/5.0 should be used instead. 

After installing the official SDK, running the application brings up the application's graphical user interface without any error messages, as shown below.


Monday, March 29, 2021

Installing the long term release version of QGIS using Flatpak on Ubuntu

The flatpak command on Ubuntu is used to install packaged software such as QGIS from a remote flathub repository. Normally, the following Terminal command to install QGIS is as follows:

$ flatpak install qgis


By default, this will install the stable branch of QGIS. In the screen shot below, it is version 3.18, but this may not be the version you want. Perhaps you wanted to use the long term release version, which is under a different lts branch. 


To get flatpak to install the lts branch of QGIS, type in the following command in the Terminal.

$ flatpak install org.qgis.qgis//lts

And follow the prompts to complete the installation.


Finally, as a check, open up QGIS and display the version.


Monday, March 22, 2021

Find the location of a Docker volume on Windows

Like any Docker versions, Docker on Windows (with WSL2) can create and use Docker data volumes. The command to create a Docker volume (named as my-data-volume), as shown in the screenshot below is: 

$ docker volume create my-data-volume


The question then is where is the corresponding location of this data volume e.g. my-data-volume in the Windows file system.

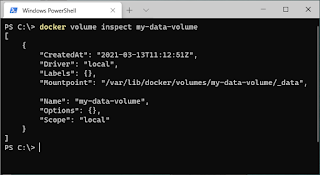
Using the inspect command below to display the Docker volume details shows the following information.

$ docker volume inspect my-data-volume


The print out indicates the my-data-volume can be found at /var/lib/docker/volumes/ but the path cannot be located with the Windows Explorer.

Instead, to go to the actual location, you will have to use the WSL path e.g.

\\wsl$\docker-desktop-data\version-pack-data\community\docker\volumes\

Typing this path in Windows Explorer shows the my-data-volume location.


Monday, March 15, 2021

Creating a simple CUDA with CMake C++ project

Assuming you have downloaded and installed the right version of the NVIDIA CUDA Toolkit for your NVIDIA GPU card, the next step is to create your awesome C++ CUDA project. In this post, I will illustrate how to create a simple Hello World project using CMake on Ubuntu. 

  1. In a folder, create a CUDA C++ file, e.g. hello.cu. Type in the following code as shown in the snippet below.

    Note: the main function simply calls an empty CUDA mykernel consisting of 1 block and 1 thread per block function. Then it prints out a hello message.

  2. Next, create a CMakeLists.txt file. Type in the following code as shown.

    Note: The CMakeLists.txt simply tells CMake to use C++ and CUDA languages and then defines the executable and its source.


  3. Create a build directory. Then change directory into the build directory and run the cmake command.

    $ mkdir build
    $ cd build
    $ cmake ..


    The processing messages appear.


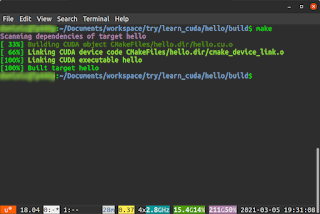
  4. Now compile the project with the make command.

    $ make


  5. Finally, run the hello executable.

    $ ./hello

    The message "Hello CUDA!" is printed to the screen.

The sample project can be downloaded from the Github repository at https://gitlab.com/dominoc925/hello-cuda-cmake