This Google Maps based tool was written partly based on some information about calculating camera field of views from this site http://www.bobatkins.com/photography/technical/field_of_view.html. The tool also use geodetic functions by Chris Veness from www.movable-type.co.uk/scripts/latlong.html.
The command makes a few assumptions:
- The camera sensor is a full frame sensor
- There is no lens distortion
- The ground elevation is flat and is based on the elevation at the center of the frame
- The earth is a perfect spheroid
- There is no roll and pitch.
To use this tool,
- Click this link http://dominoc925-pages.appspot.com/mapplets/camframes.html.
- Fill in the camera focal length e.g. 50.
- Fill in the camera sensor width e.g. 59.
- Fill in the camera sensor height e.g. 36.7.
- Fill in the camera sensor horizontal pixel dimensions e.g. 8176.
- Fill in the camera sensor vertical pixel dimensions e.g. 6132.
- Enter the aircraft altitude e.g. 1080.
- Enter the initial latitude and longitude position of the aircraft, e.g. 33.7232 and -100.3347.
- Set the capture interval e.g. 6.
- Enter the aircraft speed e.g. 33
- Enter the aircraft bearing e.g. 10
- Enter the number of frames to create e.g. 10.
- Click the Create button.
The frames are created.
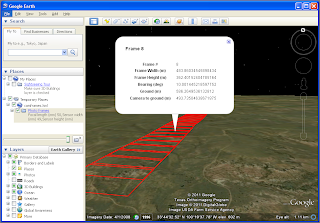
An example of the file in Google Earth is displayed in the screen shot below.


No comments:
Post a Comment