Monday, March 31, 2014

Identifying digital elevation model files with erroneous elevations in batch

A DEM file
Recently I had to identify ESRI ArcGrid ASCII files of digital elevation models with very low elevation values (below zero). If I had one or two files, then I could easily open up the file in Global Mapper or Saga GIS. But there were several hundred DEMs, which made that impractical. Luckily the free open source software GDAL has a utility gdalinfo that can generate statistics about a DEM in batch. The following example shows how to use gdalinfo to look for extreme low (or high) spikes in elevation.


  1. Open up a Windows Command Prompt.
  2. Type in the following:

    C:> gdalinfo -stats inputDEM.asc > output.txt

    Note: to append to an output file, use double ">" as below.

    C:> gdalinfo -stats inputDEM.asc >> output.txt


    Note II: For hundreds of files, simply put these commands into a batch script.
  3. Open up the output file e.g. output.txt in a text editor. Find the statistical values - minimum, maximum that are above or below the valid elevation ranges to identify the DEM files with erroneous values.

Monday, March 24, 2014

Make copies of Android apps already installed on devices

I was curious whether it was possible to copy out from mobile phones or tablets the Android apps I installed from the Google Play store. It didn't long to figure out how to do it. There are a lot of apps that can do the job including a popular file manager app: ES File Explorer which can be used to easily select the apps and either back up the Android APK file(s) to an SD card, shared or sent out. If you have the ES File Explorer app installed on the device, simply do the following to copy out the app(s).

  1. Launch the ES File Explorer app. Touch the top left blue icon as shown below.

    A menu slides from the left.

  2. Touch App Manager.

    A grid of app icons appear.

  3. Long press one or more app icons.

    The app(s) are selected.

  4. Touch one of the commands at the bottom, e.g. Backup to copy the APK's to the SD card, Share to share out to Dropbox, Google Drive, etc.
  5. If Backup was selected, then the APK's will be copied out to the folder /sdcard/backup/apps/.

    The Android apps APK files are extracted out.

Monday, March 17, 2014

Android App for monitoring 911 call incidents in Seattle, Washington

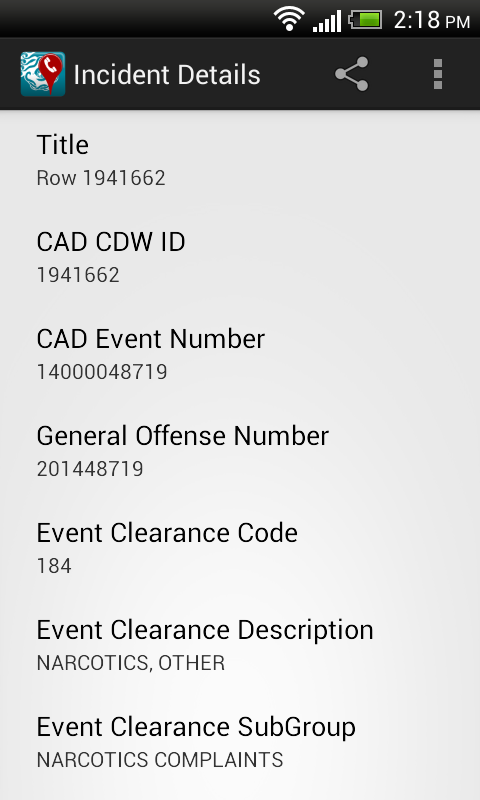
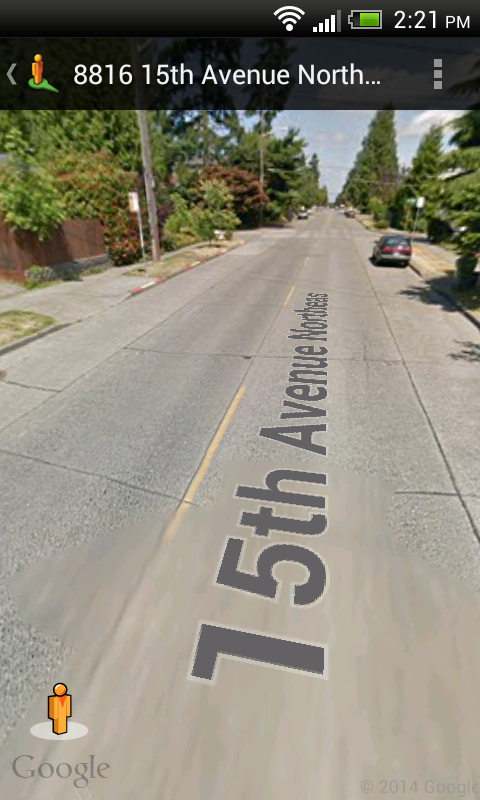
With this Android app, users can monitor the City of Seattle's Fire Department's real time 911 dispatches (which is updated every 5 minutes), the Police Department's 911 Dispatch Incident responses (only non-confidential and updated every 4 hours) and Report Incidents (updated within 6 to 12 hours). The incidents can be viewed as a text list or on a map as marker icons or as a heat map. Examples of incidents include burglary, accident, fire, assault, drugs, death, and many more. Incident details can be viewed by touching an item on the list or a marker icon on the map display. A function is available to easily filter away unwanted incidents from the list or map by text. The app allows the user to send the location  to Google Maps and/or Street View for better visualization of the 911 call incident environment.

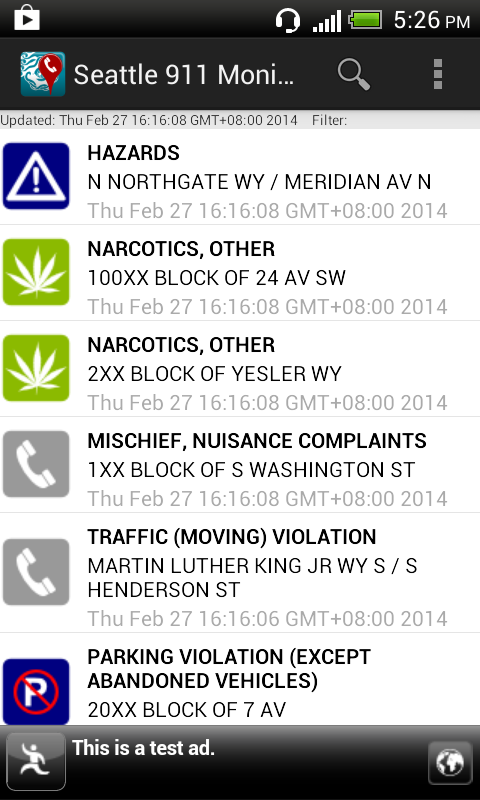
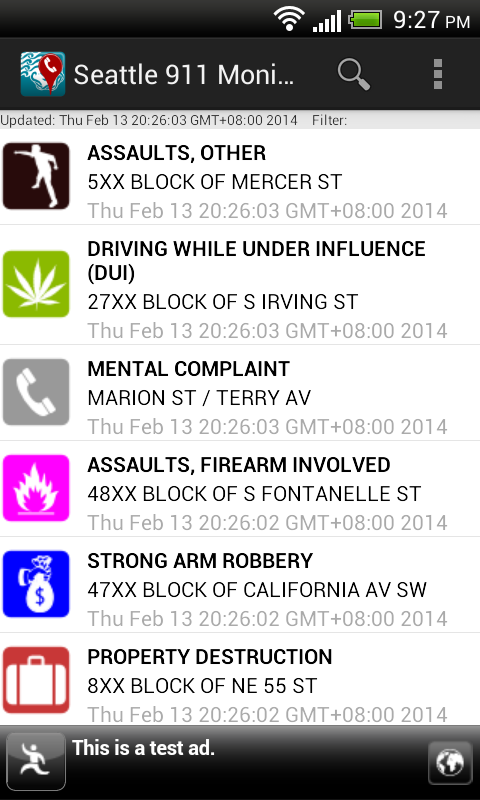
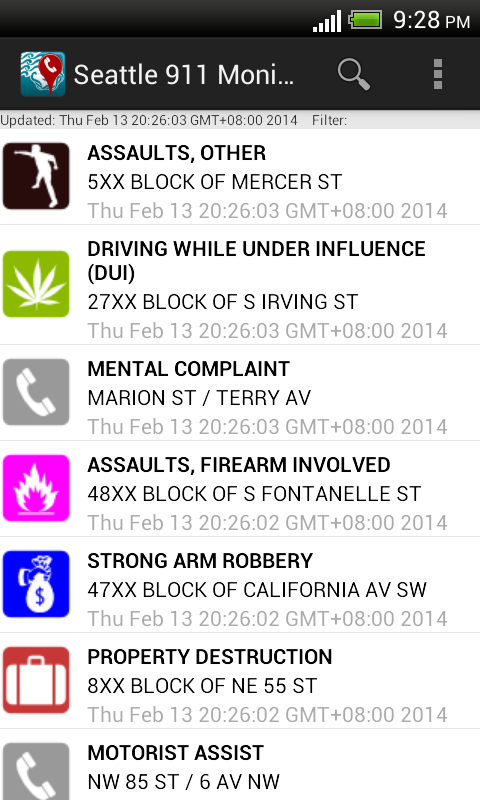
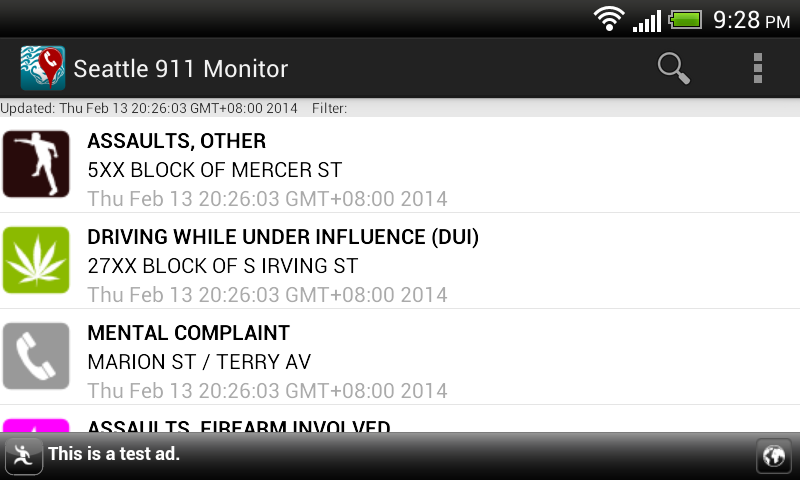
Upon launching the app, the list of incidents will be downloaded and displayed with associated icons as shown below.

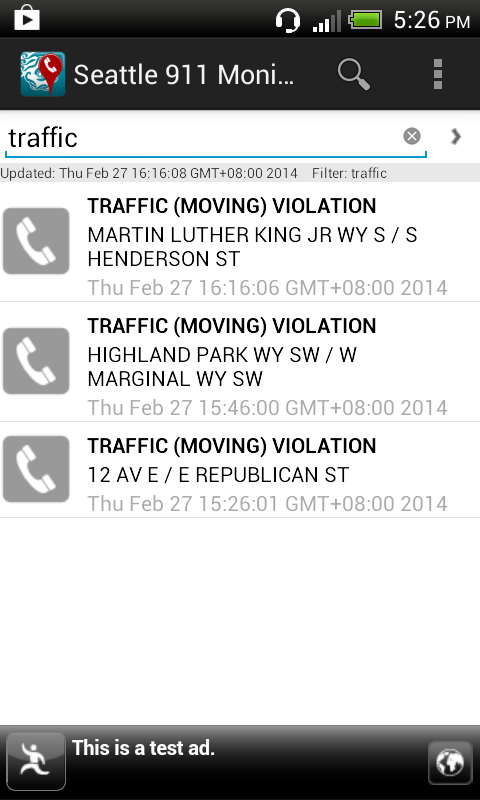
The list of incidents can be filtered by using the Filter command, which is activated by selecting the Filter icon on the Action Bar or menu item. This will toggle the display of the filter text entry field. As you type in any text e.g. traffic, the incident list is dynamically updated.


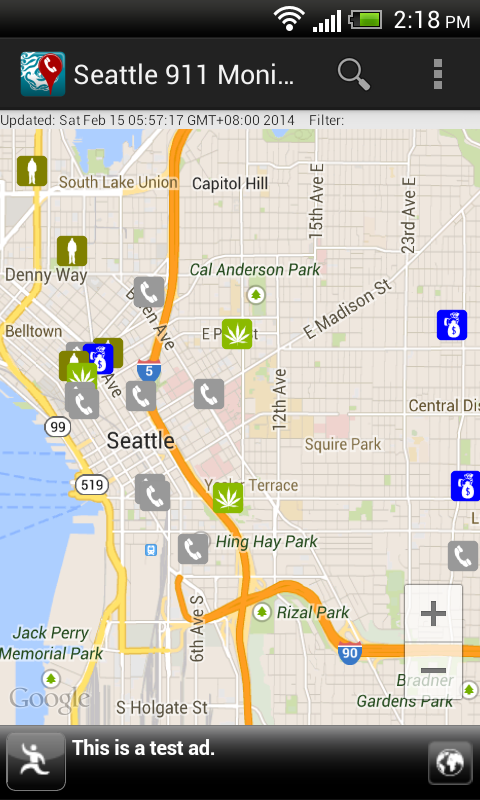
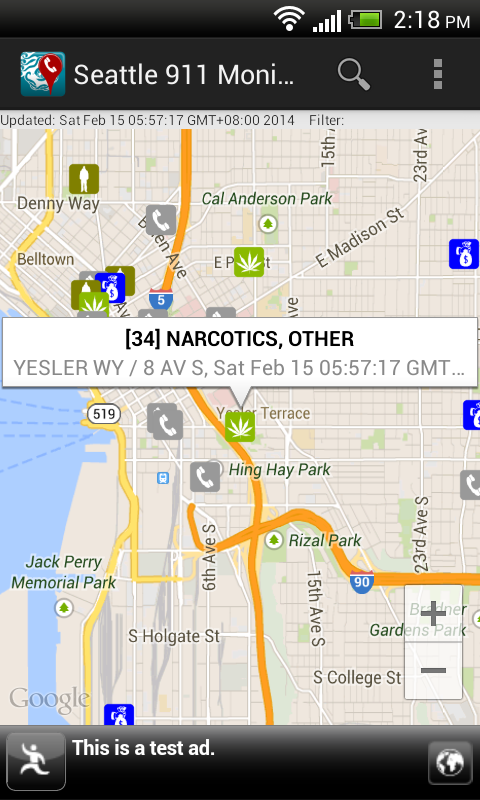
To view all the incidents on a map, simply select the Map option item in the Action Bar menu. The filter (if any) remains in effect util it is cleared. Touching any incident icon will pop up a snippet of information about the incident. Touching the snippet will display the incident details.


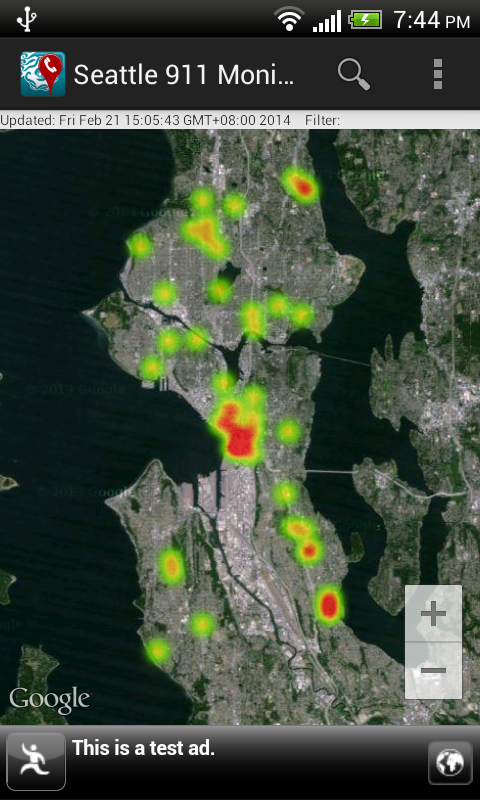
Instead of visualizing the incidents as marker icons, choosing the Heat map option item in the Action Bar menu will render the incidents as a heat map, as shown below. To display as marker icons again, just choose the Markers option item in the Action Bar menu.


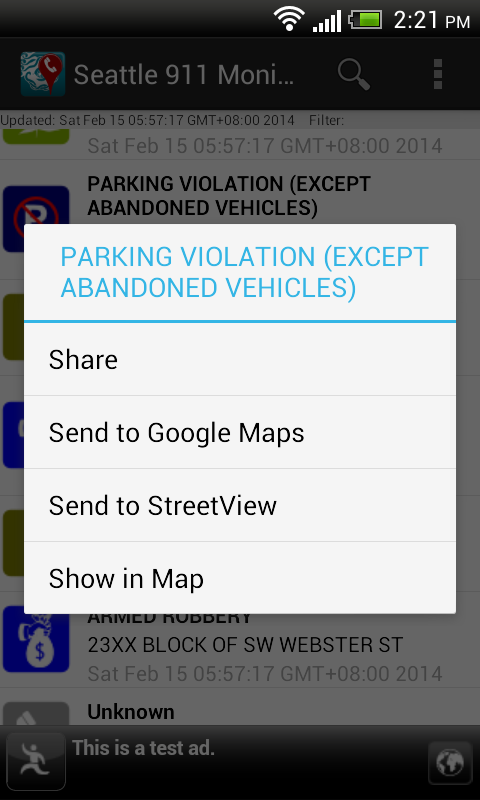
Long pressing any item in the incident list will pop up a menu, as shown below, where the selected incident can be shared, located on a map, or sent to the Google Maps or Street View app.


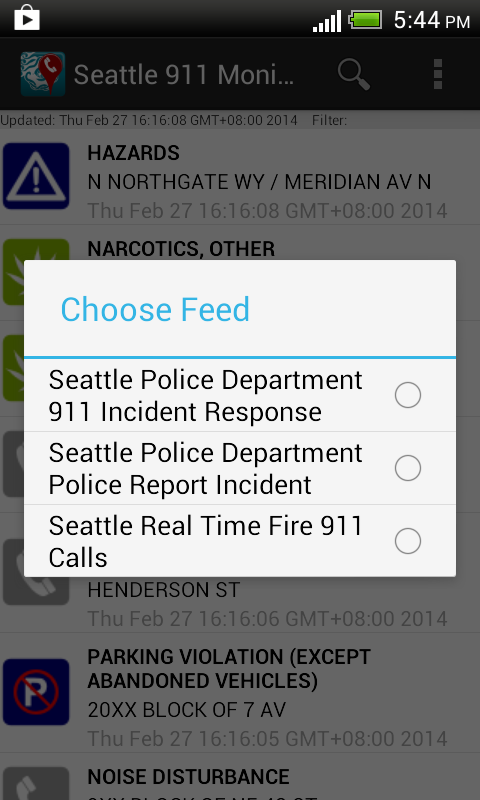
To refresh the call incidents or select a different incident feed, touch the Refresh option item in the Action Bar menu.
 
The app can be downloaded from Google Play.
Get it on Google Play

Monday, March 10, 2014

Handling the Android compilation error "Unable to execute dex: Multiple dex files define" in Eclipse

I have spent a lot of time trying to get an Android project using the Google Play Services and the Google Maps Android Utility libraries to compile successfully. A typical error message is shown in the screenshot below.

Eclipse was complaining about multiple dex files; eventually I found out that I was exporting out multiple jar files with the same classes and I had to toggle off the duplicate jar files in Eclipse. The following steps ensure that my project could compile successfully with the two libraries.

Add the Google Play Services and Google Maps Android Utility libraries

  1. In Eclipse, select the Android project in the Package Explorer. Right click and choose Properties.

    The Properties for xxx project appears.
  2. Choose Android. Click Add.

    The Project Selection dialog appears.

  3. Choose Google Play Services library. Click OK.

    The library is added.
  4. Repeat steps 2 and 3 to add the Google Maps Android Utility library.

    The library is added.
Check for Duplicate JARs
  1. Click Java Build Path.

    The Java Build Path page appears.
  2. Click the Libraries tab.


  3. In the JARS and class folders tree, expand the top level nodes.
  4. Make a note of any duplicate JAR files.

    Note: In this example, the android-support-v4.jar is duplicated. There is a copy in my Android project and there is another copy in the Google Maps Android Utility library.

  5. Click the Order and Export tab.


  6. Toggle off one the items that contain the duplicate JAR files e.g. the android-support-v4.jar file in my Android project.
  7. Click OK.

    The Properties for XXXX project is closed.

  8. If necessary, select Project | Clean to clean up the previous compilation temporary files and compile/run the project again.

    The project should now compile successfully.

Monday, March 3, 2014

Example code to hide and show the Google Play Services Smart Banner AdView depending on the data connection

A smart banner ad is displayed at the bottom of the app
The Smart Banner ad unit type in the legacy AdMob SDK (6+) can render screen-wide banner ads on any screen size in any orientation. Using it is easy - simply declare the AdView component as a smart banner type with appropriate attributes in an Android activity layout XML file and it will be ready to serve ads - all without having to write a single line of Java code. The Smart Banner will automatically hide or show itself, depending whether the data connection is disabled or enabled when the app is opened; if there is no data connection, then the ad will be hidden. If the data connection is closed after the app has been opened, keep the ad displayed.


However, the old AdMob 6+ SDK will be replaced with the new ads SDK in the Google Play Services. Java code is required to use the Smart Banner AdView. I wanted  the AdView in the new Google Play Services SDK to behave as in the legacy AdMob SDK i.e. hide itself when there is no data connection, and show itself when there is. The following example code snippets show how to do it.

Declare the Smart Banner AdView in the activity layout XML file


<LinearLayout xmlns:android="http://schemas.android.com/apk/res/android"
xmlns:tools="http://schemas.android.com/tools"
android:id="@+id/LinearLayout1"
android:layout_width="match_parent"
android:layout_height="match_parent"
android:orientation="vertical"
tools:context=".MainActivity" >
 
<!-- 
Add your layout views here. The total layout weight should be 1...
    <FrameLayout 
        android:id="@+id/map_detail_container"
        android:layout_width="match_parent"
        android:weightSum="1"
        android:layout_height="0dip"
        />
-->

<fragment        
android:id="@+id/eventListFragment"
android:name="com.dom925.EventListFragment"
android:layout_width="fill_parent"
android:layout_height="0dp"
android:layout_weight="1.0" />
<com.google.android.gms.ads.AdView
xmlns:ads="http://schemas.android.com/apk/res-auto"
android:id="@+id/mainAdView"
android:layout_gravity="center_horizontal"
android:layout_width="match_parent"
android:layout_height="wrap_content"
ads:adSize="SMART_BANNER"
ads:adUnitId="a152fa33f70c96X"
/>

Code an Ad Listener class to hide and show the AdView
This listener will hide the AdView when it is constructed. When an ad has been loaded, it will display the AdView.

package com.dom925.cadmon.seattle;
 
import android.content.Context;
import android.view.View;
import android.widget.Toast;
 
import com.google.android.gms.ads.AdListener;
import com.google.android.gms.ads.AdRequest;
import com.google.android.gms.ads.AdView;
 
public class GoogleAdListener extends AdListener {
private Context _context;
private AdView _adView;
 
public GoogleAdListener(Context context, AdView adView) {
this._context = context;
_adView = adView; 
//Hide the AdView on creation
_adView.setVisibility(View.GONE);
}

@Override
public void onAdLoaded() {
//Display the AdView if an Ad is loaded
_adView.setVisibility(View.VISIBLE);
}
}

Code the Activity to use the AdView


public class MainActivity extends FragmentActivity
{
//Declare a variable for my AdView
private AdView _adView = null;

@Override
protected void onCreate(Bundle savedInstanceState) {
super.onCreate(savedInstanceState);
setContentView(R.layout.activity_main);
 
//Initialize my AdView and assign the Ad listener to the view
_adView = (AdView)findViewById(R.id.mainAdView);
_adView.setAdListener(new GoogleAdListener(this, _adView));

//Make a request for an ad
requestGoogleAd(_adView);
 
}
 
@Override
protected void onResume() {
super.onResume();
//Show the AdView if the data connection is available
if (checkDataConnection()==true){
_adView.setVisibility(View.VISIBLE);
}        
_adView.resume();
}
@Override
protected void onPause() {
_adView.pause();
super.onPause();
}
@Override
protected void onDestroy() {
_adView.destroy();
super.onDestroy();
}
private void requestGoogleAd(AdView adView){
AdRequest adRequest = new AdRequest.Builder()
.addTestDevice(AdRequest.DEVICE_ID_EMULATOR)
.addTestDevice("541603DA032A1B8626E5C8EA6FA2AADX")
.build();
adView.loadAd(adRequest);                        
}
 
private boolean checkDataConnection(){
boolean status = false;
ConnectivityManager connectivityMgr = (ConnectivityManager)getSystemService(Context.CONNECTIVITY_SERVICE);
if (connectivityMgr.getActiveNetworkInfo()!=null && 
connectivityMgr.getActiveNetworkInfo().isAvailable() &&
connectivityMgr.getActiveNetworkInfo().isConnected()) {
status = true;
} 
return status;
}    
}


The AdView is not displayed when the app is started without a data connection. 


When the data connection is enabled, the AdView is shown when the app is resumed

Monday, February 24, 2014

Create an Android PreferenceScreen using Java, not with XML

The Android preference fragment/activity is usually used to show a list of shared preferences for users to interact with. The list of the preferences is typically predefined using an XML file. But I wanted to define the list of preferences at run time because I had a variable list of preferences, which are known only at run time. This can be done by overriding the PreferenceFragment's or PreferenceActivity's onCreate method and manually creating and appending your own preferences to the root of the PreferenceScreen object.

The following code snippet for a PreferenceFragment shows how this is done. Make the appropriate changes for pre-Honeycomb Android versions.

//...etc...
public class MyPreferenceFragment extends PreferenceFragment {
 
@Override
public void onCreate(Bundle savedInstanceState) {
super.onCreate(savedInstanceState);

//create my own PreferenceScreen
setPreferenceScreen(createMyPreference());
}
private PreferenceScreen createMyPrefenceScreen(){
//just an array of title strings for the preferences
String[] titles = { "Title1", "Title2", "Title3"};

//just an array of summary text strings for the preferences
String[] summaries = { "Summary1", "Summary2", "Summary3"};

PreferenceScreen root = getPreferenceManager().createPreferenceScreen(getActivity());
 
for (int i=0; i<titles.length; i++){
//create a preference
Preference pref = new Preference(getActivity());

//set the preference's title and summary text
pref.setTitle( titles[i]);
pref.setSummary( summaries[i]);
pref.setSelectable(false);

//append the preference to the PreferenceScreen
root.addPreference(pref);
}
 
return root;
}
}

The following screenshot shows how the resultant preference fragment/activity looks like.

Monday, February 17, 2014

How to upload, update and save an image file to Google Drive using Javascript

This is a simple Javascript Google Drive example web app to load an image file from a local drive, write some text on the image, then save the edited image to Google Drive in the cloud. The basis of this example came from the Google Drive SDK Javascript Quickstart at this location https://developers.google.com/drive/quickstart-js. Read up the Google Drive SDK Javascript Quickstart to see how to enable the Google Drive API and setup a Google Drive Javascript web app.

Setup the Javascript app
Copy the following source code and save into your own html file. Change the string <YOUR_CLIENT_ID> to your own client ID assigned to you when you created your cloud project in http://cloud.google.com/console. Publish the page to a web server.

In general, this is what the Javascript code is doing: (1) load and draw the local image file in the canvas element, (2) draw the string "Hello World" onto the canvas, (3) save the canvas into an IMG element, (4) upload the IMG element source data into Google Drive.

<html>
<head>
<meta http-equiv="Content-type" content="text/html;charset=UTF-8">
<script type="text/javascript">
 
var CLIENT_ID = '<YOUR_CLIENT_ID>';
var SCOPES = 'https://www.googleapis.com/auth/drive';
 
/**
       * Called when the client library is loaded to start the auth flow.
       */
function handleClientLoad() {
window.setTimeout(checkAuth, 1);
}
 
/**
       * Check if the current user has authorized the application.
       */
function checkAuth() {
gapi.auth.authorize(
{'client_id': CLIENT_ID, 'scope': SCOPES, 'immediate': true},
handleAuthResult);
}
 
/**
       * Called when authorization server replies.
       *
       * @param {Object} authResult Authorization result.
       */
function handleAuthResult(authResult) {
var authButton = document.getElementById('authorizeButton');
var filePicker = document.getElementById('filePicker');
var uploadButton = document.getElementById('uploadButton');

authButton.style.display = 'none';
filePicker.style.display = 'none';
uploadButton.style.display = 'none';
if (authResult && !authResult.error) {
// Access token has been successfully retrieved, requests can be sent to the API.
filePicker.style.display = 'block';
filePicker.onchange = loadImageFile;
uploadButton.onclick = newUploadFile;
} else {
// No access token could be retrieved, show the button to start the authorization flow.
authButton.style.display = 'block';
authButton.onclick = function() {
gapi.auth.authorize(
{'client_id': CLIENT_ID, 'scope': SCOPES, 'immediate': false},
handleAuthResult);
};
}
}
 
function newUploadFile(evt){
gapi.client.load('drive','v2', function(){
var theImage = document.getElementById('editedImage');
var fileTitle = theImage.getAttribute('fileName');
var mimeType = theImage.getAttribute('mimeType');
var metadata = {
'title': fileTitle,
'mimeType': mimeType
};
var pattern = 'data:' + mimeType + ';base64,';
var base64Data = theImage.src.replace(pattern,'');            
newInsertFile(base64Data,metadata);
});
}
/**
       * Insert new file.
       *
       * @param {Image} Base 64 image data
       * @param {Metadata} Image metadata
       * @param {Function} callback Function to call when the request is complete.
       */
function newInsertFile(base64Data, metadata, callback){
const boundary = '-------314159265358979323846';
const delimiter = "\r\n--" + boundary + "\r\n";
const close_delim = "\r\n--" + boundary + "--";
var contentType = metadata.mimeType || 'application/octet-stream';
var multipartRequestBody =
delimiter +
'Content-Type: application/json\r\n\r\n' +
JSON.stringify(metadata) +
delimiter +
'Content-Type: ' + contentType + '\r\n' +
'Content-Transfer-Encoding: base64\r\n' +
'\r\n' +
base64Data +
close_delim;
 
var request = gapi.client.request({
'path' : '/upload/drive/v2/files',
'method' : 'POST',
'params' : {
'uploadType' : 'multipart'
},
'headers' : {
'Content-Type' : 'multipart/mixed; boundary="' + boundary + '"'
},
'body' : multipartRequestBody
});
if (!callback) {
callback = function (file) {
alert('done');
};
}
request.execute(callback);
}
function loadImageFile(evt){
var file = evt.target.files[0];
var reader = new FileReader();
reader.file = file;
reader.onload = onImageReaderLoad;
reader.readAsDataURL(file);            
}
function onImageReaderLoad(evt){
var file = this.file;
var mimeType = file.type;
writeSomeText(file.name,file.type,evt.target.result);        
}
/**
       * Write some Hello World text on an image using the canvas.
       *
       * @param {File Name} The name of the image file
       * @param {MimeType} The mime type of the image e.g. image/png
       * @param {Image} The image data
       */
function writeSomeText(sourceImageName, mimeType, sourceImage){
var resultsDiv = document.getElementById('resultsDiv');
var sourceImg = document.createElement('img');
var resultImg = document.createElement('img');
var canvas = document.createElement('canvas');
sourceImg.onload = function(evt){
canvas.width = this.width;
canvas.height = this.height;
var ctx = canvas.getContext('2d');
ctx.drawImage(this,0,0,canvas.width,canvas.height);
ctx.font = '24px Arial';
ctx.fillText('Hello World',this.width/2,this.height/2);
ctx.restore();
resultImg.onload = function(evt2){
resultImg.setAttribute('id','editedImage');
resultImg.setAttribute('mimeType', mimeType);
resultImg.setAttribute('fileName', sourceImageName);
resultsDiv.appendChild(resultImg);
var uploadButton = document.getElementById('uploadButton');
uploadButton.style.display = 'block';
};
resultImg.src = canvas.toDataURL(mimeType);
};
sourceImg.src = sourceImage;
}    
 
</script>
<script type="text/javascript" src="https://apis.google.com/js/client.js?onload=handleClientLoad"></script>
</head>
<body>
<!--Add a file picker for the user to choose an image file to be edited -->
<input type="file" id="filePicker" style="display: none" />
<!-- Add a button to start the upload process for loading the edited image file to Google Drive -->
<input type="button" id="uploadButton" style="display:none" value="Upload" />
<input type="button" id="authorizeButton" style="display: none" value="Authorize" />
<!-- div placeholder for displaying the edited image -->
<div id="resultsDiv">
</div>
</body>
</html>


Run the Javascript app

  1. Load the web page in an Internet browser.

    If the Javascript app has not been authorized by you, then the Authorize button will be displayed.
  2. Click Authorize.

    If you are not signed in to your Google account, the following page may display. Just type in your password and sign in.


    The Request for permission page appears.
  3. Click Accept.

    The app is authorized and the browser runs the Javascript app.
  4. Click Choose File.

    The Open dialog box appears.
  5. Browse and select an image file, e.g. ic_launcher.png. Click Open.

    The app writes the text string 'Hello World' in the middle of the selected image. The Upload button appears.

  6. Click the Upload button.

    A done message appears.

     The image is saved into your Google Drive in the cloud.