Monday, June 13, 2016

Use PDAL to merge multiple LiDAR las files

I found a useful tool, something that works along the lines of GDAL for vector data, but for point cloud data; it's the Point Data Abstraction Library (PDAL).  PDAL can be downloaded from http://www.pdal.io/. It has some useful commands, like merging LiDAR las files, which I tried to use, as an alternative to other tools like Lastools.

Using PDAL to merge a few las files is straightforward, as illustrated below. If there are hundreds of las files to zip, then another tool might be more suitable.


To use PDAL to merge las files, just type in the following command at the Command prompt.
C:> pdal merge --verbose=5 part_1.las part_2.las part_3.las output.las


Note I: all the input las files will be merged into the last file name in the command.
Note II: the --verbose option tells the command the amount of processing messages to display. 0 for none. 
The resultant merge file is shown below.

Monday, June 6, 2016

Trainsity Bangkok Windows Phone app

Use this Windows Mobile 8+ app to find your way around the city of Bangkok, Thailand using the high resolution vector maps of the Bangkok Sky Train (BTS), Metro (MRT) and the Airport Rail Link train network.
The maps are small in file size and sharp without pixelation, and can work offline without a connection to the Internet. Users can click the train station labels to open Bing Maps, where they can use all the functions of the app to visualise the surrounding area and/or perform routing for directions.
There is also an offline function to calculate the best way to travel from a station to another station with a direction breakdown and estimated timings (which may vary from the actual travelling time).

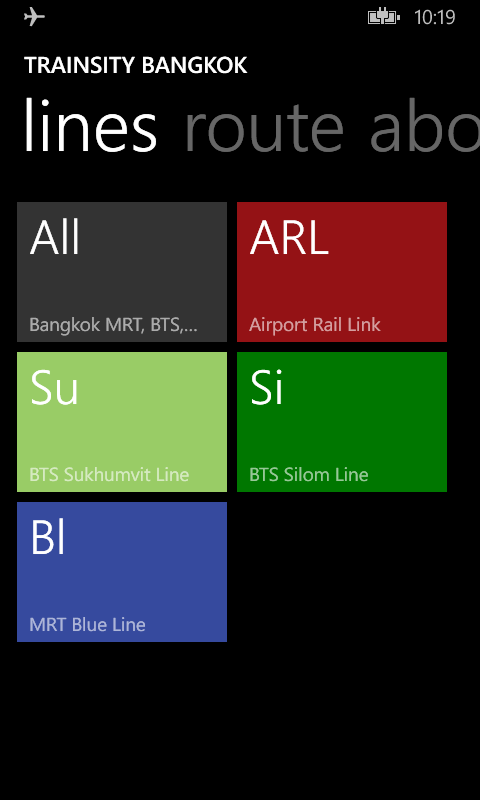
The following screenshots show how the app looks like on a Windows Mobile 8+ handset.

When a tile is tapped, a detail map view of the selected line will appear, as shown.

Tapping a labeled box on the map will display the train station on the external Maps application.


If you want to find out how long it takes to travel from one station to another station, and the best route to take, simply swipe to the Route page. Then type in the From station and To station. As you enter the values, a drop down list will appear and a station can be selected from the list. Finally, tap the Execute icon.

Tapping the more details link will display the recommended route to take.

Click the button below to download the app from the Windows Store.
Get it from Microsoft

Monday, May 30, 2016

Using Android XML layout tabs without ViewPager and Fragments

In Android, the TabLayout widget is typically used together with a ViewPager and fragments; when a user touch a tab, a fragment associated with the tab is displayed in the activity. But sometimes, I do not want or need fragments for each tab; I just want to execute some code. This post illustrates an example of using the TabLayout without a ViewPager and Fragments and setting a tab selected listener to the TabLayout.


First, create an XML layout and add in the TabLayout code. Add in the TabItem widgets underneath the parent TabLayout node. You can simple use text or icons (in this example) for the TabItem labels.

<?xml version="1.0" encoding="utf-8"?>
<LinearLayout xmlns:android="http://schemas.android.com/apk/res/android"
    xmlns:app="http://schemas.android.com/apk/res-auto"
    xmlns:tools="http://schemas.android.com/tools"
    android:layout_width="match_parent"
    android:layout_height="match_parent"
    android:orientation="vertical"
    tools:context="com.skyglob.insight.view.MainActivity">

    <android.support.design.widget.CoordinatorLayout
        android:id="@+id/coordinatorLayout"
        android:layout_width="match_parent"
        android:layout_height="match_parent"
        android:fitsSystemWindows="true">

        <android.support.design.widget.AppBarLayout
            android:layout_width="match_parent"
            android:layout_height="wrap_content"
            android:theme="@style/AppTheme.AppBarOverlay">

            <android.support.v7.widget.Toolbar
                android:id="@+id/toolbar"
                android:layout_width="match_parent"
                android:layout_height="?attr/actionBarSize"
                android:background="?attr/colorPrimary"
                app:popupTheme="@style/AppTheme.PopupOverlay" />

            <android.support.design.widget.TabLayout
                android:id="@+id/tabs"
                android:layout_width="match_parent"
                android:layout_height="wrap_content"
                app:tabGravity="fill"
                app:tabMode="fixed">

                <android.support.design.widget.TabItem
                    android:layout_width="wrap_content"
                    android:layout_height="wrap_content"
                    android:icon="@drawable/ic_action_call" />

                <android.support.design.widget.TabItem
                    android:layout_width="wrap_content"
                    android:layout_height="wrap_content"
                    android:icon="@drawable/ic_action_checkin" />

                <android.support.design.widget.TabItem
                    android:layout_width="wrap_content"
                    android:layout_height="wrap_content"
                    android:icon="@drawable/ic_action_contacts" />

                <android.support.design.widget.TabItem
                    android:layout_width="wrap_content"
                    android:layout_height="wrap_content"
                    android:icon="@drawable/ic_action_schedule" />

                <android.support.design.widget.TabItem
                    android:layout_width="wrap_content"
                    android:layout_height="wrap_content"
                    android:icon="@drawable/ic_action_logout" />

            </android.support.design.widget.TabLayout>

        </android.support.design.widget.AppBarLayout>

        <include layout="@layout/content_main" />

    </android.support.design.widget.CoordinatorLayout>

</LinearLayout>

In the activity Java code, add in the tab selected listener. The following is an example showing how to assign a tab selected listener to the TabLayout widget.


private void setupTabLayout() {
    TabLayout mTabLayout = (TabLayout) findViewById(R.id.tabs);
    mTabLayout.setOnTabSelectedListener(new TabLayout.OnTabSelectedListener() {
        @Override
        public void onTabSelected(TabLayout.Tab tab) {
            onTabTapped(tab.getPosition());
        }
        @Override
        public void onTabUnselected(TabLayout.Tab tab) {

        }
        @Override
        public void onTabReselected(TabLayout.Tab tab) {
            onTabTapped(tab.getPosition());
        }
    });
}

private void onTabTapped(int position) {
    switch (position) {
        case 0:
            // Do something when first tab is tapped here
            break;
        default:
            Toast.makeText(this, "Tapped " + position, Toast.LENGTH_SHORT);
    }
}

Monday, May 23, 2016

Android App for monitoring Washington, DC crime incidents and 311 service requests

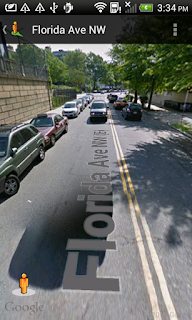
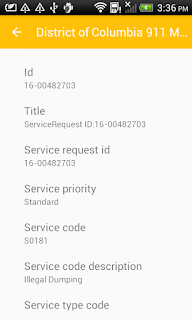
This is an Android app for monitoring Washington DC's 311 service request calls and crime incidents. The incidents can be viewed as a text list or as icons or heatmap on a map. Details about the calls can be viewed by tapping an item on the list or on a marker on the map display. A function is available to easily filter away unwanted incidents from the list or map by a text search. The app allows the user to send the incident location to the external Google Maps and/or Street View for better visualization of the incident environment.

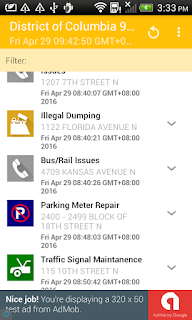
Upon launching the app, the list of incidents can be downloaded and displayed with categorized icons, as shown below.
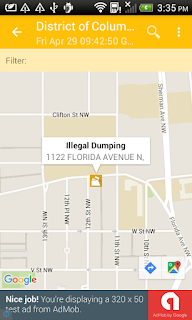
To view all the incidents on a map, simply select the Map option item in the Toolbar menu. Tapping any icon will pop up a snippet of information about the incident. Tapping the snippet will display the incident details.
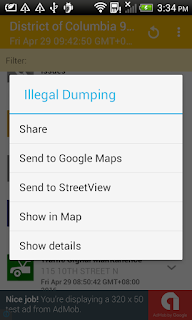
Long pressing any list item or tapping the arrow icon will pop up a menu, as shown below, where the selected incident can be shared, located on a map, or sent to the Google Maps or Street View apps.
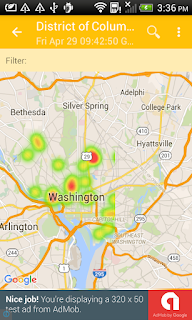
Users can visualise the incidents as a heat map instead of as marker icons. This can be done by choosing toggling the Heat map menu option on in the Tool bar menu, as shown below. To display as marker icons again, just toggle off the Heat map option.
On a table, the app will display a two pane layout - a list on the left and a map view on the right, as shown below.
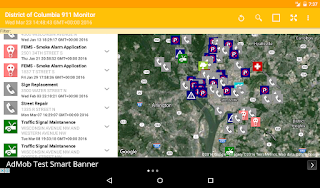
As on a handset, the incidents can be displayed as marker icons or as a heat map.
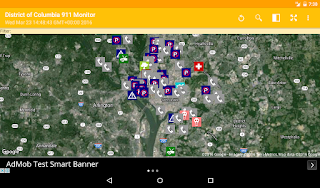
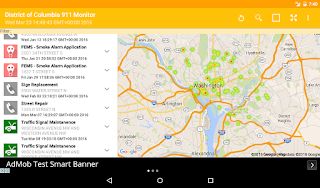
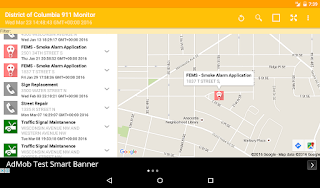
Click the badge below to download the app from the Google Play Store.

Get it on Google Play

Monday, May 16, 2016

ProGuard exceptions for Retrofit in an Android project

If you are enabling ProGuard to minify an Android APK, then it will be necessary to tell ProGuard to leave the Retrofit and related JSON data classes as they are. Otherwise, you will get class not found errors when running the Android app.

In Android Studio, to add the exceptions to ProGuard, open up the file proguard-rules.pro in the editor. Add in the following lines.


# for Retrofit
-keepattributes Signature
-keepattributes Exceptions

-keep class com.squareup.** { *; }
-keep interface com.squareup.** { *; }
-keep interface retrofit.** { *;}
-keep class retrofit.** { *; }

-keepclasseswithmembers class * {
    @retrofit.http.* <methods>;
}

-dontwarn com.squareup.okhttp.**
-dontwarn rx.**
-dontwarn retrofit.**

# add your JSON classes here
-keep class com.dom.mypackage.myclass.** { *; }
Note: for the last line above, replace it with the path to your classes that correspond to the JSON classes you are using in Retrofit.

Monday, May 9, 2016

Fix Gradle errors when upgrading old Android projects to a new Android Studio version

After upgrading my Android Studio to the latest version, I encountered problems with the Gradle version of my old Android project. The error message is saying something like the following "Gradle version 2.10 is required. Current version is 2.8. Fix Gradle wrapper and re-import project Gradle settings." A screenshot of the error is shown below.

Sometimes, clicking on the Fix hyperlink will resolve the problem; but sometimes it does not. If it does not, then it is possible to fix the problem by editing the gradle-wrapper.properties file of your project in the editor as shown below.

Simply change the version number in the distributionUrl to the new required version e.g. https\://services.gralde.org/distributions/gradle-2.10-all.zip.

Monday, May 2, 2016

Use Android Studio's Image Asset to conveniently create Android action bar menu icons from Clipart symbols

I found Android Studio's Asset Studio to be a great help in creating standard Android drawable action bar and tab menu icons e.g. Share, Search, etc . Previously, I had to search for the standard icons under the Android platform sources and manually copy them into my Android project; which is a pain as there are multiple copies of the same icon for different resolutions. The Asset Studio will create the same icon at different resolutions for you in your project from a pre-defined clip art library. The following steps illustrate how easy it is.

  1. In Android Studio, open up a project e.g. MyApplication. Mouse right click on the project's drawable folder.

    A pop up menu appears.

  2. Choose New | Image Asset.

    The Asset Studio appears.

  3. In the Asset Type field, choose Action Bar and Tab Icons. Toggle on Clipart.


  4. Click Choose.

    Clip art symbols appear.
  5. Click on a symbol.

    The chosen symbol is displayed in the Preview column at different resolutions.

  6.  In the Resource name field, type in the desired name, e.g. ic_action_exclamation.
  7. Click Next.


  8. Click Finish.

    The drawable icons are created
    .