Showing posts with label Chrome. Show all posts

Monday, February 20, 2017

Clear Javascript, CSS, and HTML web cache in Chrome

When developing Javascript code for web pages, the Chrome browser caches the Javascript code including cascading style sheets and HTML files. Any changes made to the code may not be reflected when the page is refreshed. I found this frustrating. That is, until I discovered that Chrome has a way to clear its cache before reloading the web page.

To enable this, do the following:

  1. Select Options (the 3 vertical dots icon on the top right) | More Tools | Developer Tools.

    The Developer Tools pane appears.
  2. Now, do a mouse-right click on the Reload Page icon, as shown in the screenshot below.

    A popup menu appears.

  3. Choose Empty Cache and Hard Reload.

    The cache is cleared and any any changes made to the code is reflected in the reloaded page.


Monday, January 25, 2016

WebApp for batch conversion of SVG vector files to raster PNG/JPEG images

This is a simple HTML5 WebApp for converting one or more SVG format files into raster image files in PNG or JPEG formats. At the same time, the user can choose to resultant raster image dimensions, whether it will be scaled at 25%, 50%, 75% or at a custom scale. The HTML5 canvas element is used to perform the conversion locally using the user's Internet browser without having to upload the SVG file to the web server.

  1. To run this WebApp, go to https://dominoc925-pages.appspot.com/webapp/svgimg/


  2. Optional. Click Settings on the right pane and change the Background color, transparency, scale factor, or the image format.


  3. Simply drag and drop the SVG files into the dashed box. Or click the Choose Files button and select one or more SVG files.


    The SVG file(s) are converted to raster image format.
  4. To save the converted image(s) one by one, just right click on the image and choose Save image as. Alternatively, click Main | Generate zip file on the right pane to generate a zip file containing all the converted images.


Monday, February 17, 2014

How to upload, update and save an image file to Google Drive using Javascript

This is a simple Javascript Google Drive example web app to load an image file from a local drive, write some text on the image, then save the edited image to Google Drive in the cloud. The basis of this example came from the Google Drive SDK Javascript Quickstart at this location https://developers.google.com/drive/quickstart-js. Read up the Google Drive SDK Javascript Quickstart to see how to enable the Google Drive API and setup a Google Drive Javascript web app.

Setup the Javascript app
Copy the following source code and save into your own html file. Change the string <YOUR_CLIENT_ID> to your own client ID assigned to you when you created your cloud project in http://cloud.google.com/console. Publish the page to a web server.

In general, this is what the Javascript code is doing: (1) load and draw the local image file in the canvas element, (2) draw the string "Hello World" onto the canvas, (3) save the canvas into an IMG element, (4) upload the IMG element source data into Google Drive.

<html>
<head>
<meta http-equiv="Content-type" content="text/html;charset=UTF-8">
<script type="text/javascript">
 
var CLIENT_ID = '<YOUR_CLIENT_ID>';
var SCOPES = 'https://www.googleapis.com/auth/drive';
 
/**
       * Called when the client library is loaded to start the auth flow.
       */
function handleClientLoad() {
window.setTimeout(checkAuth, 1);
}
 
/**
       * Check if the current user has authorized the application.
       */
function checkAuth() {
gapi.auth.authorize(
{'client_id': CLIENT_ID, 'scope': SCOPES, 'immediate': true},
handleAuthResult);
}
 
/**
       * Called when authorization server replies.
       *
       * @param {Object} authResult Authorization result.
       */
function handleAuthResult(authResult) {
var authButton = document.getElementById('authorizeButton');
var filePicker = document.getElementById('filePicker');
var uploadButton = document.getElementById('uploadButton');

authButton.style.display = 'none';
filePicker.style.display = 'none';
uploadButton.style.display = 'none';
if (authResult && !authResult.error) {
// Access token has been successfully retrieved, requests can be sent to the API.
filePicker.style.display = 'block';
filePicker.onchange = loadImageFile;
uploadButton.onclick = newUploadFile;
} else {
// No access token could be retrieved, show the button to start the authorization flow.
authButton.style.display = 'block';
authButton.onclick = function() {
gapi.auth.authorize(
{'client_id': CLIENT_ID, 'scope': SCOPES, 'immediate': false},
handleAuthResult);
};
}
}
 
function newUploadFile(evt){
gapi.client.load('drive','v2', function(){
var theImage = document.getElementById('editedImage');
var fileTitle = theImage.getAttribute('fileName');
var mimeType = theImage.getAttribute('mimeType');
var metadata = {
'title': fileTitle,
'mimeType': mimeType
};
var pattern = 'data:' + mimeType + ';base64,';
var base64Data = theImage.src.replace(pattern,'');            
newInsertFile(base64Data,metadata);
});
}
/**
       * Insert new file.
       *
       * @param {Image} Base 64 image data
       * @param {Metadata} Image metadata
       * @param {Function} callback Function to call when the request is complete.
       */
function newInsertFile(base64Data, metadata, callback){
const boundary = '-------314159265358979323846';
const delimiter = "\r\n--" + boundary + "\r\n";
const close_delim = "\r\n--" + boundary + "--";
var contentType = metadata.mimeType || 'application/octet-stream';
var multipartRequestBody =
delimiter +
'Content-Type: application/json\r\n\r\n' +
JSON.stringify(metadata) +
delimiter +
'Content-Type: ' + contentType + '\r\n' +
'Content-Transfer-Encoding: base64\r\n' +
'\r\n' +
base64Data +
close_delim;
 
var request = gapi.client.request({
'path' : '/upload/drive/v2/files',
'method' : 'POST',
'params' : {
'uploadType' : 'multipart'
},
'headers' : {
'Content-Type' : 'multipart/mixed; boundary="' + boundary + '"'
},
'body' : multipartRequestBody
});
if (!callback) {
callback = function (file) {
alert('done');
};
}
request.execute(callback);
}
function loadImageFile(evt){
var file = evt.target.files[0];
var reader = new FileReader();
reader.file = file;
reader.onload = onImageReaderLoad;
reader.readAsDataURL(file);            
}
function onImageReaderLoad(evt){
var file = this.file;
var mimeType = file.type;
writeSomeText(file.name,file.type,evt.target.result);        
}
/**
       * Write some Hello World text on an image using the canvas.
       *
       * @param {File Name} The name of the image file
       * @param {MimeType} The mime type of the image e.g. image/png
       * @param {Image} The image data
       */
function writeSomeText(sourceImageName, mimeType, sourceImage){
var resultsDiv = document.getElementById('resultsDiv');
var sourceImg = document.createElement('img');
var resultImg = document.createElement('img');
var canvas = document.createElement('canvas');
sourceImg.onload = function(evt){
canvas.width = this.width;
canvas.height = this.height;
var ctx = canvas.getContext('2d');
ctx.drawImage(this,0,0,canvas.width,canvas.height);
ctx.font = '24px Arial';
ctx.fillText('Hello World',this.width/2,this.height/2);
ctx.restore();
resultImg.onload = function(evt2){
resultImg.setAttribute('id','editedImage');
resultImg.setAttribute('mimeType', mimeType);
resultImg.setAttribute('fileName', sourceImageName);
resultsDiv.appendChild(resultImg);
var uploadButton = document.getElementById('uploadButton');
uploadButton.style.display = 'block';
};
resultImg.src = canvas.toDataURL(mimeType);
};
sourceImg.src = sourceImage;
}    
 
</script>
<script type="text/javascript" src="https://apis.google.com/js/client.js?onload=handleClientLoad"></script>
</head>
<body>
<!--Add a file picker for the user to choose an image file to be edited -->
<input type="file" id="filePicker" style="display: none" />
<!-- Add a button to start the upload process for loading the edited image file to Google Drive -->
<input type="button" id="uploadButton" style="display:none" value="Upload" />
<input type="button" id="authorizeButton" style="display: none" value="Authorize" />
<!-- div placeholder for displaying the edited image -->
<div id="resultsDiv">
</div>
</body>
</html>


Run the Javascript app

  1. Load the web page in an Internet browser.

    If the Javascript app has not been authorized by you, then the Authorize button will be displayed.
  2. Click Authorize.

    If you are not signed in to your Google account, the following page may display. Just type in your password and sign in.


    The Request for permission page appears.
  3. Click Accept.

    The app is authorized and the browser runs the Javascript app.
  4. Click Choose File.

    The Open dialog box appears.
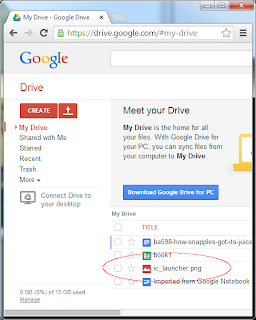
  5. Browse and select an image file, e.g. ic_launcher.png. Click Open.

    The app writes the text string 'Hello World' in the middle of the selected image. The Upload button appears.

  6. Click the Upload button.

    A done message appears.

     The image is saved into your Google Drive in the cloud.
 

Monday, February 3, 2014

How to display a preview of CSS fonts in a Select Option drop down menu

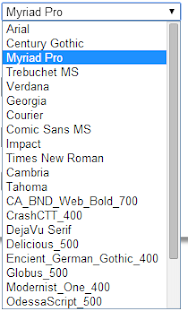
The HTML Select Option element is normally used to display a list of options for users to make a choice. I wanted to use the option list for users to choose a font to use for further processing. I thought it would be nice to be able to show a preview of the fonts in the list itself, like how word processing software like Microsoft Word does it. I managed to figure how to do it by using some web fonts from Google, cascading style sheets (CSS) and a Web Font Loader.

In general, the following needs to be done in the HTML page: (1) download the web fonts you want to use in the select option list, (2) define style sheet classes for each font,  and (3) wrap each option with the optgroup tag and assign it with the style sheet class.

I managed to get this to work for Chrome and FireFox browsers but not for any of Microsoft's Internet Explorer browsers.

Download web fonts
In the header head tag section of the HTML file, make a link using the link tag to the web fonts you want to use. An example is shown below. Here, I am linking to the Allura and Dynalight fonts from Google.


<!DOCTYPE html> 
<html> 
<head> 
<title>Example font preview</title> 
<meta name="viewport"
content="width=device-width, initial-scale=1.0, user-scalable=no"> 
<meta charset="UTF-8"> 
<link href="../webappstyles.css" rel="stylesheet" type="text/css" />
<link href='http://fonts.googleapis.com/css?family=Allura' rel='stylesheet' type='text/css'>
<link href='http://fonts.googleapis.com/css?family=Dynalight' rel='stylesheet' type='text/css'>        


If you want to use the fonts in Javascript, then it would be wise to use the Web Font Loader to pre-load the fonts. This can be done by appending the font family names to the Web Font load method. The example code shows how this is done. The code can be included in the HTML head tag section.


<script src="//ajax.googleapis.com/ajax/libs/webfont/1.4.7/webfont.js"></script>
<script>
WebFont.load({
google: {
families: ['Allura', 'Dynalight']
}
});
</script>    


Define CSS classes
Inside the style tag section of the header, define a style sheet class for each font you want to use.


<style type="text/css">
.Allura { font-family: Allura, cursive; }
.Dynalight { font-family: Dynalight, cursive; }    
</style>

Wrap each option
In the select tag, wrap each option tag with the optgroup tag and assign the appropriate CSS style defined previously.


<select id="fontTypeCombo">
<optgroup class='Allura'>
<option>Allura</option>
</optgroup>
<optgroup class='Dynalight'>
<option>Dynalight</option>
</optgroup>
</select>

Now, when the HTML page is displayed in Chrome or FireFox, clicking on the select option combo box should display a list with a preview of the fonts.

Monday, February 25, 2013

HTML5 Picture Text WebApp for making social network picture status message

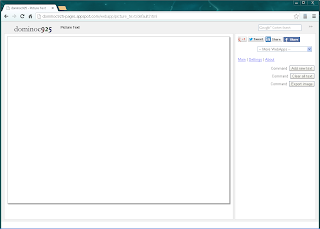
Using HTML5 and a great Canvas Javascript library Fabricjs, I made a simple web app for placing text string on images for sharing on social networks like Facebook, Google+ or Twitter. One or more text strings can be placed on the canvas. Once placed, the text can be edited, rotated, scaled, stretched or styled with different fonts and stroked. The background can be a plain color fill or a user defined image - the image can be set with some opacity value.

To run the web app, go to http://dominoc925-pages.appspot.com/webapp/picture_text/default.html.


Change the canvas
  1. On the right pane, click Settings.


  2. In the Canvas width field, type in a new width (in pixels) e.g. 800.
  3. In the Canvas height field, type in a new height (in pixels) e.g. 600.
  4. In the Canvas fill color field, pick a new background color e.g. grey.
  5. To use an image for the background, choose Image in the Background combo box.

    Additional fields appear.

  6. Click the Choose File button. Choose an image.

    The image is displayed in the canvas.

  7. To change the image opacity, type in a value between 0 and 1 in the Background image opacity field.

Placing text

  1. On the right pane, click Add new text.

    The Add text dialog appears.

  2. Type in any text string in the Text string field.
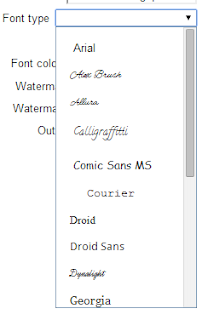
  3. Optional. Choose a font, font style, effects, line spacing, text alignment, text fill color from the various combo boxes.
  4. Click Okay.

    The text string is placed randomly on the canvas.

  5. Close the dialog.
Move, rotate, resize, stretch the text
  1. Select the text string on the canvas.

    Handles appear around the text string.
  2. To move the text, just drag it to a new location.
  3. To resize the text, just press down SHIFT and drag the corner handles (four sided arrow cursor).
  4. To rotate the text, just drag the corner handles (diagonal double headed arrow cursor).


  5. To stretch the text, just drag the side handles (vertical or horizontal double headed arrow cursor). 
Changing the text properties
  1. Select the text string on the canvas.

    The Properties and Delete buttons appear on the right pane.

  2. On the right pane, click Properties.

    The Update text dialog appears.

  3. To change the text string, just type in new text in the Text string field.
  4. To change the font, style, effects, line spacing, or text alignment, use the combo boxes.
  5. To change the text fill color, just pick another color in the Text fill color picker field.
  6. To apply a stroke around the text, toggle on Stroke text. Then choose a color from the Text stroke color picker field. Choose a text stroke width in the Text stroke width field.
  7. Click Okay.

    The text string is updated.

  8. Close the dialog.
Creating the picture text image file
  1. On the right pane, click Export image.

    The text is composited with the background and a new window of the PNG image pops up.
  2. Right click on the image. Choose Save image as.


  3. Type in a file name and save the image.

Monday, January 7, 2013

Earthquake Monitor Web App

Since Google has announced that it will be closing down the iGoogle site, I decided to migrate some of the Google Gadgets that I had written to Chrome Web Apps for the Chrome Web Store. I consolidated the various earthquake gadgets using the USGS, British Geological Survey, Euro-Mediterranean Seismic Monitoring Center, and the New Zealand GeoNet earthquake feeds into a single Web App.

The screenshot below shows the Earthquake Monitor Web App. It can be installed through the Chrome Web Store (search for Earthquake Monitor) or directly from this url address http://dominoc925-pages.appspot.com/webapp/quakemon/default.html.


Simply choose an earthquake source feed in the side bar's Earthquake feed combo box as shown below.

The earthquake epicenters will be displayed as color coded icons by depth and time on Google Maps. Hovering the cursor on the icons will display a tool tip showing summary details about the earthquake event. Clicking on the icon will open up a page showing more detailed information.


Clicking on the List link in the side bar will display a list view of the earthquake events. The list can be sorted according to the time, depth or magnitude of the earthquake event. Clicking on the Map link will center and zoom to the earthquake epicenter in Google Maps.


Monday, December 17, 2012

WebApp to show Shapefile information

I wrote a simple HTML5 Web App to show basic information about one or more ESRI Shapefile (*.shp) files similar to the shpinfo command from the open source ShapeLib library. The processing of the Shapefile is done in the local web browser without having to upload it to a server. The web app can be run from this web site http://dominoc925-pages.appspot.com/webapp/shpfile_info/default.html.

One the page is displayed, either click the button and select one or more Shapefiles or drag and drop *.shp files into the dashed box as shown in the screenshots below.


The Shapefile information is displayed in the web page.