Showing posts with label VeloView. Show all posts

Monday, September 2, 2019

Resolving VeloView not displaying live sensor data from Velodyne Lidar sensors

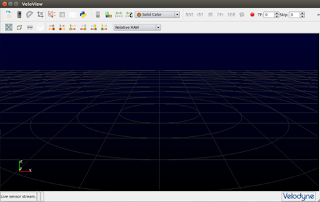
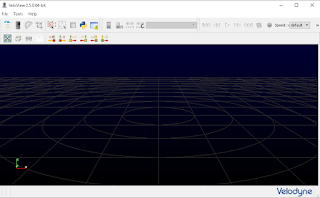
This is a fairly common problem when running VeloView with a real Velodyne Lidar sensor on Windows - even though the sensor e.g. VLP-16 or HDL-32 are powered on and connected to the host computer, no live point cloud data is displayed in VeloView. All you get is a blank screen as shown below.


The probable reason is that the Windows Defender firewall is set to block VeloView from accessing the ports used by the Velodyne sensors. Normally, Windows will prompt whether to allow the program to access the ports on the first startup of the program. If you click no to the prompt, then Windows will never ask again. To enable the ports for VeloView, you will have to manually open the ports. The steps are shown below.

  1. Click the Windows Start button. Start typing "firewall with advanced...".

    A list of matches appear.


  2. Click on Windows Defender Firewall with Advanced Security.

    The Windows Defender Firewall with Advanced Security dialog box appears.

  3. Click on Inbound Rules. Scroll the list and look for entries with the name Veloview.


  4. For each Veloview entry, double click on it.

    The Veloview Properties appear.

  5. Toggle on Enabled. Choose Allow the Connection. Click OK. Repeat for each Veloview entry.

    The entry in the list should be marked with a green tick icon.

  6. Close the dialog.

    VeloView should be able to display the live data from the Velodyne sensor.

Monday, August 5, 2019

Convert a Velodyne PCAP file into a ROS bag file

Normally Velodyne laser sensors record LiDAR data packets in PCAP format (*.pcap) file. If later on you want to process this recorded PCAP file in some SLAM algorithm in ROS e.g. ROS Cartogropher, then it may be necessary to convert it into a ROS bag file.

To convert the PCAP file e.g. HDL32-V2_Monterey_Highway.pcap, perform the following:
  1.  Open up a Terminal. Enter the command to record the messages under the ROS topic /velodyne_points to an output bag file.

    $ rosbag record -O /path/to/output.bag /velodyne_points
    Note: /velodyne_points is the message to record. Leave blank if you want to record all messages.
  2. Open up another Terminal. Change directory to the location of the PCAP file, e.g. /path/to/Downloads/.

    $ cd /path/to/Downloads
  3. Enter the command to playback the Velodyne PCAP file and publish as a point cloud.

    $ roslaunch velodyne_pointcloud 32e_points.launch pcap:=$(pwd)/HDL32-V2_Monterey_Highway.pcap readonce:=true


    Note: this command publishes a HDL-32E PCAP file as a point cloud.
  4. Wait until the PCAP file is fully read. You can use the following command in another Terminal to check if anymore data is published.

    $ rostopic echo /velodyne_points

    A stream of points appear.
  5. When no more messages appear, the PCAP file is fully read. In the first Terminal, press CTRL-C to interrupt and complete the recording process to the bag file.

    The bag file is created.

Monday, July 8, 2019

Setup an Ubuntu VirtualBox instance on Windows 10 to connect to a Velodyne VLP-16 sensor

An Ubuntu 18.04 guest OS virtual machine running on a Windows 10 host can connect to a Velodyne VLP-16 LiDAR sensor and process the sensor's data and positioning packets. However, the VirtualBox Ubuntu guest OS must be configured properly to transfer the LiDAR data packets from the host OS to the guest OS. The following steps show how to perform the settings.
  1. On Windows, open the Internet and Network Settings.

     
  2.  Click the Change adapter options.

    The Network Connections window opens.
  3. Right click on the Local Area Connection icon. Choose Properties.

    The Local Area Connection Properties dialog box appears.
  4. Select Internet Protocol Version 4. Click Properties.

    The Internet Protocol Version 4 (TCP/IPV4) Properties appear.
  5. Toggle on Use the following IP address. In the IP address field, type in the following address:

    192.168.1.77
  6. Click OK to all the dialog boxes.

    The local Windows machine IP address is changed to 192.168.1.77


  7. Optional. If necessary, use the Windows Defender Firewall with Advanced Security App to open up the host Windows OS UDP ports for Oracle VirtualBox. In the Inbound Rules, make sure the VirtualBox Manager entries are enabled, as shown below.


  8. Now start Oracle VirtualBox.

    The Oracle VM VirtualBox Manager appears.
  9. Select the Ubuntu instance, e.g. Ubuntu18. Then click Settings.

    The Ubuntu18 Settings dialog box appears.
  10. Click Network. Then click the Port forwarding button.

    The Port forwarding rules dialog box appears.
  11. Click the Plus icon and add in two UDP protocol rules as shown below.


    Note: The rules will forward UDP packets from ports 2368 and 8308 on the Windows host to the same ports on the Ubuntu guest.
  12. Click OK.
  13. Now start the Ubuntu18 host.
  14. Login to Ubuntu and run Veloview. In Veloview, connect to the Velodyne VLP-16 sensor stream as per normal.

    The LiDAR point cloud is displayed.

Monday, May 6, 2019

Export Velodyne PCAP to LAS files in VeloView

VeloView is an open source application for working with Velodyne's popular LiDAR sensors (HDL-64E, HDL-32E, VLP-16 etc.). It is available from this website https://www.paraview.org/veloview/.

VeloView has an export to LAS file format command but you would not know it as it is not available from the graphical user interface. To generate LAS files, it is necessary to use the Python command line interface. The steps below show how it can be done.
  1. Run VeloView and load a Velodyne PCAP file.

  2. Choose Tools | Python Console.

    The Python Console appears.
  3. To export out the current frame, type in the following command at the Python prompt.

    >>> vv.saveLASCurrentFrame('c:/path/to/output.las', 0)

    Note 1: the last argument indicates the coordinate transformation mode. 0 = raw, 1 = absolute, 2 = relative.
    Note 2: Replace c:/path/to/ with your actual file system path
  4. To export a range of frames by frame numbers, type in the following command at the Python prompt.

    >>> vv.saveLASFrames('c:/path/to/output.las', 10, 20, 0)

    Note: in this example, 10 is the starting frame, 20 is the ending frame, and 0 is the raw transformation mode.
  5. To export a list of frames by time steps, type in the following command at the Python prompt.

    >>> vv.saveLAS('c:/path/to/output/las', timesteps, 0)

    Note: timesteps is an array of integers specifying the time steps e.g. [0,1,2,...10] and 0 is the raw transformation mode.

    To get the available time steps in the PCAP file, type in the following command at the Python prompt.

    >>> timesteps = vv.getCurrentTimesteps()
  6. Optional. Display the resultant LAS file in a viewer.

Monday, February 8, 2016

Resolving the ImportError: No module named paraview.simple when running VeloView

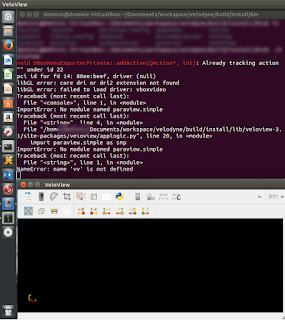
VeloView is an open source viewer for displaying point cloud data from a Velodyne laser sensor, you know the one used in driverless Google cars. After downloading and compiling the VeloView source code on an Ubuntu computer, I encountered some error messages when running the VeloView application, as shown below.
"ImportError: No module named paraview.simple"

Even though the application's main window appears, none of the commands work. And the reference grid is not displayed in the 3D view.

I figured the problem has something to do with Python being unable to locate required modules, and I added all the locations of all the other VeloView compiled packages - Paraview, VeloView, VTK into the PYTHONPATH environment variable, as shown below.


  1. Open up the .profile file in the user's home directory in a text editor, e.g.

    $ cd
    $ vi .profile
  2. Add in the following line.

    export PYTHONPATH=$PYTHONPATH:/usr/local/lib/paraview-4.3/site-packages:/usr/local/lib/veloview-3.1/site-packages:/usr/local/lib/paraview-4.3/site-packages/vtk

    A part of the .profile file is shown in the screenshot below.


  3. Save and close the .profile file.


Now when the VeloView application is run, the ImportError message no longer appears.