Showing posts with label Google App Engine. Show all posts

Monday, March 26, 2018

Resolving Maven "trustAnchors parameter must be non-empty" error

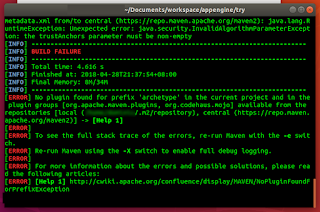
I encountered this Maven error on a new Ubuntu 18.04 system while trying to perform a mvn build on a Google AppEngine project. A screenshot of the error message is shown below.


It seems to be complaining about some "java.security.InvalidAlgorithmParameterException: the trustAnchors parameter must be non-empty" error.

After trying out some suggestions about regenerating Java security certificates, which didn't work, I managed to resolve the problem by creating a Maven  settings.xml file under a hidden folder .m2 underneath the user's home directory.

An example settings.xml file is shown below.

<?xml version="1.0" encoding="UTF-8"?>
<settings xmlns="http://maven.apache.org/SETTINGS/1.0.0" xmlns:xsi="http://www.w3.org/2001/XMLSchema-instance" xsi:schemaLocation="http://maven.apache.org/SETTINGS/1.0.0                            http://maven.apache.org/xsd/settings-1.0.0.xsd">
   <localRepository>/home/yourname/.m2/repository</localRepository>
   <interactiveMode />
   <usePluginRegistry />
   <offline />
   <pluginGroups />
   <servers />
   <mirrors />
   <proxies>
      <!-- 
               <proxy>
      <id>default</id>
      <active>true</active>
      <protocol>http</protocol>
      <host>proxy-host</host>
      <port>8080</port>
      <username>user</username>
      <password>password123</password>
      <nonProxyHosts>localhost,127.0.0.1</nonProxyHosts>
    </proxy> -->
   </proxies>
   <activeProfiles>
      <!--make the profile active all the time -->
      <activeProfile>securecentral</activeProfile>
   </activeProfiles>
   <profiles>
      <profile>
         <id>securecentral</id>
         <!--Override the repository (and pluginRepository) "central" from the
                     Maven Super POM -->
         <repositories>
            <repository>
               <id>central</id>
               <url>http://repo1.maven.apache.org/maven2/</url>
               <releases>
                  <enabled>true</enabled>
               </releases>
            </repository>
         </repositories>
         <pluginRepositories>
            <pluginRepository>
               <id>central</id>
               <url>http://repo1.maven.apache.org/maven2/</url>
               <releases>
                  <enabled>true</enabled>
               </releases>
            </pluginRepository>
         </pluginRepositories>
      </profile>
   </profiles>
</settings>
Change the localRepository tag from /home/yourname/.m2/repository to correct location of your Maven repository.

Then place this the settings.xml file in the following location /home/your_user_id/.m2/

Now when running Maven build commands, the error messages no longer appear.


Monday, November 9, 2015

Enable basic Spring Security authentication and authorization in a Google App Engine site

After some effort, I managed to get a Google App Engine project to work with a simple Spring Security authentication and authorization over a secure HTTPS protocol. In addition to Spring Core and Spring MVC, Spring Security needs to be installed and configured for the App Engine project.

Add Spring Security to the project's pom.xml file
  1. Open up the pom.xml in a text editor, e.g. C:\MyProject\myapp\pom.xml. Add in a convenience property for the Spring Security version.


  2. Add in the dependencies for Spring Security.
<!-- Spring security dependencies -->
<dependency>
	<groupId>org.springframework.security</groupId>
	<artifactId>spring-security-core</artifactId>
	<version>${spring.security.version}</version>
</dependency>    

<dependency>
	<groupId>org.springframework.security</groupId>
	<artifactId>spring-security-web</artifactId>
	<version>${spring.security.version}</version>
</dependency>    

<dependency>
	<groupId>org.springframework.security</groupId>
	<artifactId>spring-security-config</artifactId>
	<version>${spring.security.version}</version>
</dependency>

Add in the Spring Security filters and the security configuration file to web.xml
  1. Open up the configuration web.xml file e.g. C:\MyProject\myapp\src\main\webapp\WEB-INF\web.xml in a text editor.
  2. Add in the filter and filter mapping sections for Spring Security.


  3. Add in the name and location of the Spring Security configuration file e.g. C:\MyProject\myapp\src\main\webapp\WEB-INF\spring-security.xml in the context-param section as shown below.


An example of the resultant web.xml file

<?xml version="1.0" encoding="UTF-8"?>
<web-app version="2.5" xmlns="http://java.sun.com/xml/ns/javaee" xmlns:xsi="http://www.w3.org/2001/XMLSchema-instance" xsi:schemaLocation="http://java.sun.com/xml/ns/javaee http://java.sun.com/xml/ns/javaee/web-app_2_5.xsd">

	<context-param>
		<param-name>contextConfigLocation</param-name>
		<param-value>
		/WEB-INF/dispatcher-servlet.xml,
		/WEB-INF/spring-security.xml
      	</param-value>
	</context-param>

	<context-param>
		<param-name>log4jConfigLocation</param-name>
		<param-value>/WEB-INF/classes/log4j.properties</param-value>
	</context-param>

	<!-- Bootstrap the root application context as usual using ContextLoaderListener -->
	<listener>
		<listener-class>org.springframework.web.context.ContextLoaderListener</listener-class>
	</listener>

    <servlet>
        <servlet-name>dispatcher</servlet-name>
        <servlet-class>org.springframework.web.servlet.DispatcherServlet</servlet-class>
        <load-on-startup>1</load-on-startup>      
    </servlet>

    <servlet-mapping>
        <servlet-name>dispatcher</servlet-name>
        <url-pattern>/</url-pattern>
    </servlet-mapping>

	<!-- Add support for HTTPS -->
    <security-constraint>
        <web-resource-collection>
            <web-resource-name>MySecureSite</web-resource-name>
            <url-pattern>/*</url-pattern>
        </web-resource-collection>
        <user-data-constraint>
            <transport-guarantee>CONFIDENTIAL</transport-guarantee>
        </user-data-constraint>
    </security-constraint>

	<!-- For Spring Security -->
	<context-param>
		<param-name>contextConfigLocation</param-name>
		<param-value>/WEB-INF/spring-security.xml</param-value>
	</context-param>

	<filter>
		<filter-name>springSecurityFilterChain</filter-name>
		<filter-class>org.springframework.web.filter.DelegatingFilterProxy</filter-class>
	</filter>
	
	<filter-mapping>
		<filter-name>springSecurityFilterChain</filter-name>
		<url-pattern>/*</url-pattern>
	</filter-mapping>
	
</web-app>

Create the Spring Security configuration file spring-security.xml
  1. Use a text editor and create the Spring Security configuration file e.g. C:\MyProject\myapp\src\main\webapp\WEB-INF\spring-security.xml.

  2. Create an http element and add in one or more intercept-url elements to define which URLs you want to enable Spring Security, e.g. "/*" for all.


An example listing is shown below. This example enables security for all mappings from the root for any user with the role ROLE_ADMIN. There is only one user admin with the password admin authorized with the role ROLE_ADMIN. Add in more roles and users as required.

<beans:beans xmlns:beans="http://www.springframework.org/schema/beans"
	xmlns:xsi="http://www.w3.org/2001/XMLSchema-instance" xmlns="http://www.springframework.org/schema/security"
	xsi:schemaLocation="http://www.springframework.org/schema/beans 
	http://www.springframework.org/schema/beans/spring-beans.xsd
		http://www.springframework.org/schema/security 
		http://www.springframework.org/schema/security/spring-security-4.0.xsd">

	<http auto-config="true">
		<intercept-url pattern="/*" access="hasRole('ROLE_ADMIN')" />
	</http>
	
	<authentication-manager>
		<authentication-provider>
			<user-service>
				<user name="admin" password="admin" authorities="ROLE_ADMIN" />
			</user-service>
		</authentication-provider>
	</authentication-manager>
	
</beans:beans>

Code the Spring controller
  1. Develop the Java application logic for the Spring Controller. Add in the Spring annotations @Controller and map one or more methods to URLs using the @RequestMapping annotations as shown below.


package com.mycompany.myapp;

import org.springframework.stereotype.Controller;
import org.springframework.web.bind.annotation.RequestMapping;
import org.springframework.web.bind.annotation.RequestMethod;
import org.springframework.web.bind.annotation.ResponseBody;

@Controller
public class MySvc {
	@RequestMapping("/hello")
	public @ResponseBody String index(){
		return "Greetings from Spring Boot!";
	}	
}


Compile and deploy the application to Google App Engine. Now when the site URL e.g. https://myapp.appspot.com/hello is first accessed, a default Spring login prompt will appear.

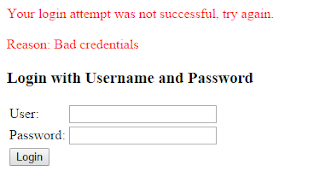
If an incorrect user name or password is submitted, the authentication will fail.

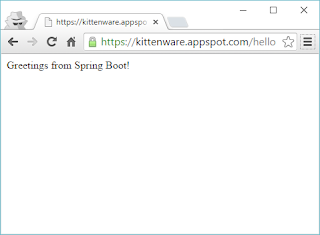
If the correct user name and password is submitted, Spring Security will check the user's authorization for the requested URL. If it's in the user's role, then the URL will return the requested resource to the user as shown below.
 

Monday, October 12, 2015

Enabling HTTPS for a Spring Google App Engine deployment

Following the previous post on adding Spring to a Google App Engine application, I wanted to add support for the secure HTTPS protocol to the application. It is quite straightforward to do so by simply adding the security-constraint element to the application's web.xml file as shown below/

  1. Open up the web.xml file in a text editor e.g. c:\MyProject\myapp\src\main\webapp\WEB-INF\web.xml. Add in the following security-constraint elements.

    Note: the example below encrypts the application from the top parent url using the "/*" url pattern.

The development server can only use HTTP, so in order to check the results, the application must be deployed to Google App Engine. As shown below, the Chrome browser shows the HTTPS "padlock" while accessing a URL of the application.
 

Monday, October 5, 2015

Add Spring to a Google App Engine application

Spring is a Java based framework that takes a lot of work out from developing web applications that you can "just run". I tried to install Spring on Google's App Engine platform as a service (PAAS) but there are a few "gotchas".

Google App Engine runs the older Java 1.7 SDK and hence you must adjust the development environment accordingly. Java 1.8 cannot be used otherwise you will encounter no class found when trying to deploy your Spring application. The Servlet API should be version 2.5 only. Once you keep to the above versions, you only need to follow the steps below to add Spring to a skeleton Google App Engine template. For more information on creating the skeleton with Maven, see Google's documentation at https://cloud.google.com/appengine/docs/java/tools/maven.

Creating the skeleton

  1. Open up a Command Prompt. Change to a parent folder where you want to build the project, e.g. C:\MyProjects\.

    C:\> cd \MyProjects
  2. Type in the Maven command to create a skeleton.

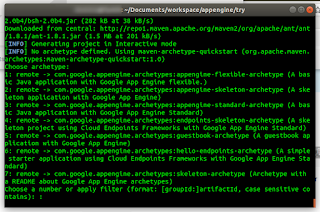
    C:\> mvn archetype:generate -Dappengine-version=1.9.27 -Dapplication-id=your-app-id -Dfilter=com.google.appengine.archetypes:appengine-skeleton-archetype

  3. When prompted for the groupId, type in a name space, e.g. com.mycompany.myapp.
  4. When prompted for the artifactId, type in e.g. myapp.
  5. When prompted for the version, type in a value or accept the default.
  6. When prompted for the package, type in a value or accept the default.
  7. When prompted to confirm, type in Y.

    The skeleton is created.
Add the application's Java code and logic
  1. Using your favorite text editor or IDE, create the Java source code in the skeleton project's src\main folder , e.g. Application.java and MySvc.java.
    Application.java with Spring configuration annotations

    MySvc.java with Spring controller annotations. This just prints out a message "Greetings from Spring Boot" when invoked. 


Add in Spring configurations in the pom.xml file
  1. Open up the skeleton's pom.xml file in a text editor.
  2. In the properties section of the pom.xml file, add in a property for defining the Spring version for convenience.

    <spring.version>4.2.1.RELEASE</spring.version>
  3. In the dependencies section of the pom.xml file, add in the all the Spring dependencies you want to use in the application, making use of the Spring version property defined earlier.

    An example listing for the edited pom.xml file.
<?xml version="1.0" encoding="UTF-8"?>
<project xmlns="http://maven.apache.org/POM/4.0.0" xmlns:xsi="http://www.w3.org/2001/XMLSchema-instance" xsi:schemaLocation="http://maven.apache.org/POM/4.0.0 http://maven.apache.org/xsd/maven-4.0.0.xsd">
 
<modelVersion>4.0.0</modelVersion>
<packaging>war</packaging>
<version>1.0-SNAPSHOT</version>
 
<groupId>com.mycompany.myapp</groupId>
<artifactId>myapp</artifactId>
 
<properties>
<app.id>com.mycompany.myapp</app.id>
<app.version>1</app.version>
<appengine.version>1.9.27</appengine.version>
<gcloud.plugin.version>2.0.9.74.v20150814</gcloud.plugin.version>
<project.build.sourceEncoding>UTF-8</project.build.sourceEncoding>
<maven.compiler.showDeprecation>true</maven.compiler.showDeprecation>

<!-- Add a property for Spring -->
<spring.version>4.2.1.RELEASE</spring.version>
</properties>
 
<prerequisites>
<maven>3.1.0</maven>
</prerequisites>
 
<dependencies>
<!-- Compile/runtime dependencies -->
<dependency>
<groupId>com.google.appengine</groupId>
<artifactId>appengine-api-1.0-sdk</artifactId>
<version>${appengine.version}</version>
</dependency>
<dependency>
<groupId>javax.servlet</groupId>
<artifactId>servlet-api</artifactId>
<version>2.5</version>
<scope>provided</scope>
</dependency>
<dependency>
<groupId>jstl</groupId>
<artifactId>jstl</artifactId>
<version>1.2</version>
</dependency>
 
<!-- Test Dependencies -->
<dependency>
<groupId>com.google.appengine</groupId>
<artifactId>appengine-testing</artifactId>
<version>${appengine.version}</version>
<scope>test</scope>
</dependency>
<dependency>
<groupId>com.google.appengine</groupId>
<artifactId>appengine-api-stubs</artifactId>
<version>${appengine.version}</version>
<scope>test</scope>
</dependency>

<!-- Spring Dependencies -->
 
<dependency>
<groupId>org.springframework</groupId>
<artifactId>spring-aop</artifactId>
<version>${spring.version}</version>
</dependency>
 
<dependency>
<groupId>org.springframework</groupId>
<artifactId>spring-context</artifactId>
<version>${spring.version}</version>
</dependency>
 
<dependency>
<groupId>org.springframework</groupId>
<artifactId>spring-beans</artifactId>
<version>${spring.version}</version>
</dependency>
 
<dependency>
<groupId>org.springframework</groupId>
<artifactId>spring-context-support</artifactId>
<version>${spring.version}</version>
</dependency>
 
<dependency>
<groupId>org.springframework</groupId>
<artifactId>spring-core</artifactId>
<version>${spring.version}</version>
</dependency>
 
<dependency>
<groupId>org.springframework</groupId>
<artifactId>spring-expression</artifactId>
<version>${spring.version}</version>
</dependency>
 
<dependency>
<groupId>org.springframework</groupId>
<artifactId>spring-web</artifactId>
<version>${spring.version}</version>
</dependency>
 
<dependency>
<groupId>org.springframework</groupId>
<artifactId>spring-webmvc</artifactId>
<version>${spring.version}</version>
</dependency>


</dependencies>
 
<build>
<!-- for hot reload of the web application-->
<outputDirectory>${project.build.directory}/${project.build.finalName}/WEB-INF/classes</outputDirectory>
<plugins>
<plugin>
<groupId>org.codehaus.mojo</groupId>
<artifactId>versions-maven-plugin</artifactId>
<version>2.1</version>
<executions>
<execution>
<phase>compile</phase>
<goals>
<goal>display-dependency-updates</goal>
<goal>display-plugin-updates</goal>
</goals>
</execution>
</executions>
</plugin>
<plugin>
<groupId>org.apache.maven.plugins</groupId>
<version>3.1</version>
<artifactId>maven-compiler-plugin</artifactId>
<configuration>
<source>1.7</source>
<target>1.7</target>
</configuration>
</plugin>
<plugin>
<groupId>org.apache.maven.plugins</groupId>
<artifactId>maven-war-plugin</artifactId>
<version>2.4</version>
<configuration>
<archiveClasses>true</archiveClasses>
<webResources>
<!-- in order to interpolate version from pom into appengine-web.xml -->
<resource>
<directory>${basedir}/src/main/webapp/WEB-INF</directory>
<filtering>true</filtering>
<targetPath>WEB-INF</targetPath>
</resource>
</webResources>
</configuration>
</plugin>
 
<plugin>
<groupId>com.google.appengine</groupId>
<artifactId>appengine-maven-plugin</artifactId>
<version>${appengine.version}</version>
<configuration>
<enableJarClasses>false</enableJarClasses>
<version>${app.version}</version>
<!-- Comment in the below snippet to bind to all IPs instead of just localhost -->
<!-- address>0.0.0.0</address>
                    <port>8080</port -->
<!-- Comment in the below snippet to enable local debugging with a remote debugger
                         like those included with Eclipse or IntelliJ -->
<!-- jvmFlags>
                      <jvmFlag>-agentlib:jdwp=transport=dt_socket,address=8000,server=y,suspend=n</jvmFlag>
                    </jvmFlags -->
</configuration>
</plugin>
<plugin>
<groupId>com.google.appengine</groupId>
<artifactId>gcloud-maven-plugin</artifactId>
<version>${gcloud.plugin.version}</version>
<configuration>
<set_default>true</set_default>
</configuration>
</plugin>
</plugins>
<pluginManagement>
<plugins>
<!--This plugin's configuration is used to store Eclipse m2e settings only. It has no influence on the Maven build itself.-->
<plugin>
<groupId>org.eclipse.m2e</groupId>
<artifactId>lifecycle-mapping</artifactId>
<version>1.0.0</version>
<configuration>
<lifecycleMappingMetadata>
<pluginExecutions>
<pluginExecution>
<pluginExecutionFilter>
<groupId>
org.codehaus.mojo
</groupId>
<artifactId>
versions-maven-plugin
</artifactId>
<versionRange>
[2.1,)
</versionRange>
<goals>
<goal>
display-plugin-updates
</goal>
<goal>
display-dependency-updates
</goal>
</goals>
</pluginExecutionFilter>
<action>
<ignore></ignore>
</action>
</pluginExecution>
</pluginExecutions>
</lifecycleMappingMetadata>
</configuration>
</plugin>
</plugins>
</pluginManagement>
</build>
</project>

Modify the Servlet's web.xml  file to add in Spring configurations

  1. Open up the skeleton project's web.xml file in [project]\src\main\webapp\WEB-INF\ folder in a text editor.
  2. Add in sections for defining the Spring configuration context, listener, dispatcher sections.
  3. In the context-param section's contextConfigLocation param-name, define your controller's class name e.g. com.mycompany.myapp.Application.
  4. In the servlet section's contextConfigLocation init-param, define your controller's class name e.g. com.mycompany.myapp.Application.

    An example web.xml file is shown below
    .
<?xml version="1.0" encoding="UTF-8"?>
<web-app version="2.5" xmlns="http://java.sun.com/xml/ns/javaee" xmlns:xsi="http://www.w3.org/2001/XMLSchema-instance" xsi:schemaLocation="http://java.sun.com/xml/ns/javaee http://java.sun.com/xml/ns/javaee/web-app_2_5.xsd">
 
<context-param>
<param-name>contextClass</param-name>
<param-value>
org.springframework.web.context.support.AnnotationConfigWebApplicationContext
</param-value>
</context-param>
 
<context-param>
<param-name>log4jConfigLocation</param-name>
<param-value>/WEB-INF/classes/log4j.properties</param-value>
</context-param>
 
<!-- Configuration locations must consist of one or more comma- or space-delimited 
        fully-qualified @Configuration classes. Fully-qualified packages may also 
        be specified for component-scanning -->
<context-param>
<param-name>contextConfigLocation</param-name>
<param-value>com.mycompany.myapp.Application</param-value>
</context-param>
 
<!-- Bootstrap the root application context as usual using ContextLoaderListener -->
<listener>
<listener-class>org.springframework.web.context.ContextLoaderListener</listener-class>
</listener>
 
<servlet>
<servlet-name>dispatcher</servlet-name>
<servlet-class>org.springframework.web.servlet.DispatcherServlet</servlet-class>
<init-param>
<param-name>contextClass</param-name>
<param-value>org.springframework.web.context.support.AnnotationConfigWebApplicationContext</param-value>
</init-param>
<init-param>
<param-name>contextConfigLocation</param-name>
<param-value>com.mycompany.myapp.Application</param-value>
</init-param>        
</servlet>
 
<servlet-mapping>
<servlet-name>dispatcher</servlet-name>
<url-pattern>/*</url-pattern>
</servlet-mapping>
 
 
</web-app>

Building and deploying to the development server

  1. Open a Command Prompt. Change directory to the root of the skeleton project e.g. C:\MyProjects\myapp\.

    C:\> cd \MyProjects\myapp
  2. Type in the Maven build command.

    C;\gt; mvn clean install
  3. To run the Spring application in the Google App Engine development server, type in the command:

    C:\> mvn appengine:devserver


    The Spring example can be accessed from a browser as shown below.