Showing posts with label NVIDIA. Show all posts

Monday, August 9, 2021

Fixing the Tensorflow error: could not load dynamic library 'libcudart.so.11.0'

I tried to install and run Tensorflow on a Ubuntu 20.04 laptop with a Nvidia GPU but I encountered the "could not load dynamic library 'libcudart.so.11.0'" error message, as shown in the screenshot below.

To resolve the issue, I had to install the Nvidia kernel and Cuda 11 libraries from the Nvidia repository. The steps are outlined below.

  1. On the Ubuntu machine, open a Terminal. Type in the following commands to add the Nvidia ppa repository:

    $ wget https://developer.download.nvidia.com/compute/cuda/repos/ubuntu2004/x86_64/cuda-ubuntu2004.pin

    $ sudo mv cuda-ubuntu2004.pin /etc/apt/preferences.d/cuda-repository-pin-600 && sudo apt-key adv --fetch-keys https://developer.download.nvidia.com/compute/cuda/repos/ubuntu2004/x86_64/7fa2af80.pub

    $ sudo add-apt-repository "deb https://developer.download.nvidia.com/compute/cuda/repos/ubuntu2004/x86_64/ /"

  2. In the Terminal, type in the commands to install the Nvidia kernel.

    $ sudo apt-get update && sudo apt-get install -y nvidia-kernel-source-460

  3. Finally, install Cuda with the following command.

    $ sudo apt-get -y install cuda

Subsequently when importing the Tensorflow library, the error message no longer appears.

Note: Download and install any additional missing libraries from https://developer.download.nvidia.com/compute/cuda/repos/ubuntu2004/x86_64/ if necessary.

Monday, March 15, 2021

Creating a simple CUDA with CMake C++ project

Assuming you have downloaded and installed the right version of the NVIDIA CUDA Toolkit for your NVIDIA GPU card, the next step is to create your awesome C++ CUDA project. In this post, I will illustrate how to create a simple Hello World project using CMake on Ubuntu. 

  1. In a folder, create a CUDA C++ file, e.g. hello.cu. Type in the following code as shown in the snippet below.

    Note: the main function simply calls an empty CUDA mykernel consisting of 1 block and 1 thread per block function. Then it prints out a hello message.

  2. Next, create a CMakeLists.txt file. Type in the following code as shown.

    Note: The CMakeLists.txt simply tells CMake to use C++ and CUDA languages and then defines the executable and its source.


  3. Create a build directory. Then change directory into the build directory and run the cmake command.

    $ mkdir build
    $ cd build
    $ cmake ..


    The processing messages appear.


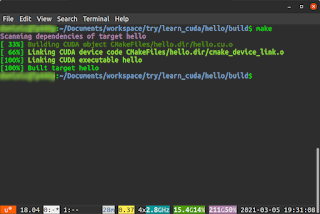
  4. Now compile the project with the make command.

    $ make


  5. Finally, run the hello executable.

    $ ./hello

    The message "Hello CUDA!" is printed to the screen.

The sample project can be downloaded from the Github repository at https://gitlab.com/dominoc925/hello-cuda-cmake

Monday, March 8, 2021

CUDA11.2.props not found in Visual Studio Community 2019

While trying out the NVIDIA CUDA development sample solutions in Visual Studio Community 2019, I encountered error messages about some CUDA11.2.props files not found. An example is shown in the screen shot below.

The solution to this is simple: simply do the following:

  1. Using the Windows Explorer, browse to the location of the NVIDIA CUDA Toolkit e.g. C:\Program Files\NVIDIA GPU Computing Toolkit\CUDA\v11.2\extras\visual_studio_integration\MSBuildExtensions\.


  2. Select and copy all the files inside the folder: CUDA 11.2.props, CUDA 11.2.targets, CUDA 11.2.xml, and Nvda.Build.CudaTasks.v11.2.dll.

  3. Browse to the folder C:\Program Files(x86)\Microsoft Visual Studio\2019\Community\MSBuild\Microsoft\VC\v160\BuildCustomizations\.


  4. Paste the copied CUDA files inside.


Now, when compiling the CUDA sample solutions, the error messages no longer appear, as shown below.