Showing posts with label MacOSX. Show all posts

Monday, November 4, 2019

Fixing the git-credential-osxkeychain password prompts on every git transaction

After a password change in my gitlab account, sometimes the git-credential-osxkeychain password prompt (shown below) will always pop up whenever I try to perform a git commit transaction on my Macbook.

And it seemingly will not allow you to proceed even though the correct password has been entered; only by pressing the ESC key will MacOSX allow the transaction to go through.

To resolve this issue, the following steps can be done:
  1. Press Command + spacebar on the keyboard to bring up the Finder. Type in keychain. Press Enter.

    The Keychain access dialog box appears.
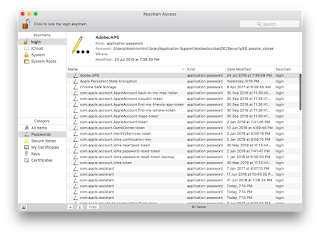
  2. In the Search field, type in gitlab.

    The list is filtered by the search string.
  3. Now, mouse right click on the gitlab entry on the list. Choose Delete "gitlab.com".

    The keychain entry is deleted.
The gitlab keychain entry will be regenerated the next time and the git-credential-osxkeychain prompt will no longer pop up.

Monday, February 22, 2016

How to prevent vector graphics from becoming a raster image while doing a Copy and Paste operation in Inkscape

While using Inkscape on a Macbook, I found that copying and pasting a group of vector graphic elements within Inkscape will convert the vector group into a bitmap image after the paste operation. This may be a problem if I wanted to manipulate the vector elements individually. The problem is shown in the screenshot below - see the circled part of the status bar indicating that the selected graphic is an image with a certain resolution.

To get Inkscape to paste as vector elements, the following steps should be done:

  1. In MacOSX, activate the XQuartz application. Then select XQuartz | Preferences.


    The XQuartz Preferences dialog box appears.


  2. Click Pasteboard tab. Toggle off Update Pasteboard when CLIPBOARD changes.


  3. Close the dialog box.
From then on, copying and pasting group of vector elements will no longer result in a conversion of the elements to a bitmap image, as shown in the screenshot below. 


Wednesday, January 21, 2015

How to mirror or project an Android device screen to a Mac

I wanted to be able to project the screen of an Android handset on to a Macbook to demo an app to an audience. I found a post for a Windows PC on this site http://dmzilla.com/2014/07/21/how-to-display-or-mirror-an-android-device-screen-on-pc-no-root/ but not for a Mac. The post describes downloading and using the Android SDK platform tools along with a Jar file to do the projection to a PC. I thought that the same Jar file could be used on a Mac so I tried out the idea, and it turned out to be functional. So here are the steps to get it to work on a Mac. I am assuming that the following has been done:

  • The Java SE Runtime Environment (JRE) has been installed
  • The Android SDK has been installed to a folder on the Mac e.g. /home/users/admin/Application/sdk/


  1. Download the Jar file http://dmzilla.com/files/display-android-on-windows-pc/%5bDMZilla%5d-Android-Screen-Monitor-(ASM).jar. Put the Jar file to the same location as the Android SDK's adb executable e.g. /home/users/admin/Application/sdk/platform-tools/.

    Note: the actual souce code is available on https://code.google.com/p/android-screen-monitor/
  2. Connect an Android device to the Mac. If necessary, enable USB debugging on the device.
  3. Open up a Terminal.

  4. In the Terminal, type in the cd command to change to the location of the Jar file.

    $ cd /home/users/admin/Application/sdk/platform-tools
  5. Set the Path environment variable to include the Android SDK's platform-tools folder. In the Terminal, type in the export command.

    $ export PATH=$PATH:/home/users/admin/Application/sdk/platform-tools
  6. In the Terminal, run the Jar file.

    $ java -jar \[DMZilla\]-Android-Screen-Monitor-\(ASM\).jar
    The Select a Android Device prompt appears.
  7. In the Select a Android Device prompt, click the device label. Click OK.

    The Android Screen Monitor displays the screen contents of the Android device.
  8. Now on the Android device, run any app you want to present and project to the Mac screen.